

 Deutsch
 Español
 Français
 Hrvatski
 Italiano
 Polski
 Português (BR)

View & Manage Runs
Overview
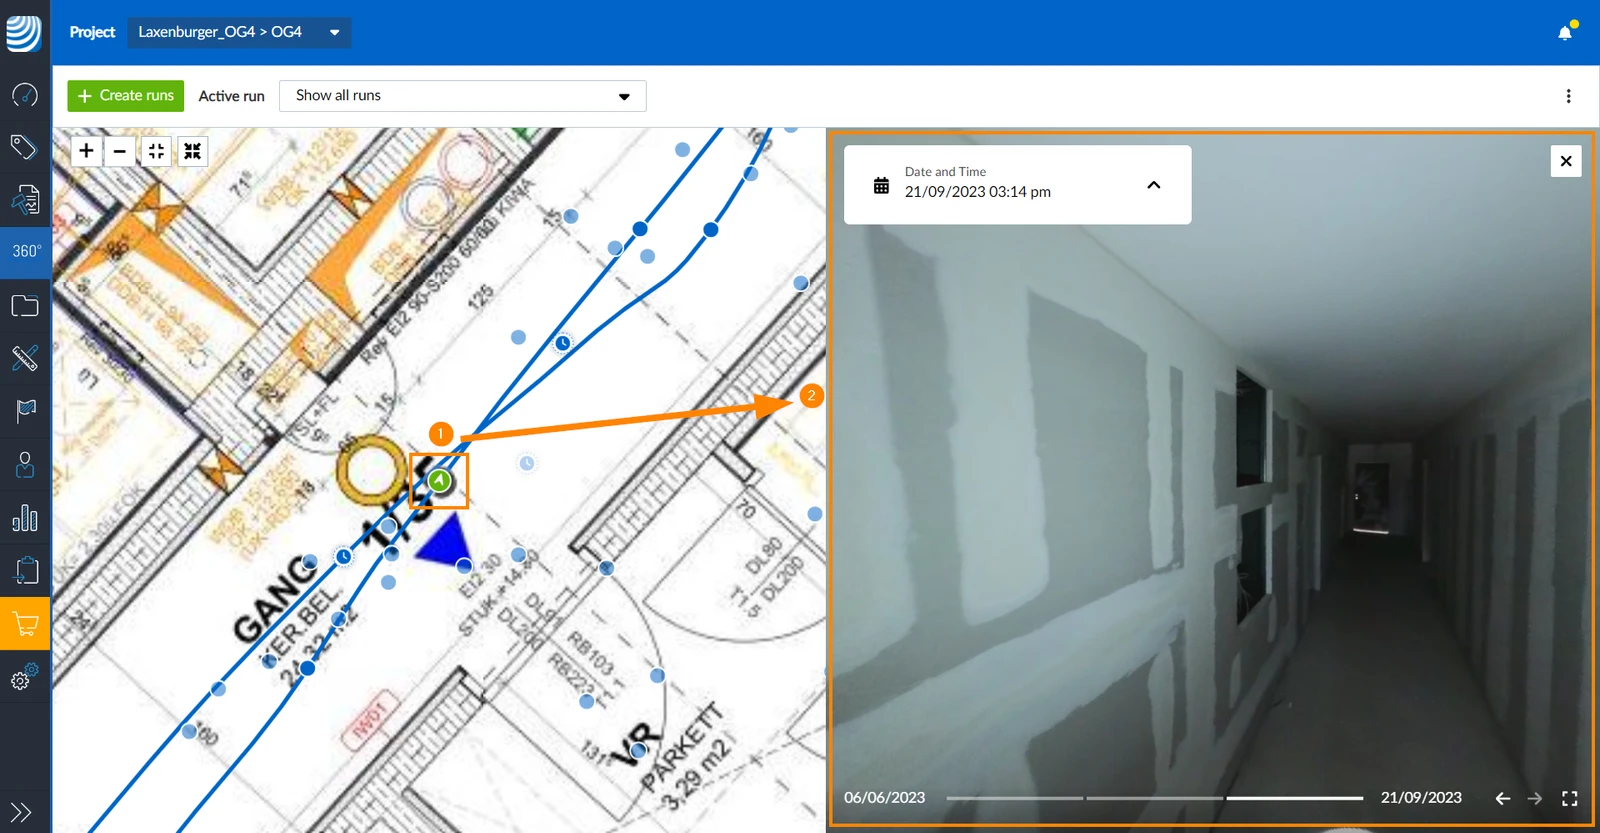
A run consists of the path of all 360° images positioned on a 2D plan of one single recording.
You can select which runs of a plan you want to view and manage. The Manage Runs section below explains how to handle runs that you no longer need, either temporarily or permanently. You can also rename runs in the mobile app.
View 360° images by clicking on a image point on the run.
Access & Permissions
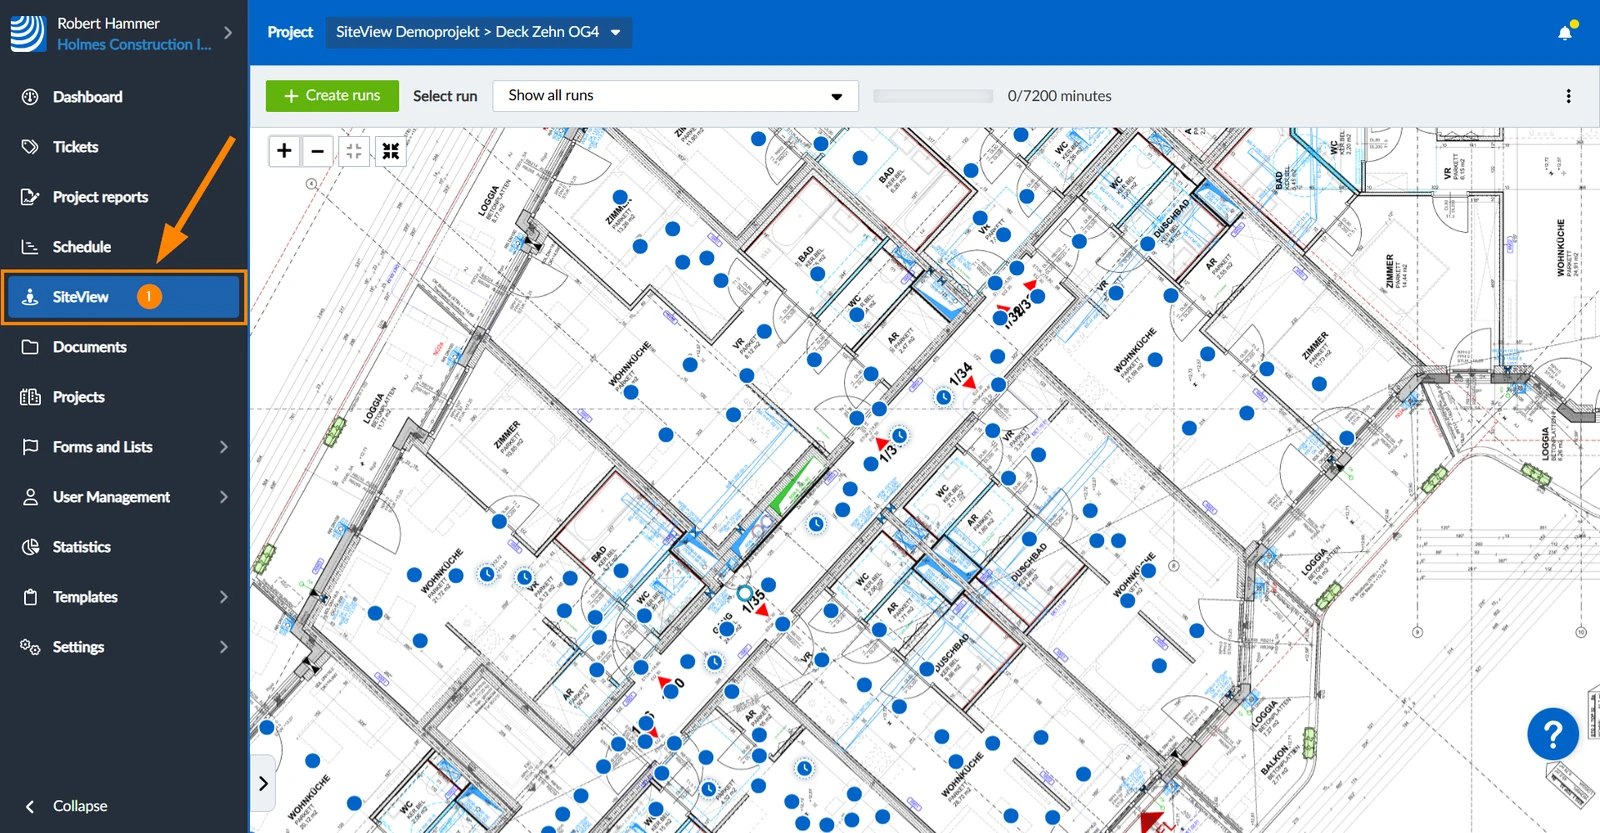
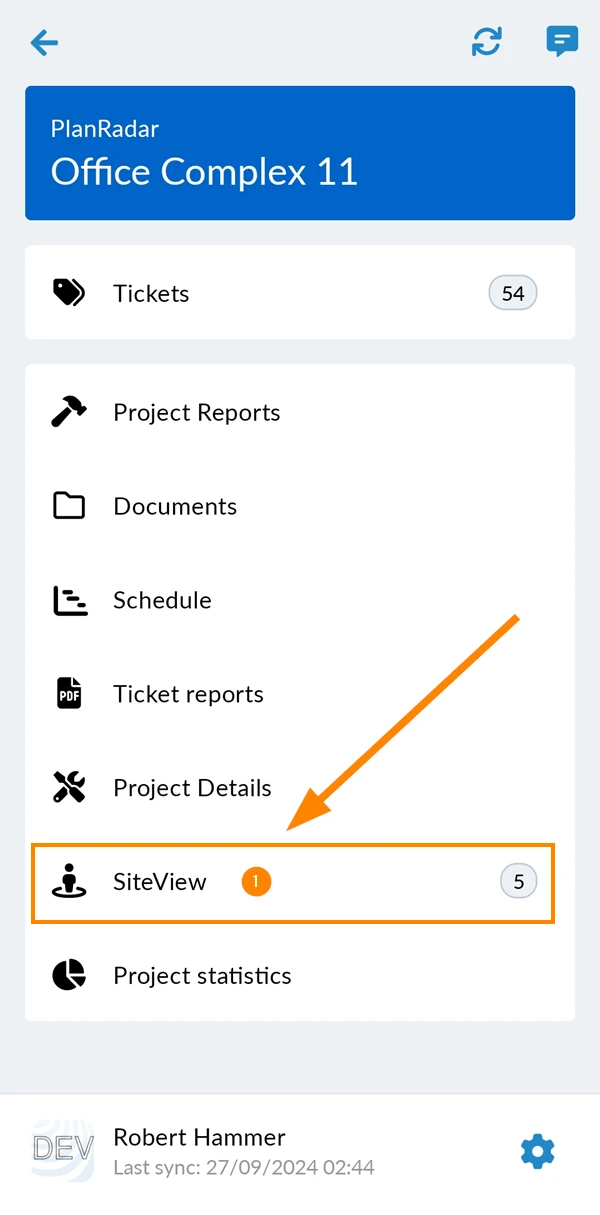
How to access SiteView
- Click SiteView
- Tap SiteView
Select a Plan
To select a plan:
- Open the Project and location drop-down menu
- Select a plan
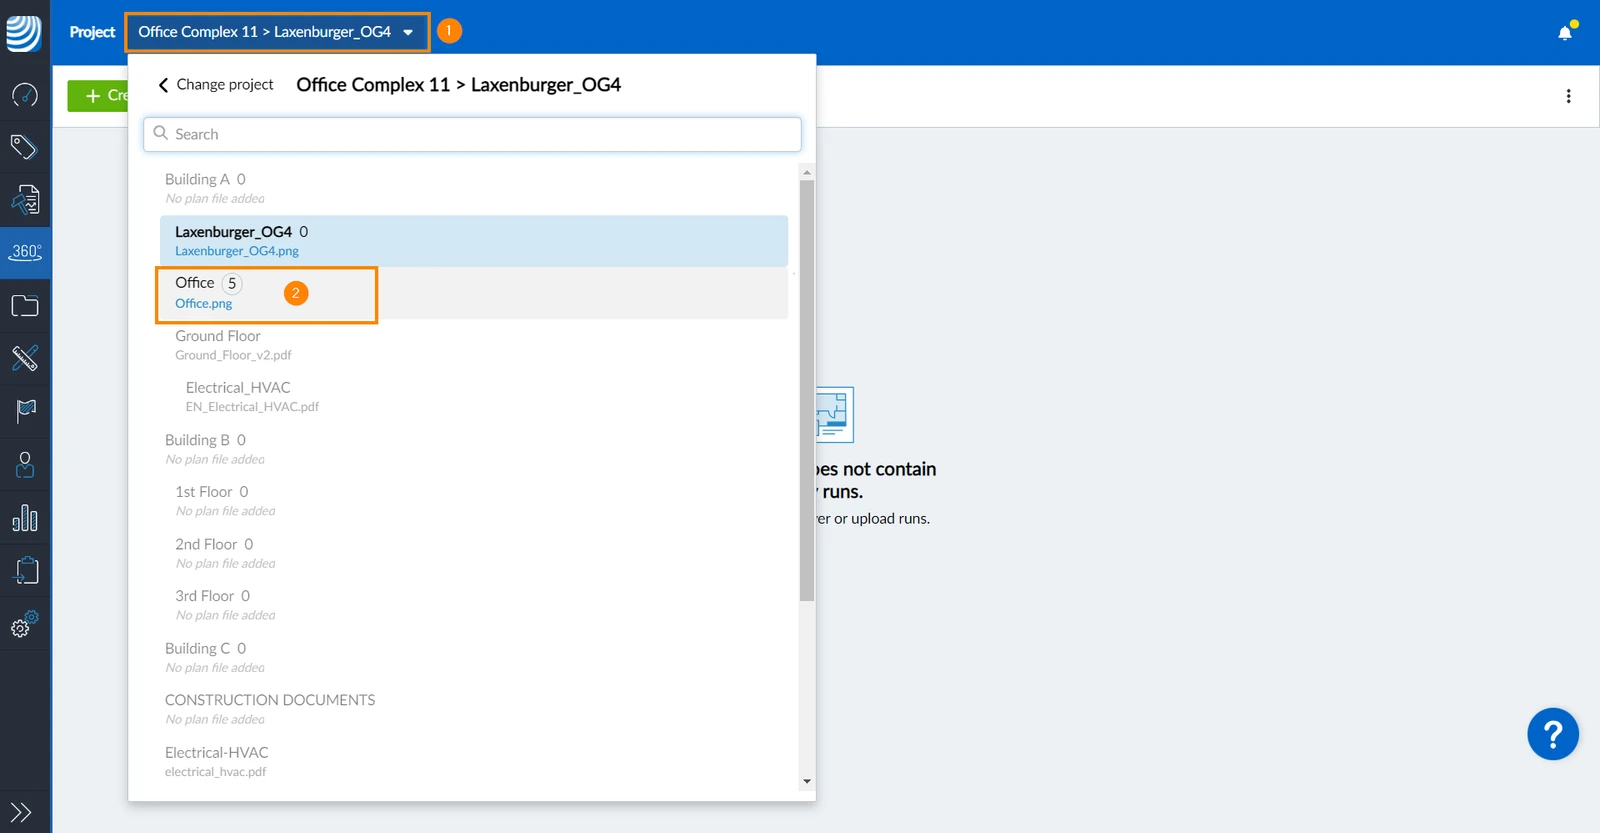
- Tap the location selector
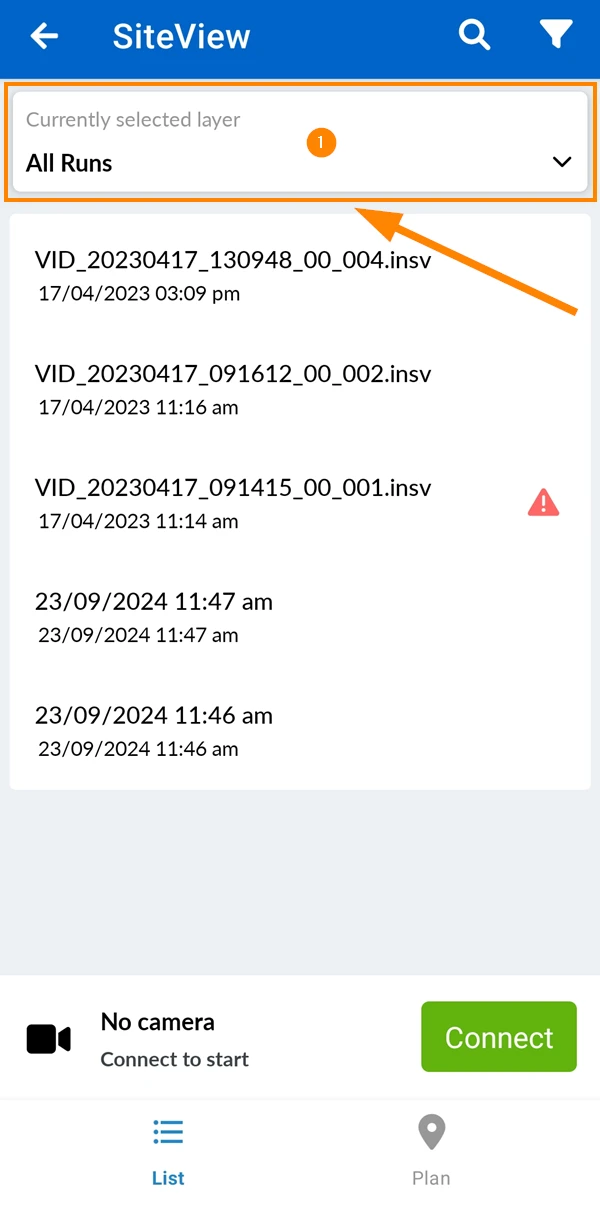
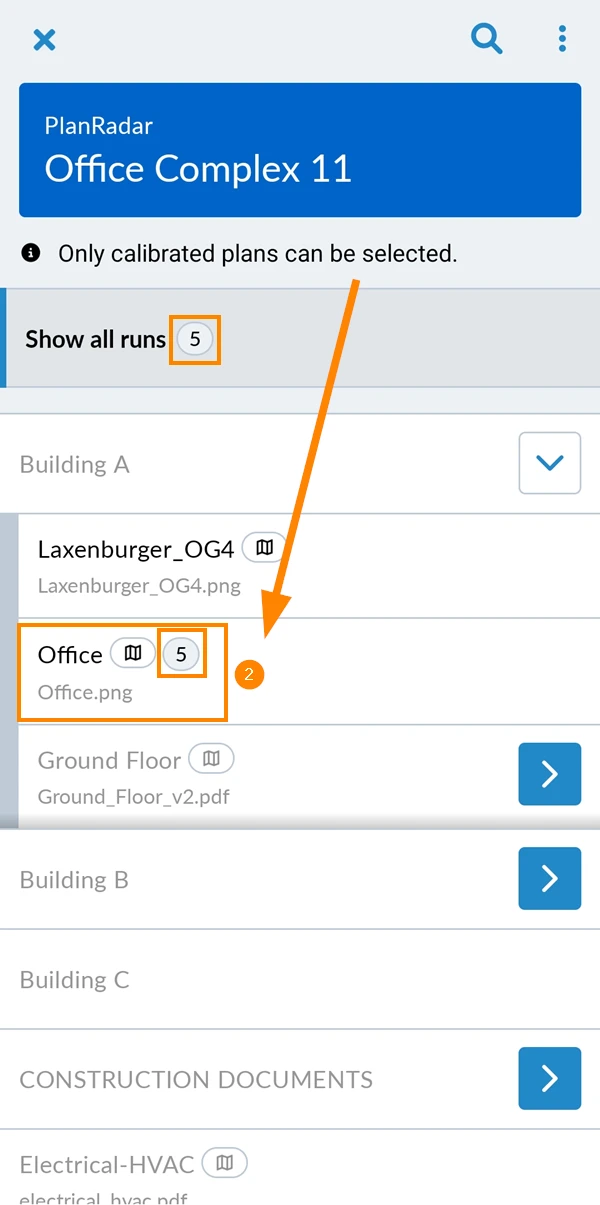
- Tap the plan e.g. Office.
See the number of runs on that plan e.g. 5.
View Runs
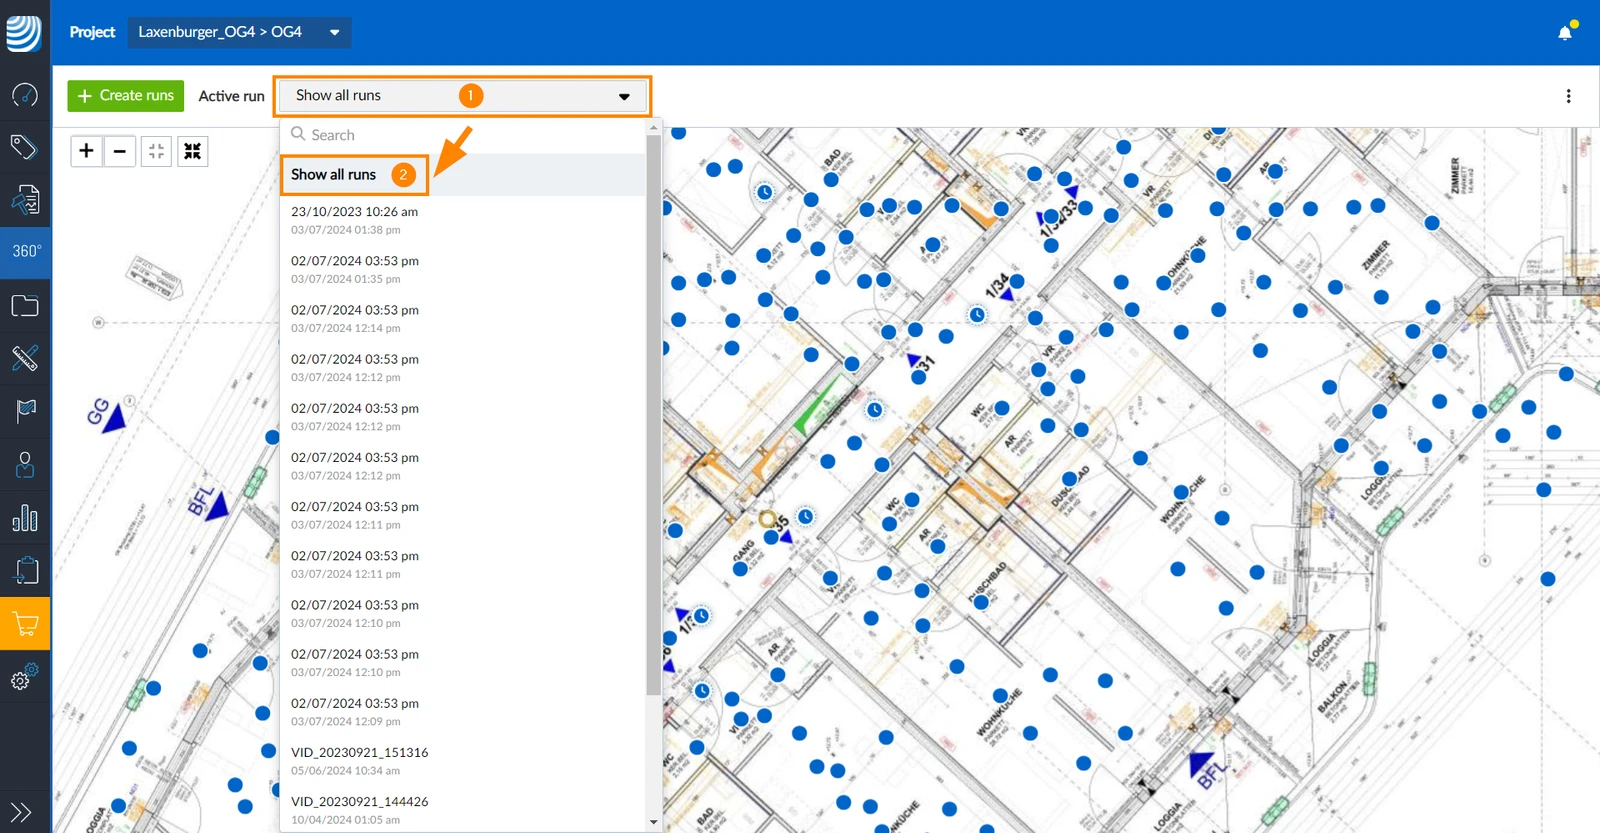
Show all runs is selected by default in the Webapp. You can also Select a run to view a specific one.
Show All Runs
To show all runs of a plan:
- Open the Active run drop-down
- Click Show all runs
Select a Run
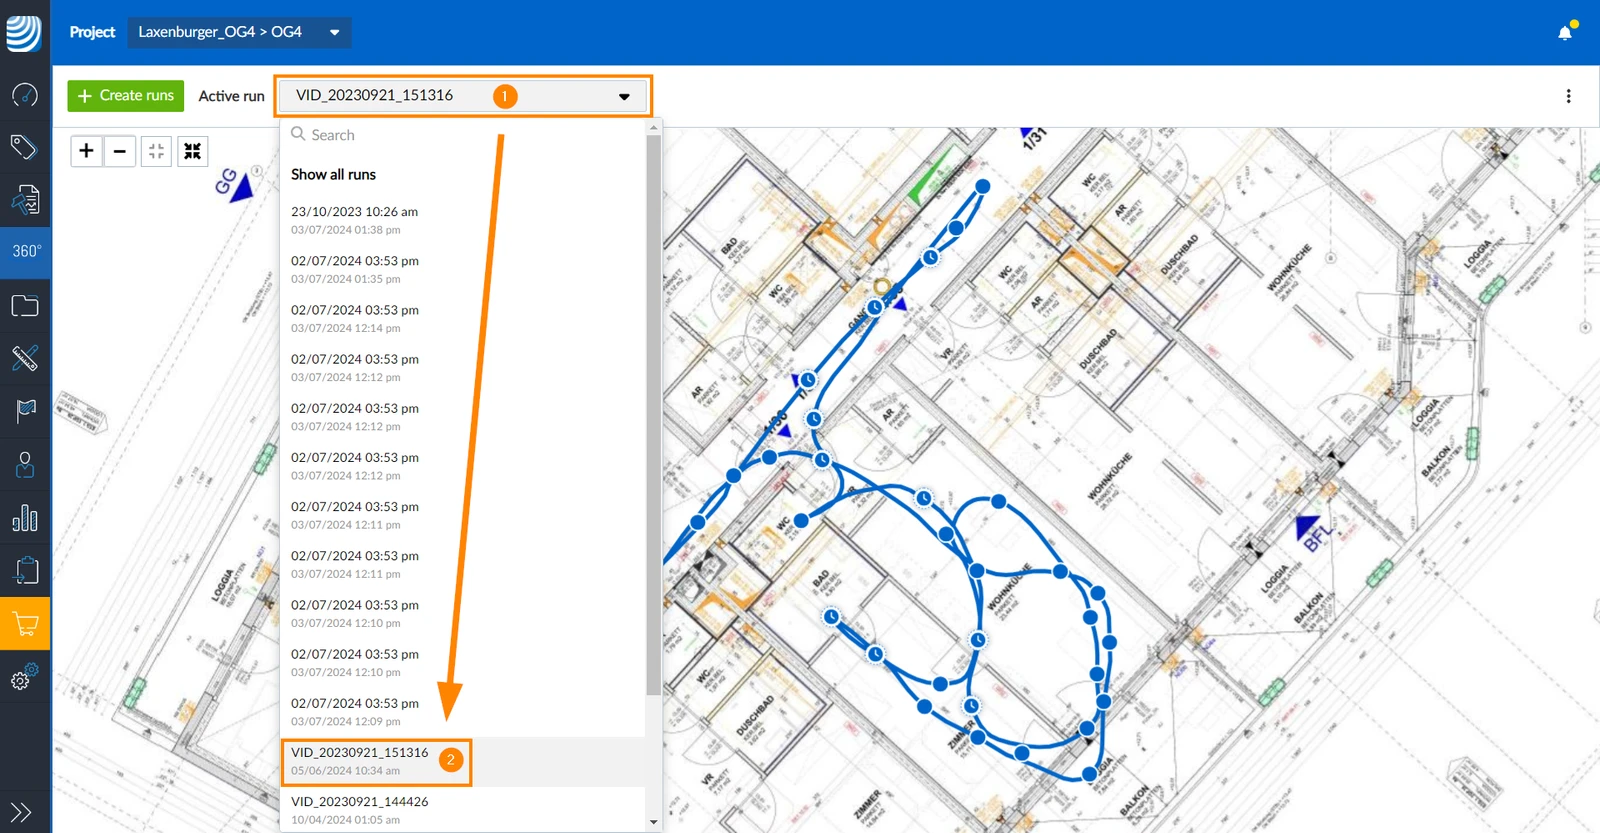
To select a specific run:
- Open the Active run drop-down
- Click on the run in the list
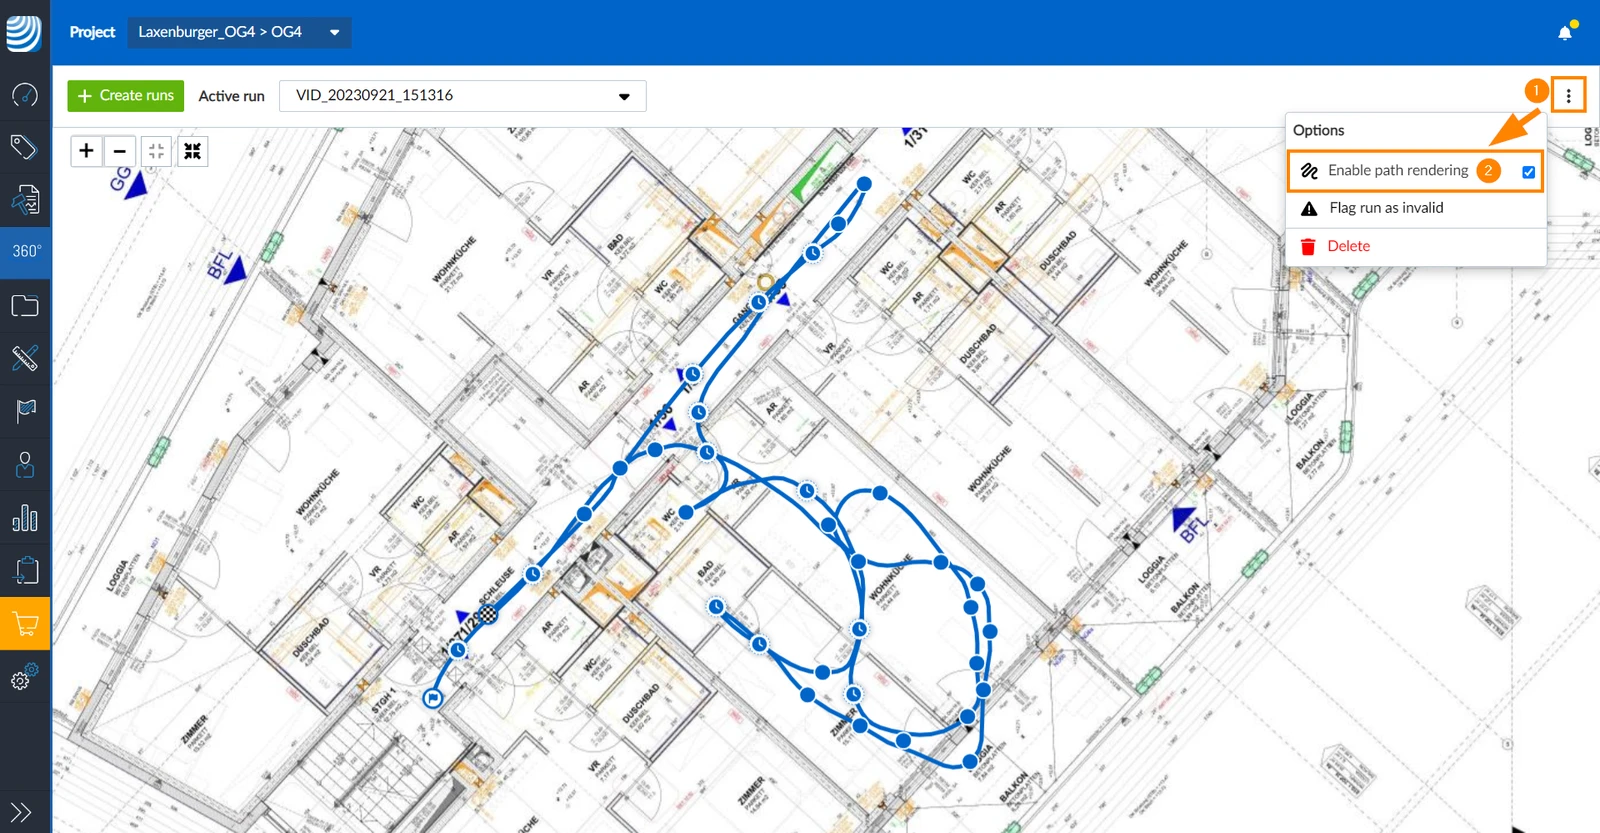
View/Hide the Path
The path of a run is displayed by default but can be hidden as well.
To hide the path (= disable path rendering):
- Open the more menu
- Click Enable path rendering to clear the checkbox
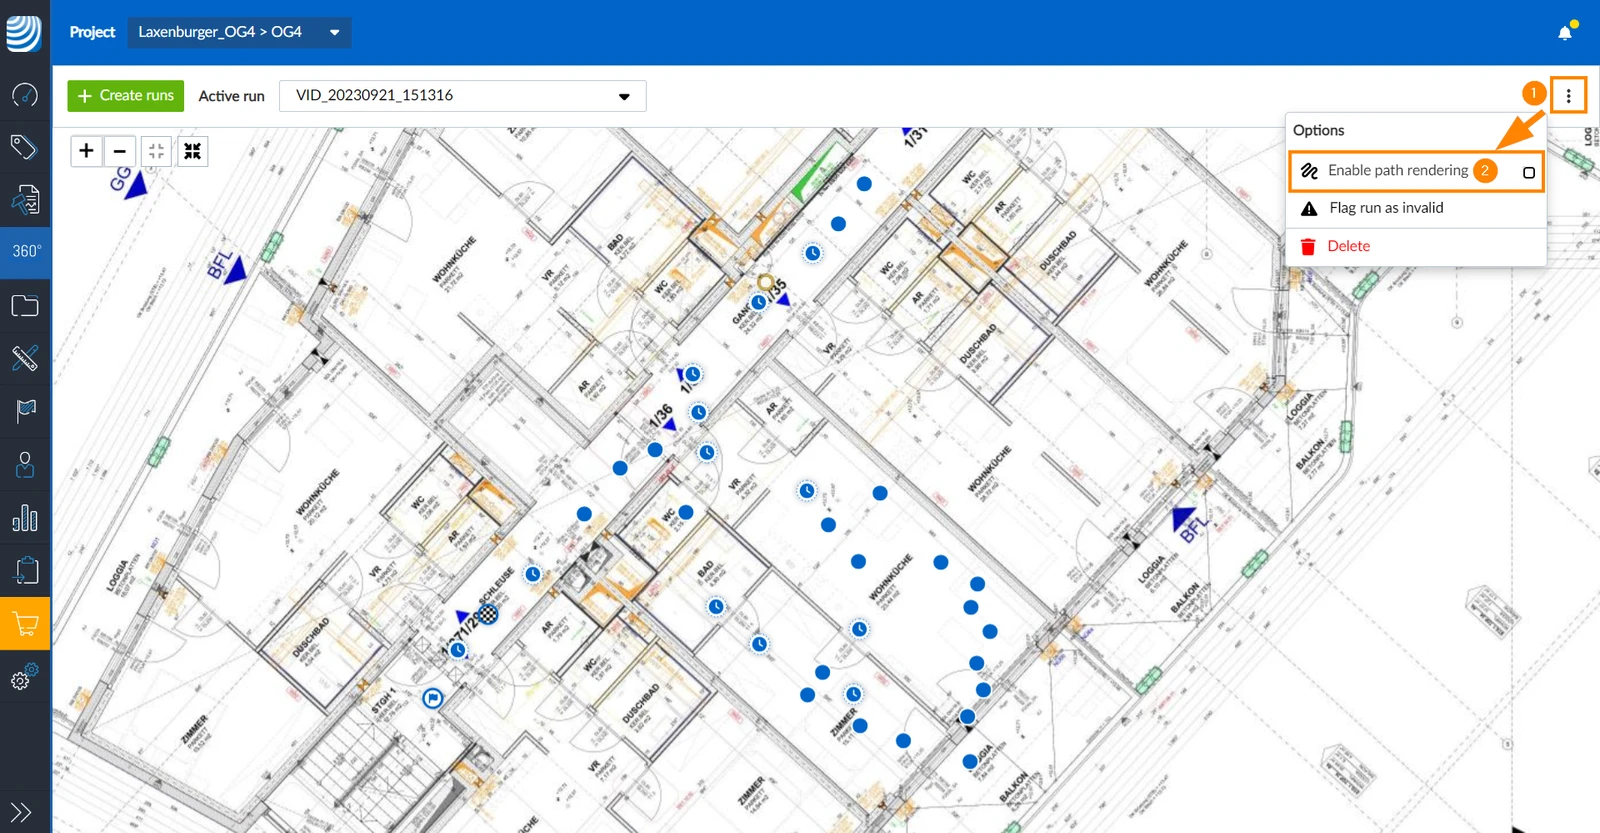
To view the path (=enable path rendering):
- Open the more menu
- Click Enable path rendering to select the checkbox
View Runs on a Map
Outdoor runs can also be shown on a map, at the GPS positions of their image points.
To view runs on a map:
- Select an outdoor run, or Show all runs
- In the View drop-down select Map
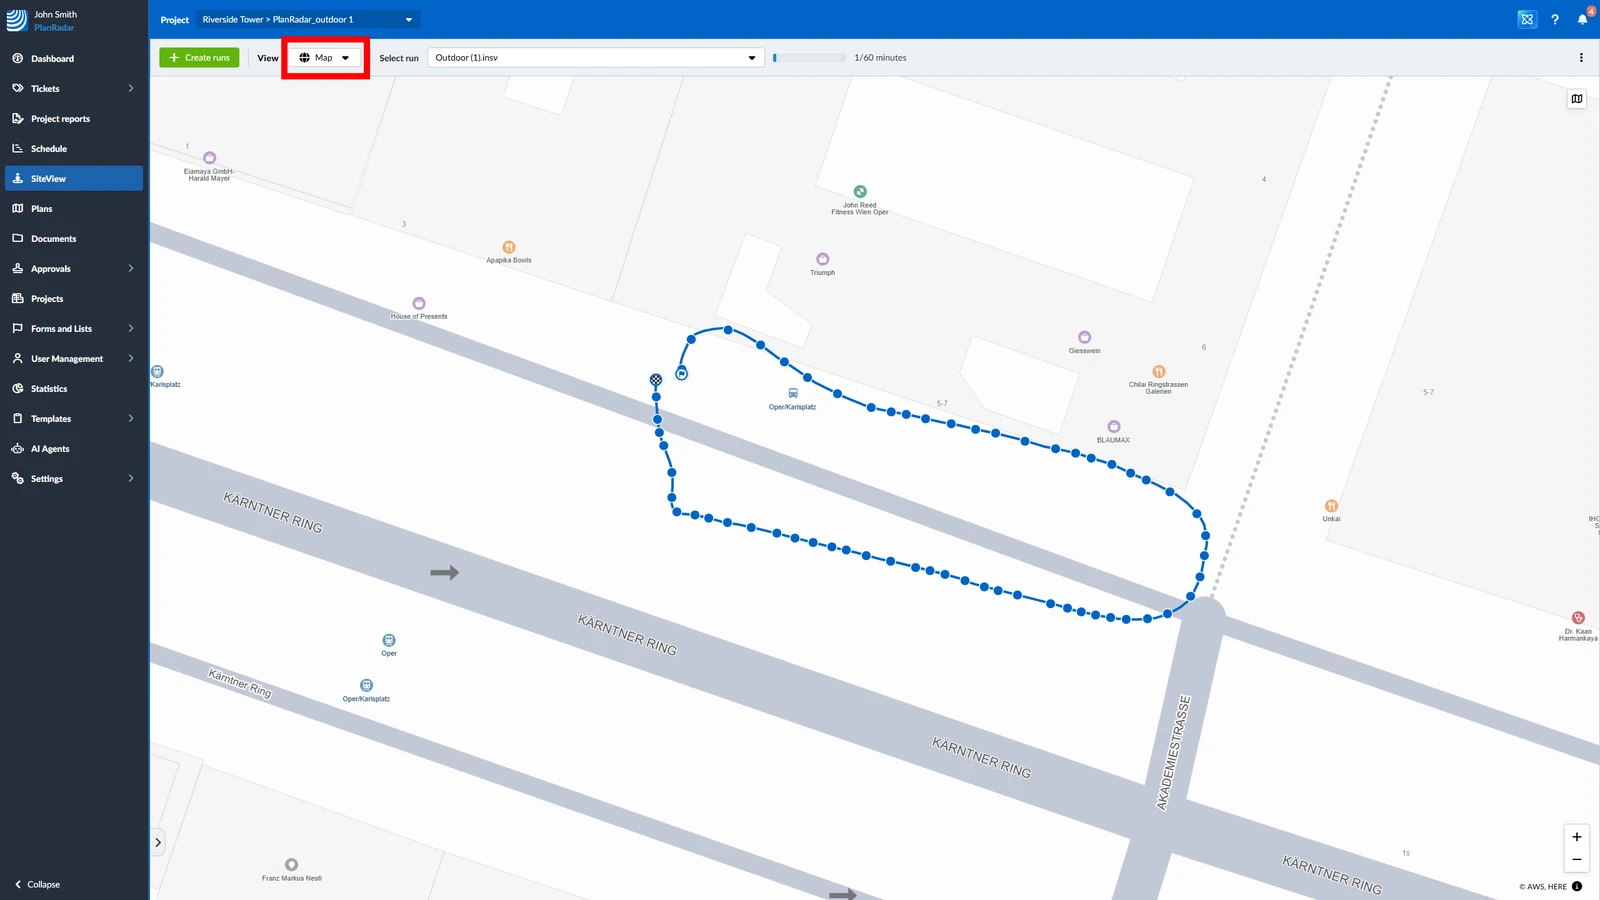
- A single run is shown with its path, as on the plan.
- With Show all runs, the image points of all outdoor runs are shown, without paths.
- Click an image point to open its 360° image, as on the plan.
Indoor runs cannot be shown on the map: Map is greyed out for them. If there is nothing to show, the message No SiteView runs with a GPS position to show on the map. appears.
You can change the map style as in the Tickets Map View. The map is not available on every PlanRadar server — if you don't see Map, it is not available for your account.
View a Run on the 2D Dollhouse
A 2D dollhouse is a top-down image of an indoor run. It is created automatically for some indoor runs after they have been processed.
To view a run on the 2D dollhouse:
- Select an indoor run
- In the View drop-down select 2D Dollhouse
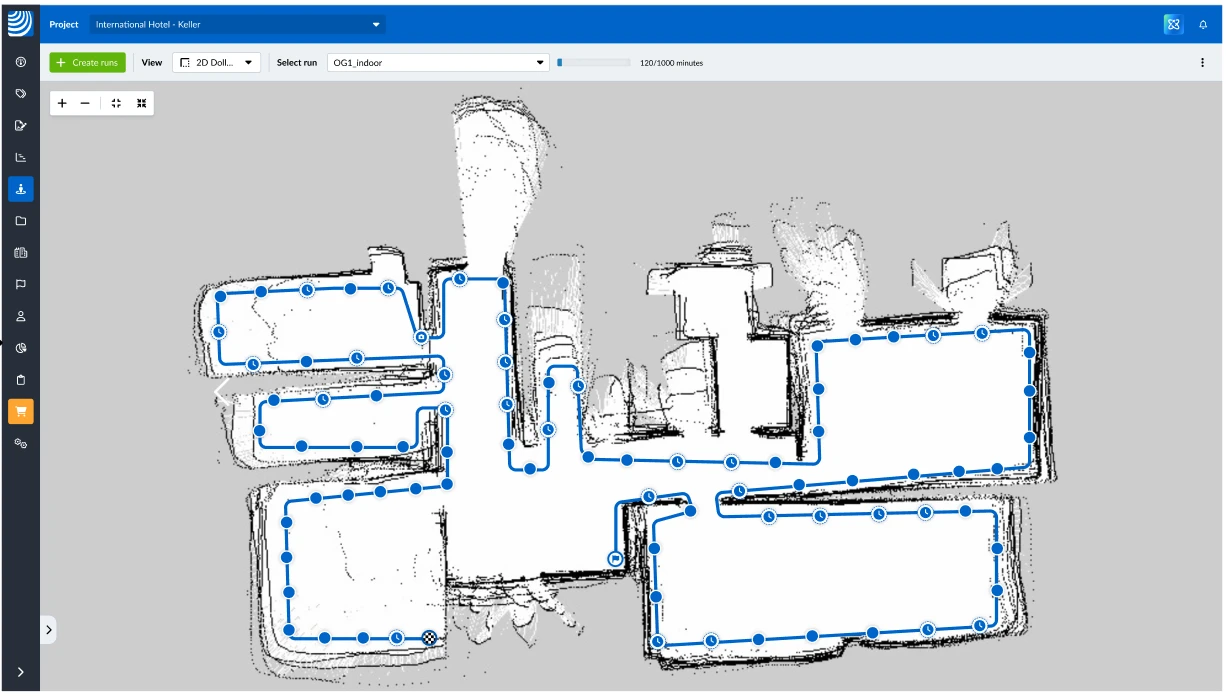
The 2D dollhouse replaces the plan, and the run is shown on top of it with its path and image points. Click an image point to open its 360° image, as on the plan.
2D Dollhouse is greyed out if no single indoor run is selected, or if the selected run has no 2D dollhouse. Runs recorded before October 2026 have no 2D dollhouse. If you select a run without a 2D dollhouse, the view switches back to 2D plan.
Rate the Quality of Runs
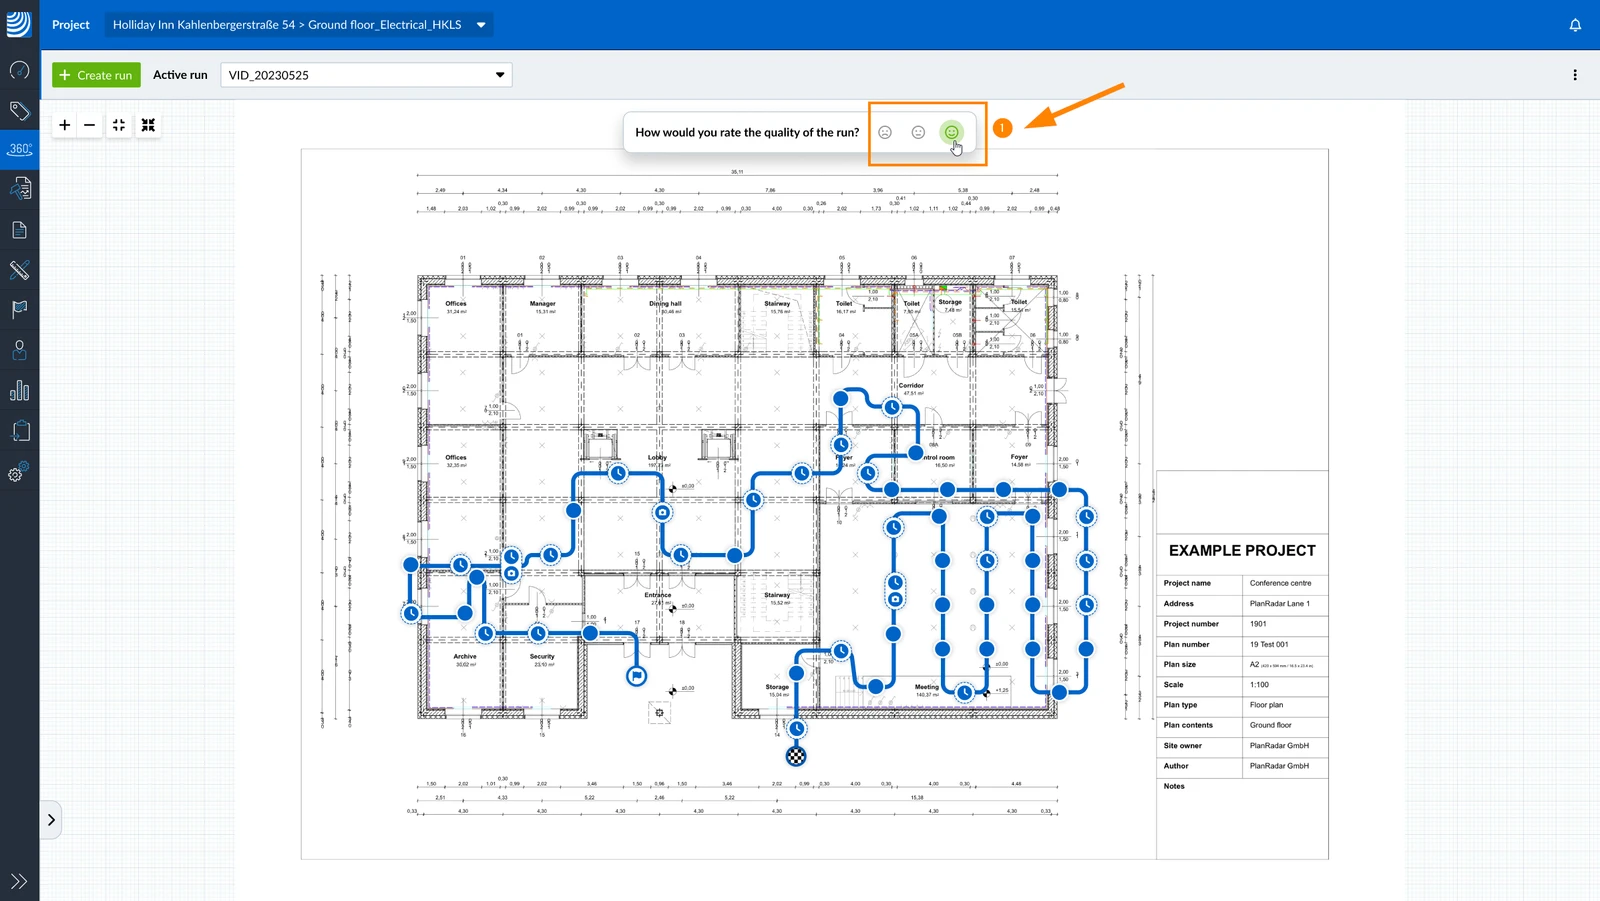
Rate the quality of the processed runs to help us improve the algorithm that places the image points on the plan. We will automatically ask for your feedback when you view a run in the Webapp. Once a run has been rated by you or someone else in your account, we will not ask for feedback on that run again.
To rate a run as poor, average or good quality:
- Click on the red, yellow or green smiley
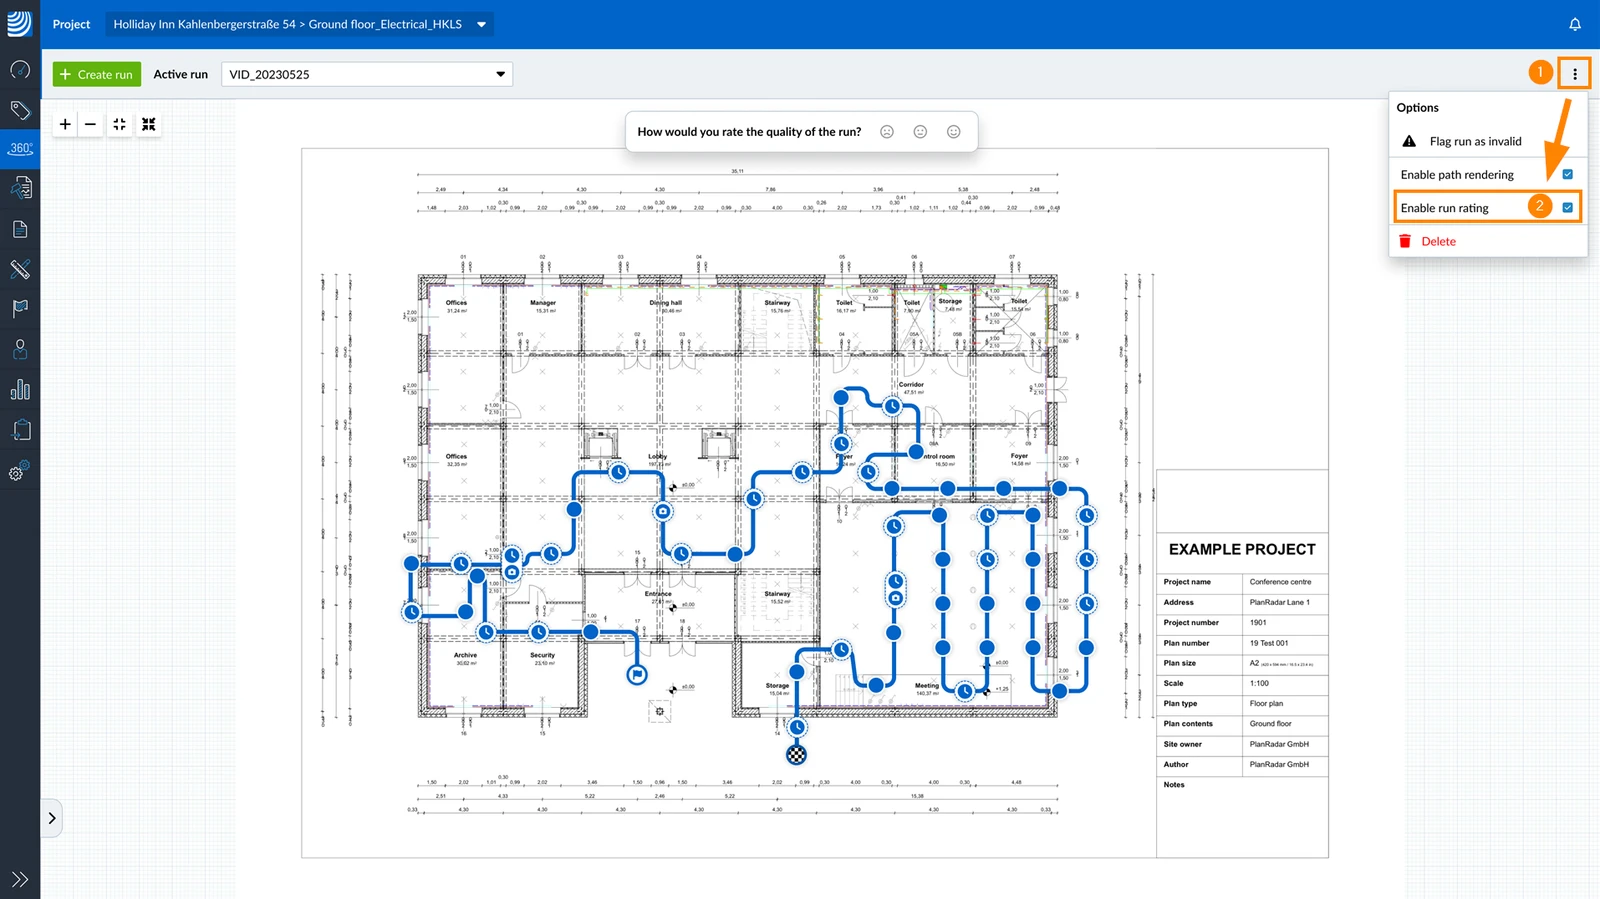
If you don't want to be asked to rate runs, you can turn it off. You can turn it back on later.
- Open the More menu
- Clear the Enable run rating checkbox
Show All Runs
To show all runs of a plan:
- Tap Plan
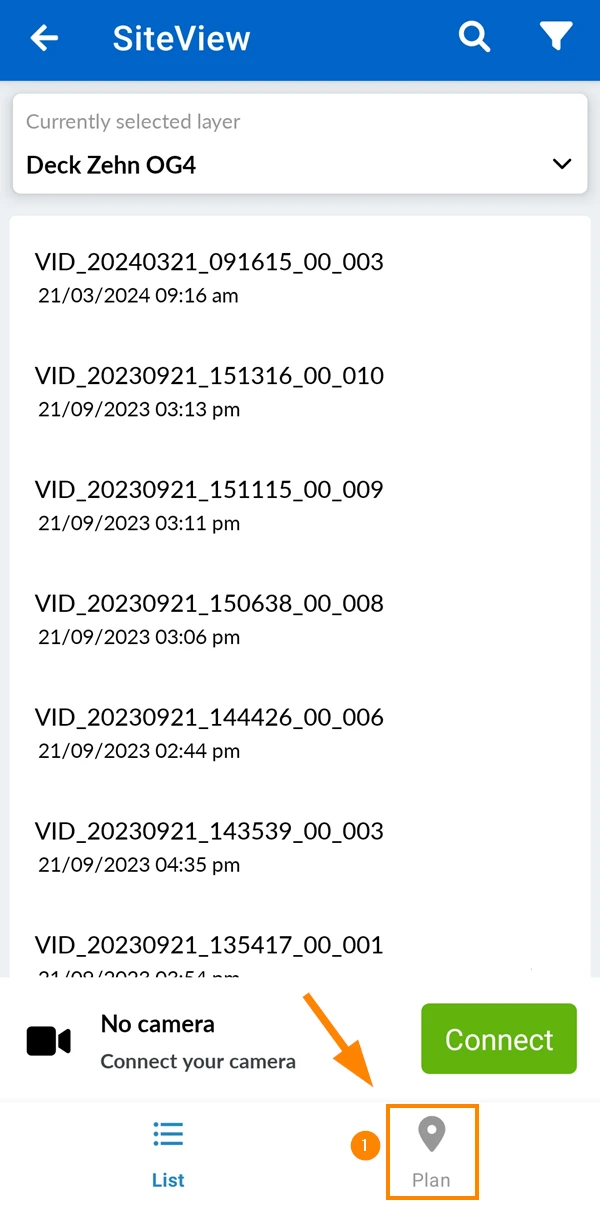
- See all runs and image points simultaneously
Select a Run
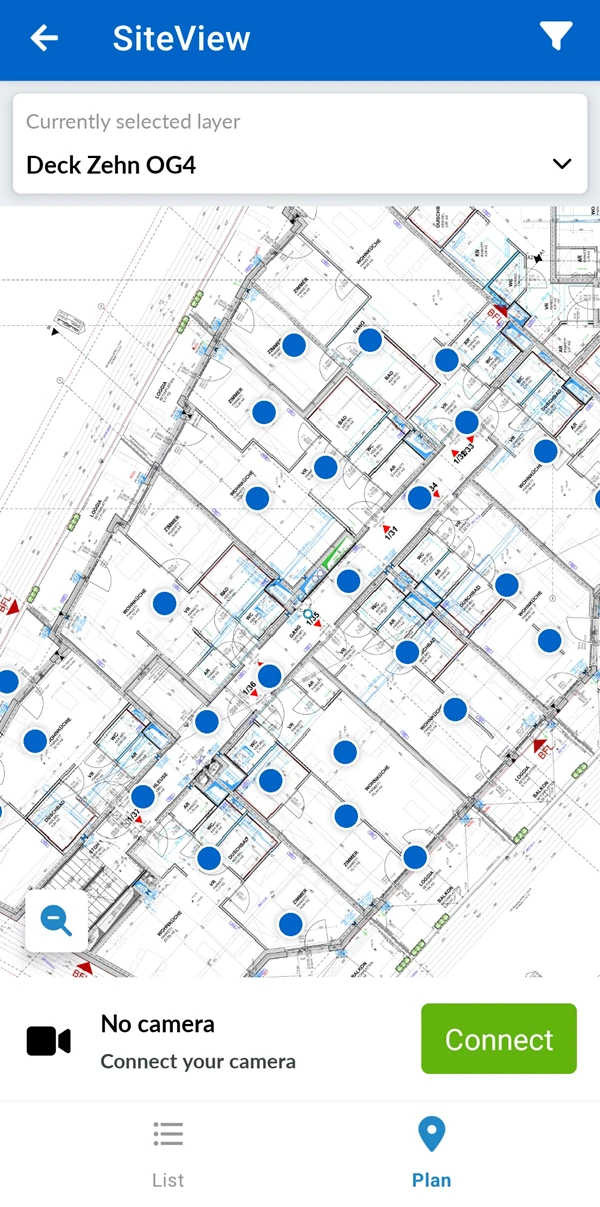
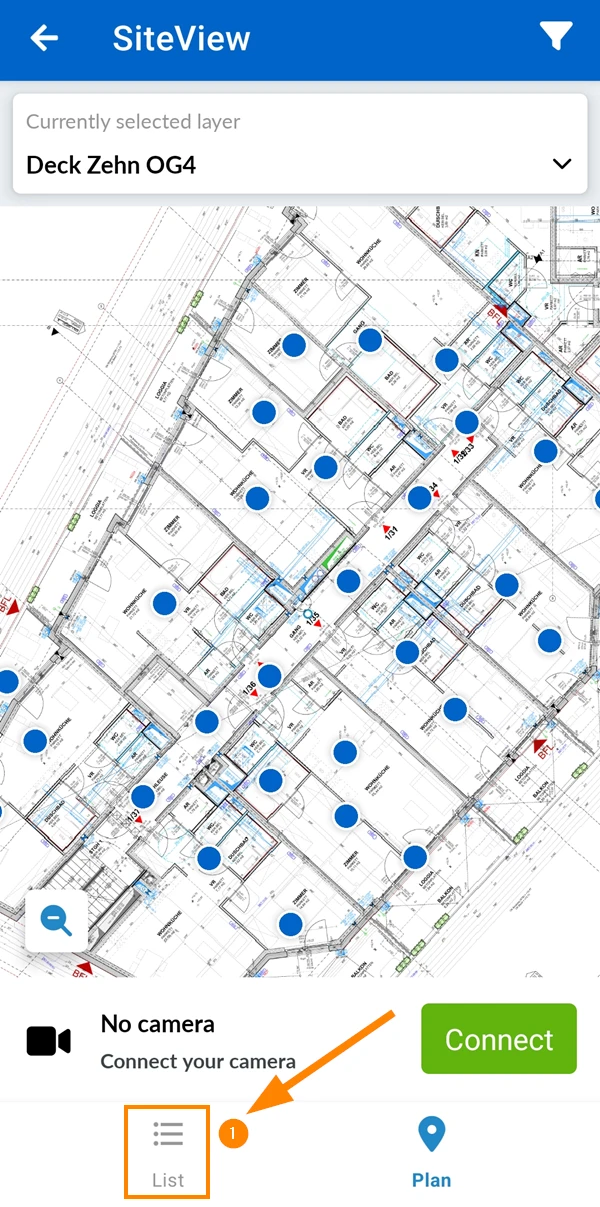
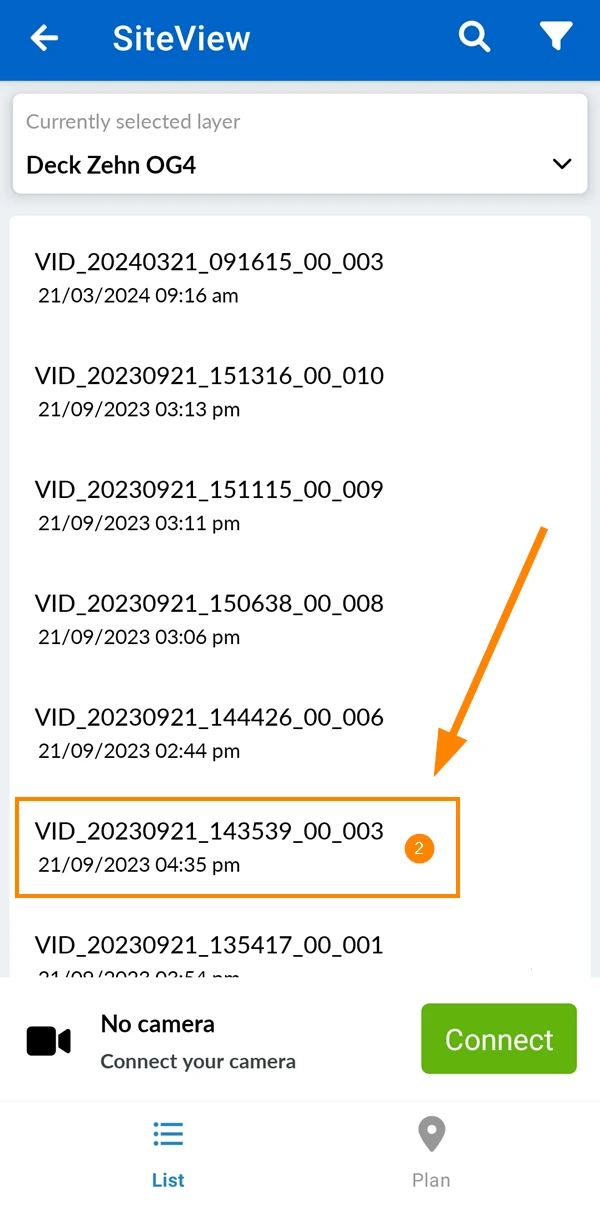
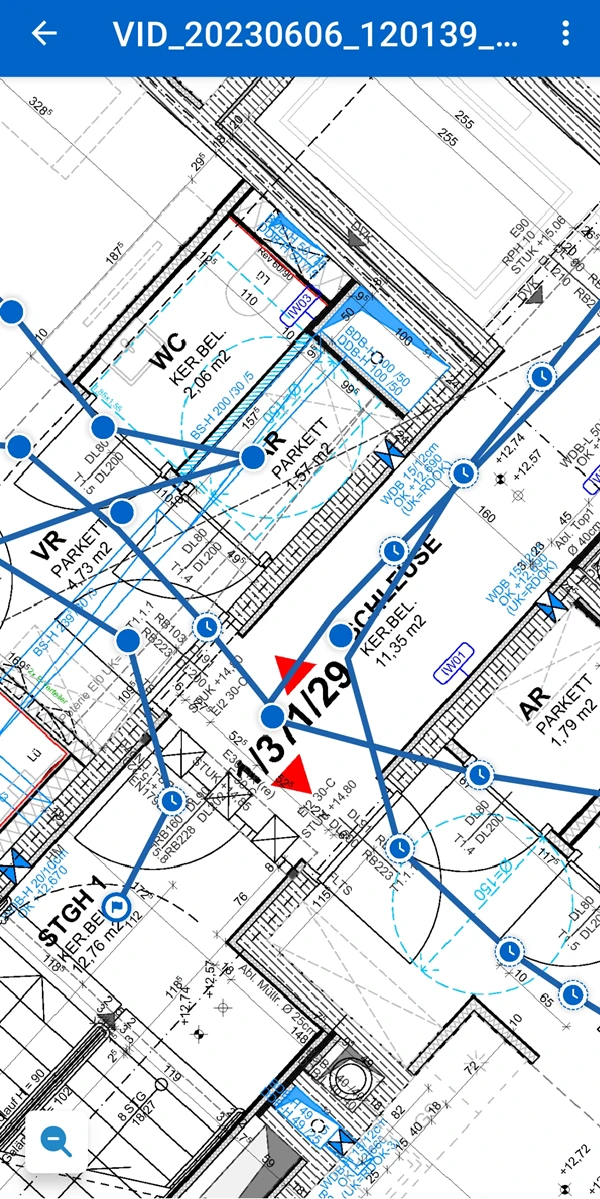
To select a run and show the plan with the run and its image points:
- Tap List
- Tap on the run
- See the run and its path and image points
Filter Runs
Filter your list of runs to see only the runs that are currently relevant to you.
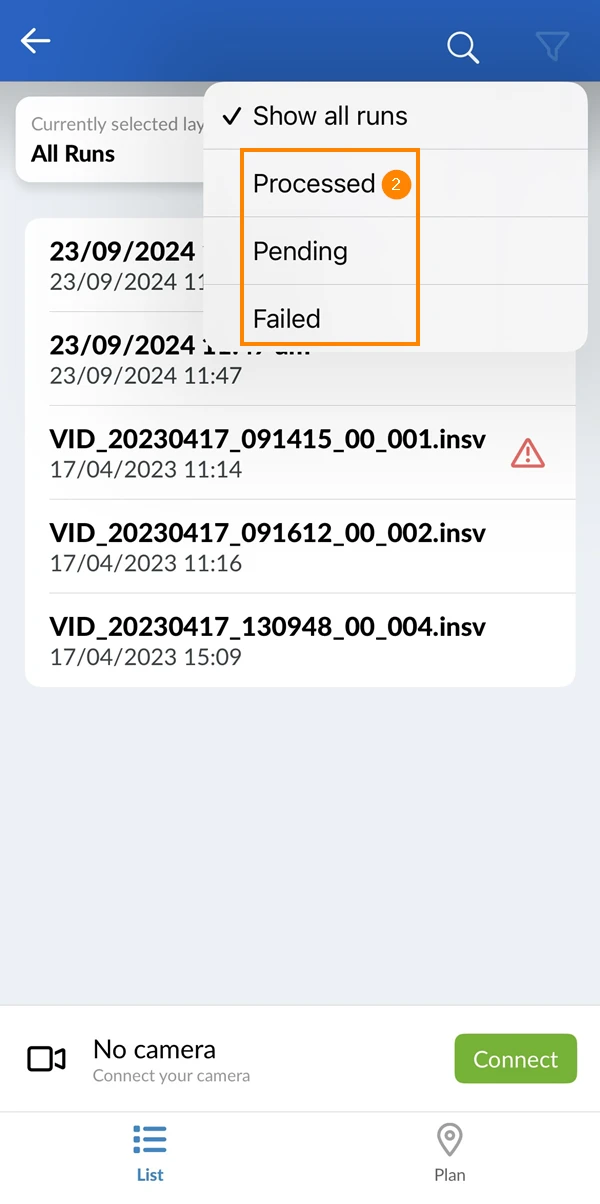
By default the filter is set to Show all runs. You can also filter for:
- Processed: Runs that have been successfully processed.
- Pending: Runs that have not yet been fully processed.
- Failed: Runs that have been processed but have failed.
Runs flagged as invalid are only displayed if Show all runs is selected. Read more below in Flag a Run as Invalid & Reset Starting Position.
To filter your runs:
- Tap the filter icon
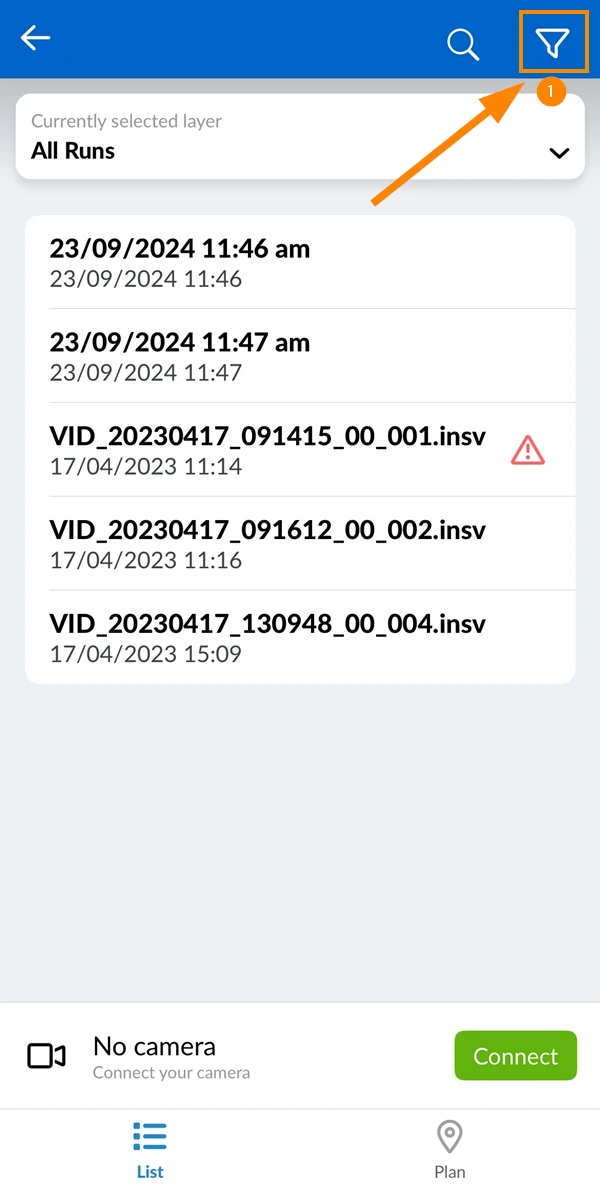
- Tap Processed, Pending or Failed
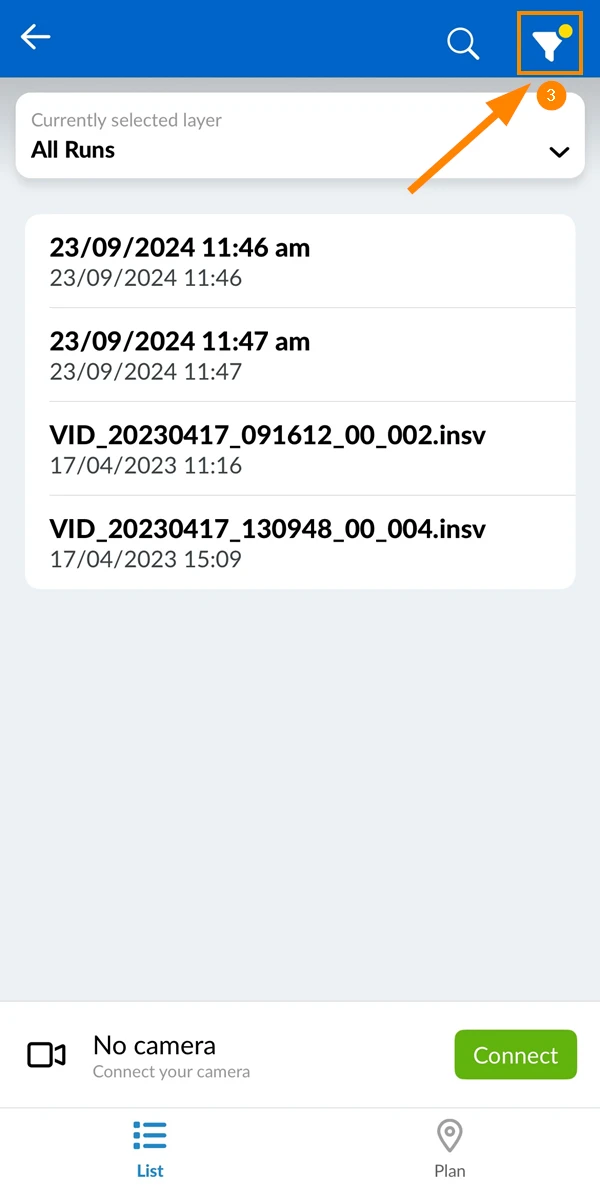
- The filter icon has a yellow dot to indicate that a filter is active.
Manage Runs
You can flag runs as invalid (and optionally reset the starting position) or permanently delete runs.
Flag a Run as Invalid & Reset Starting Position
If you notice a problem with a run after processing, it may be due to an incorrect starting position.
Instead of deleting and re-uploading the run, you can flag it as invalid and reset the starting position.
Other factors, such as poor lighting or extremely high rooms, might also affect the run's quality. Flagging a run as invalid allows the PlanRadar support team to assist and analyze.
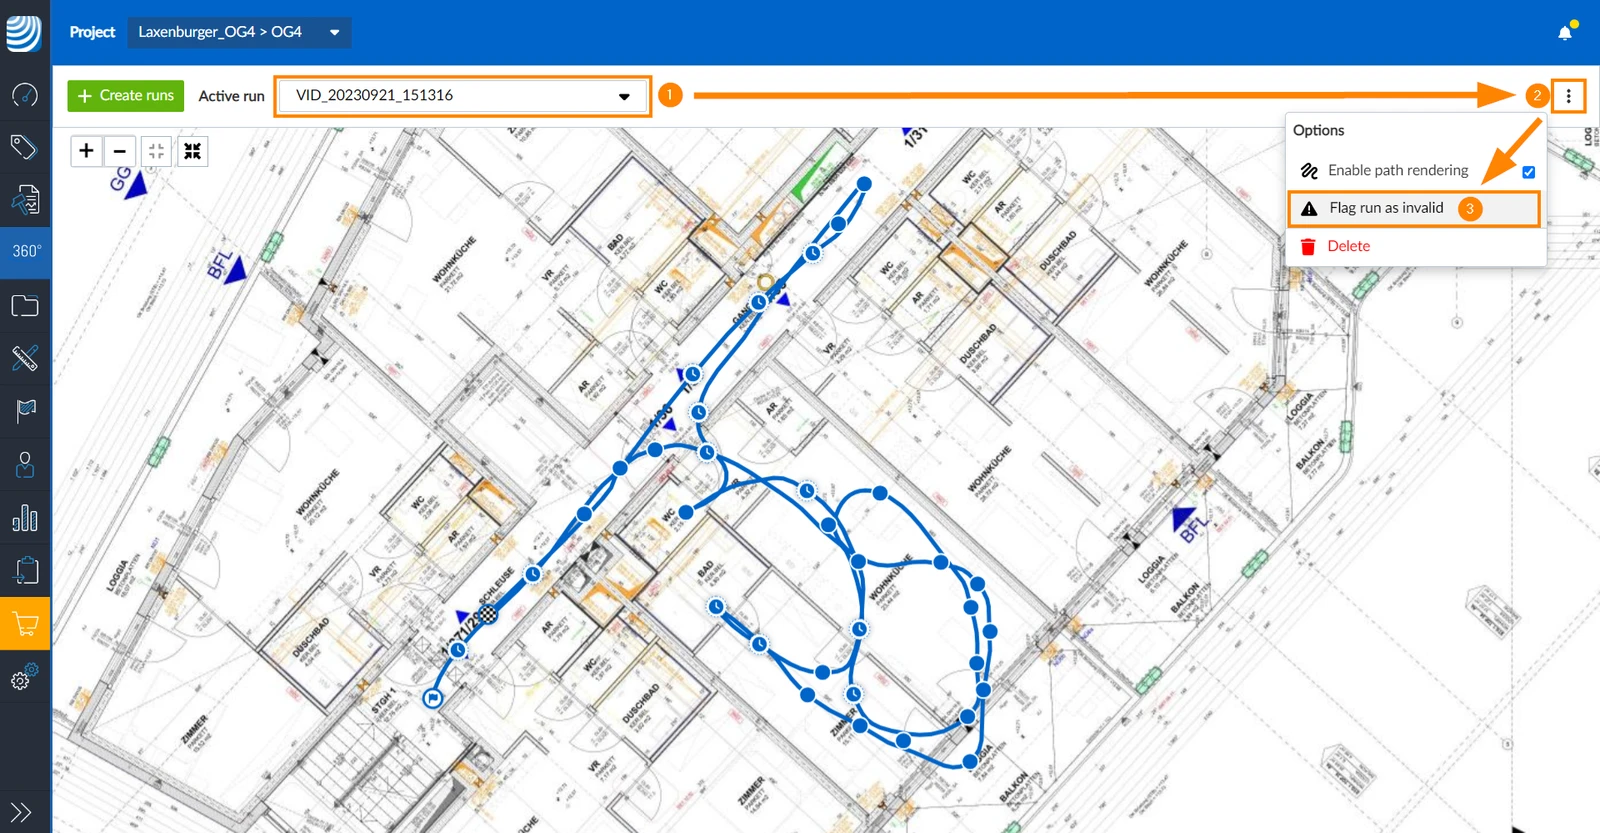
To flag a run as invalid:
- Select the run in the Active run drop-down
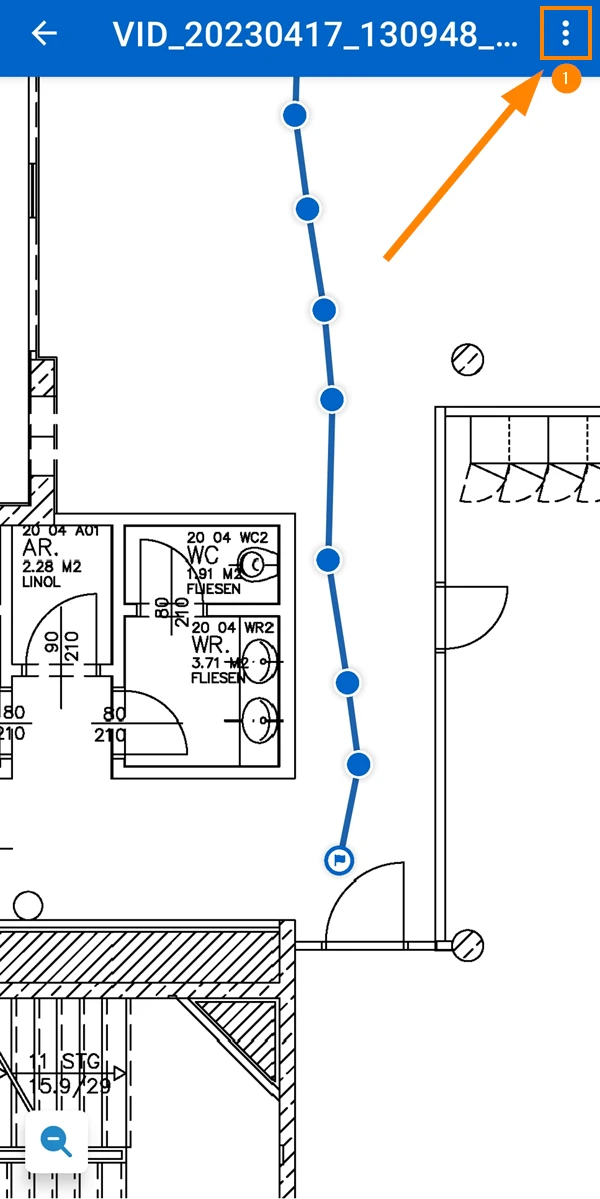
- Open the more menu
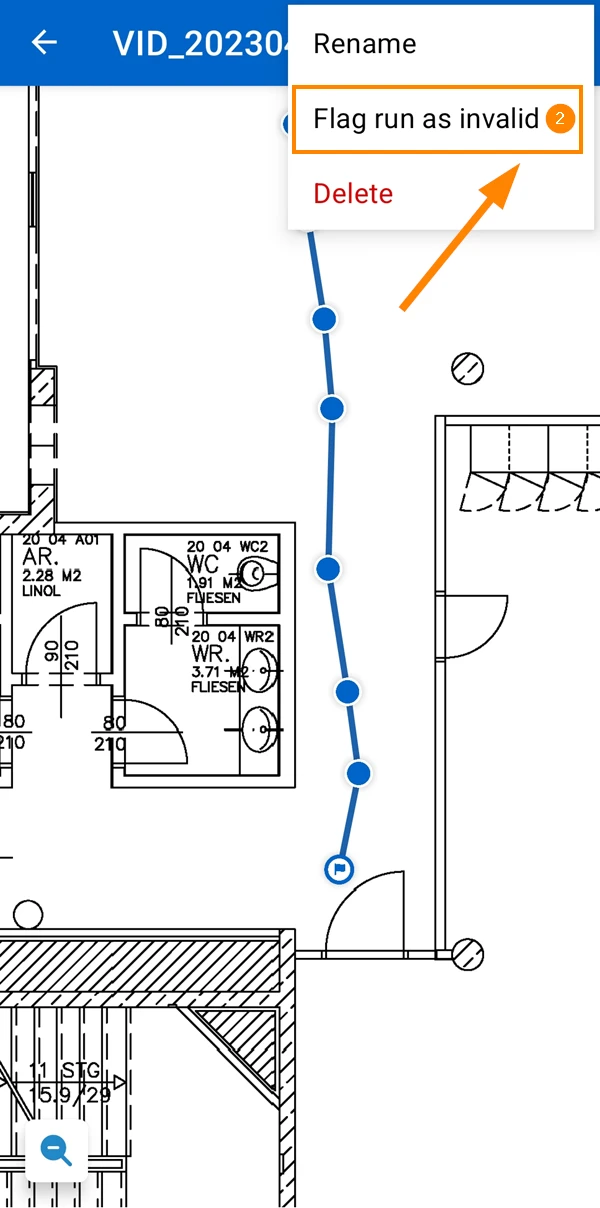
- Click Flag run as invalid
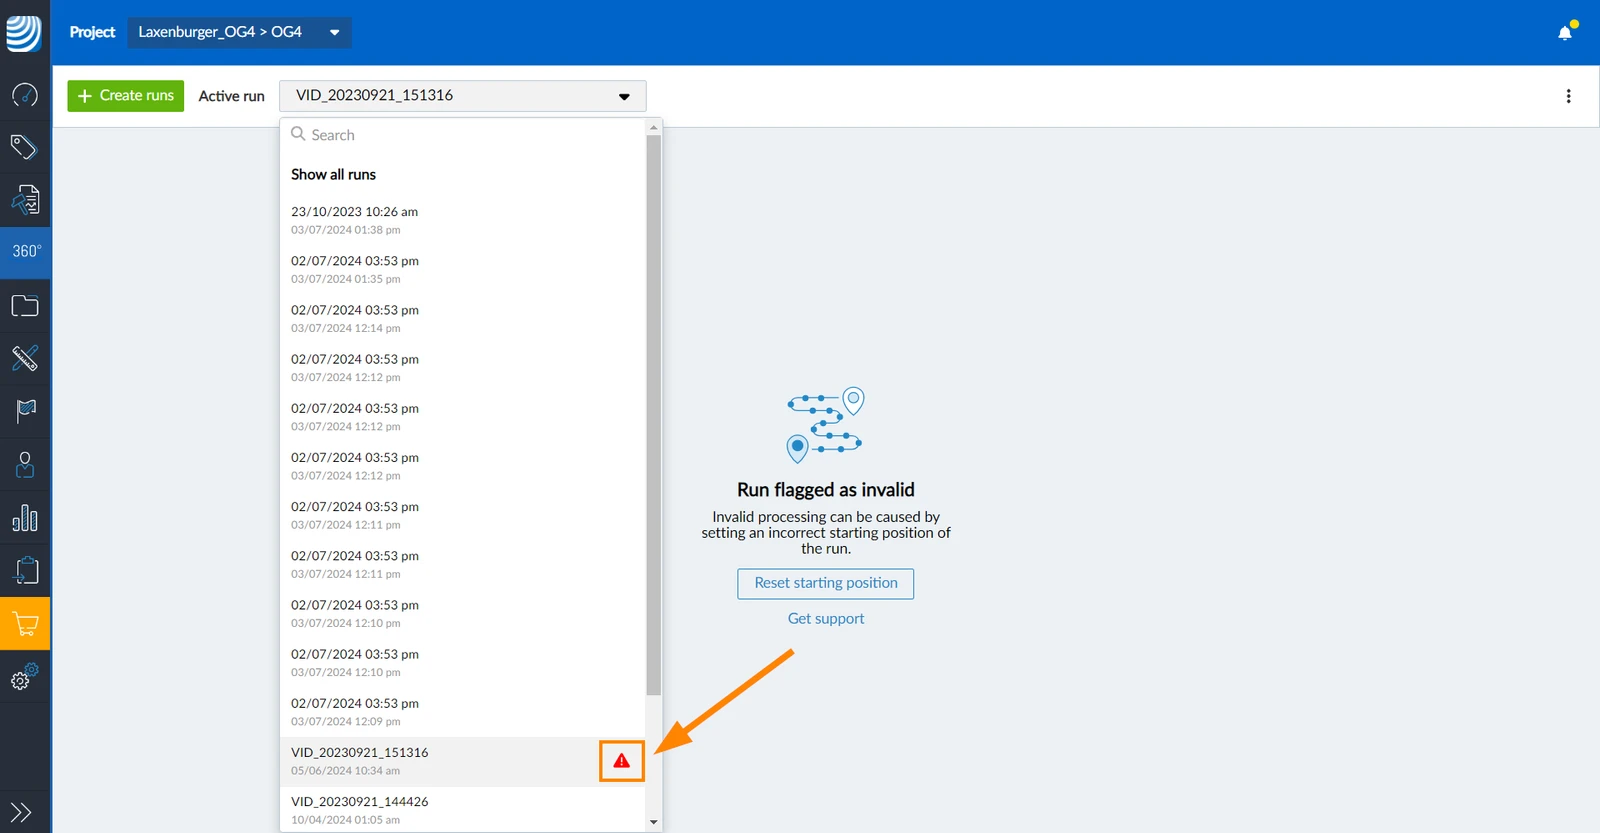
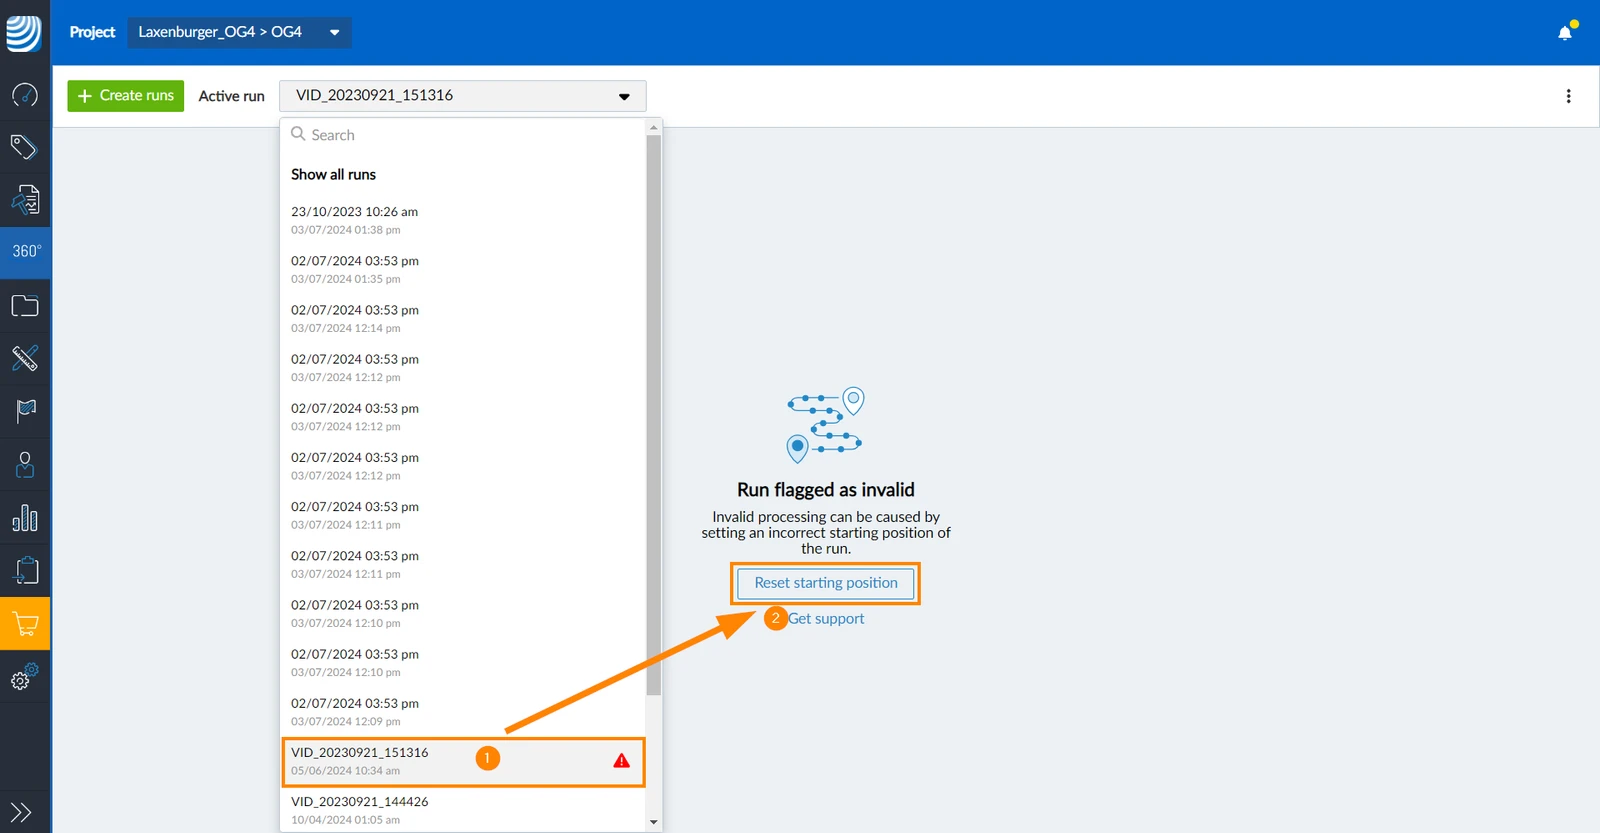
Runs flagged as invalid are still listed in the Active run drop-down list, but are highlighted with a red exclamation mark:
- Tap More
- Tap Flag run as invalid
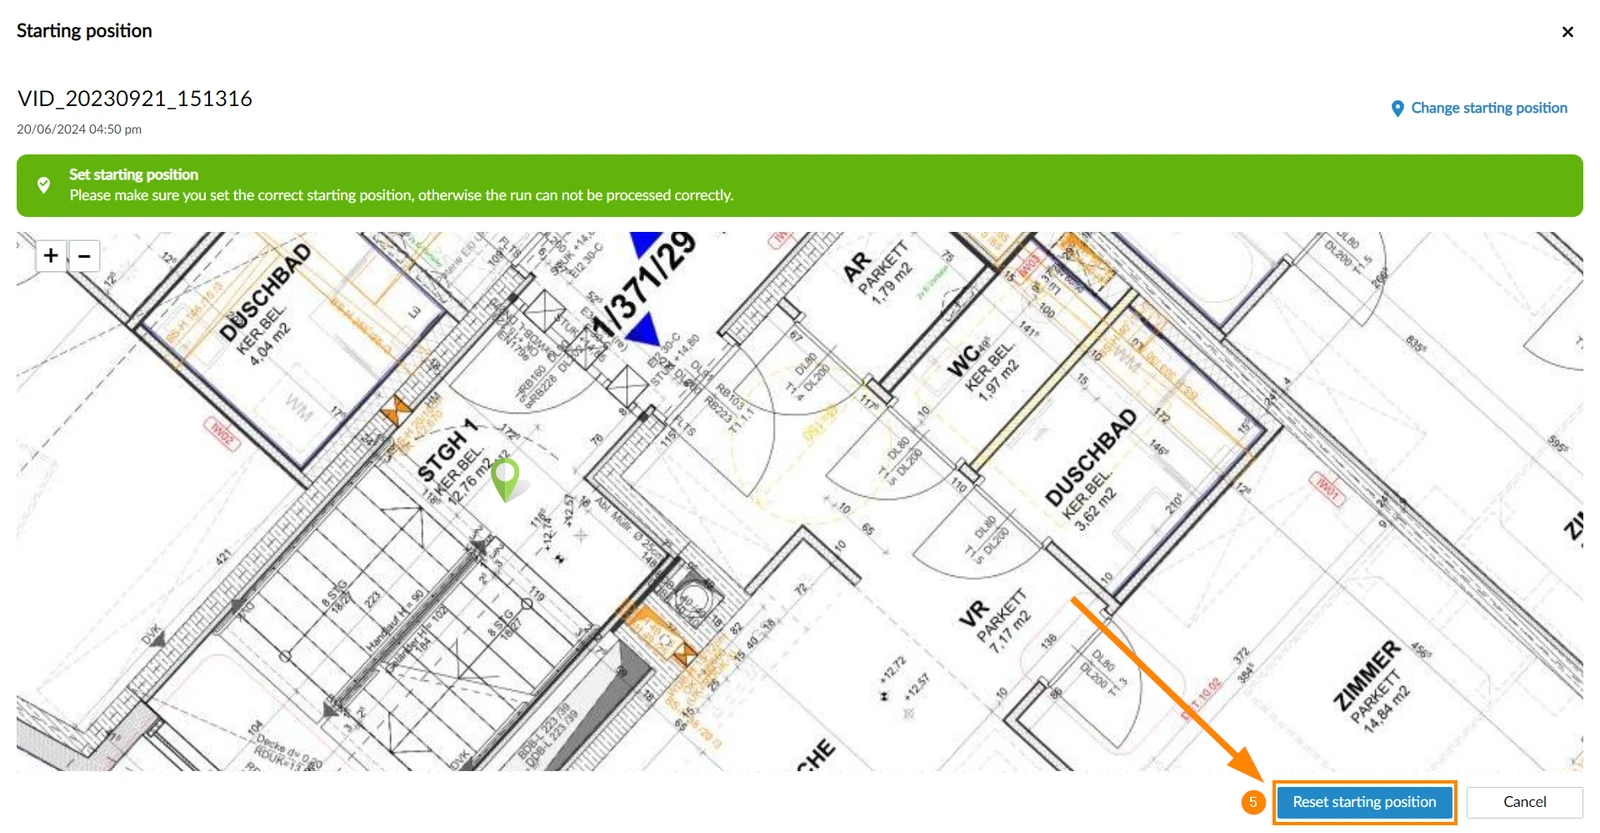
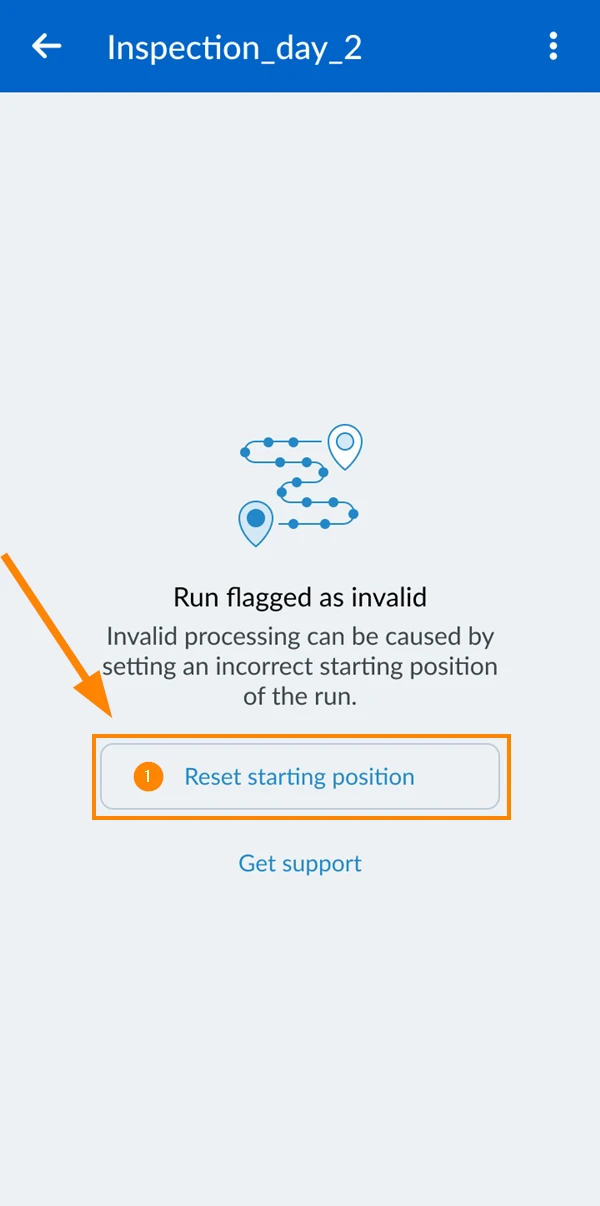
To reset the starting position of a run that is flagged as invalid:
- Select the run in the Active run drop-down
- Click Reset starting position
- Drag and drop the pin to the new starting position
- Click ✔ to confirm the starting position
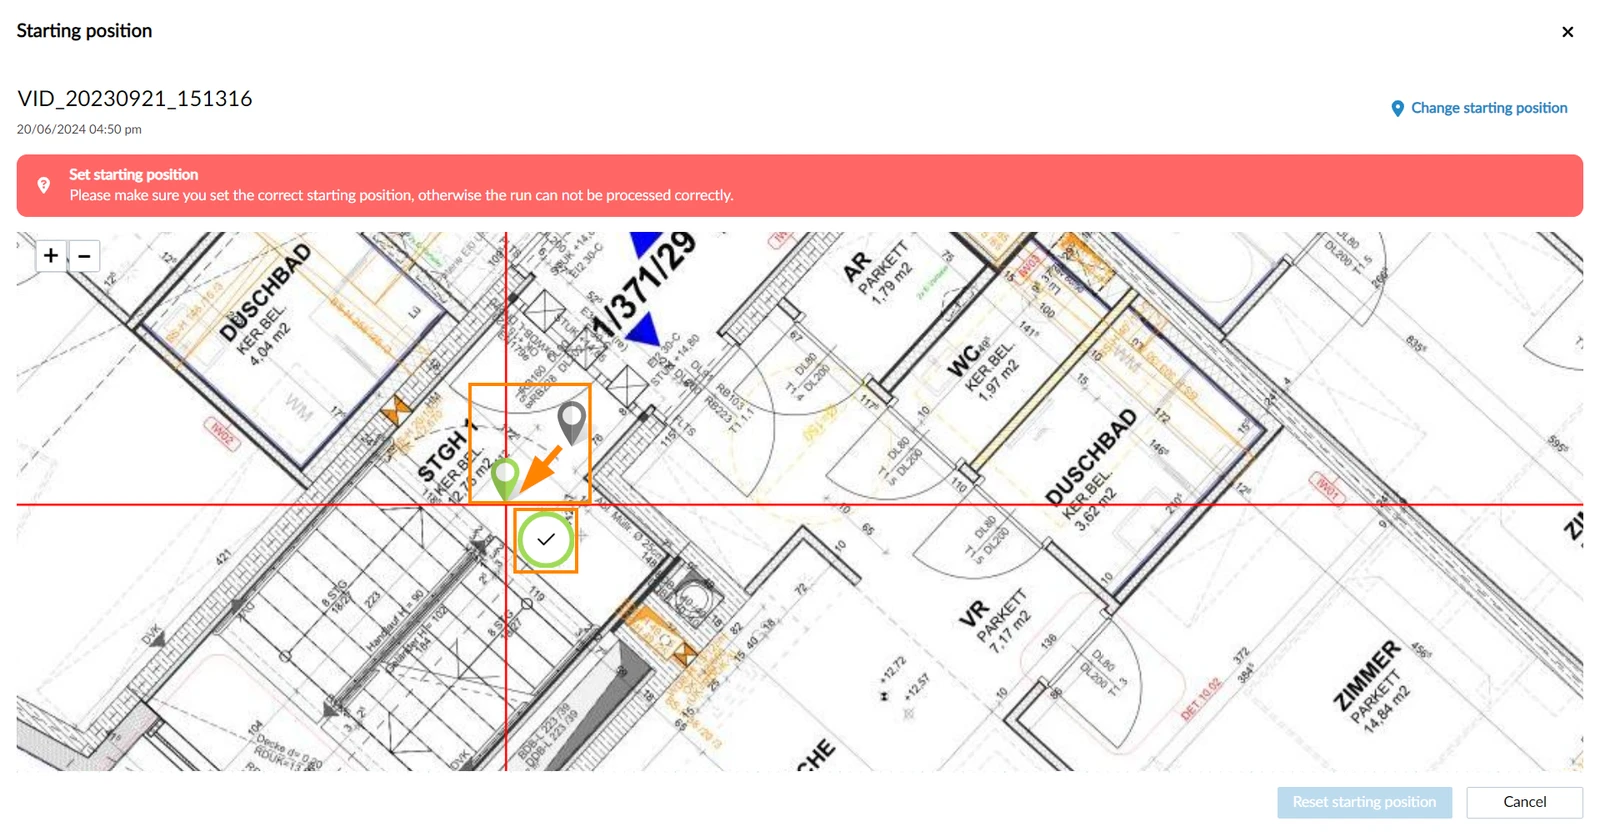
- Click Reset starting position to start processing the run
- Tap Reset starting position
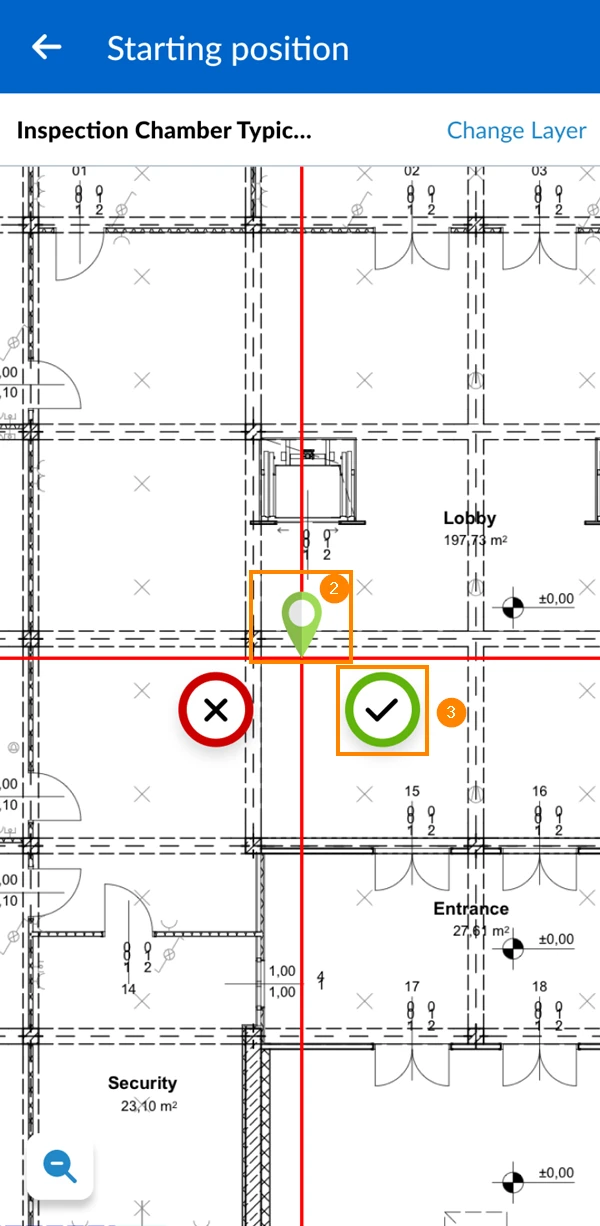
- Drag and drop the pin to the new starting position
- Tap ✔ to confirm the starting position
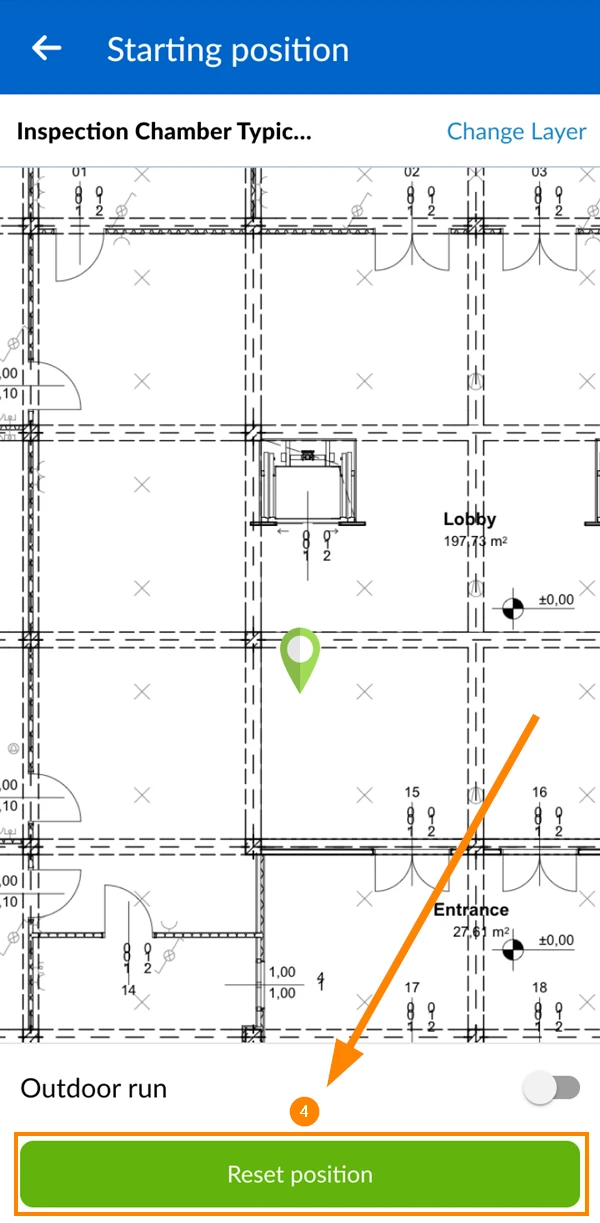
- Tap Reset position
Delete a Run
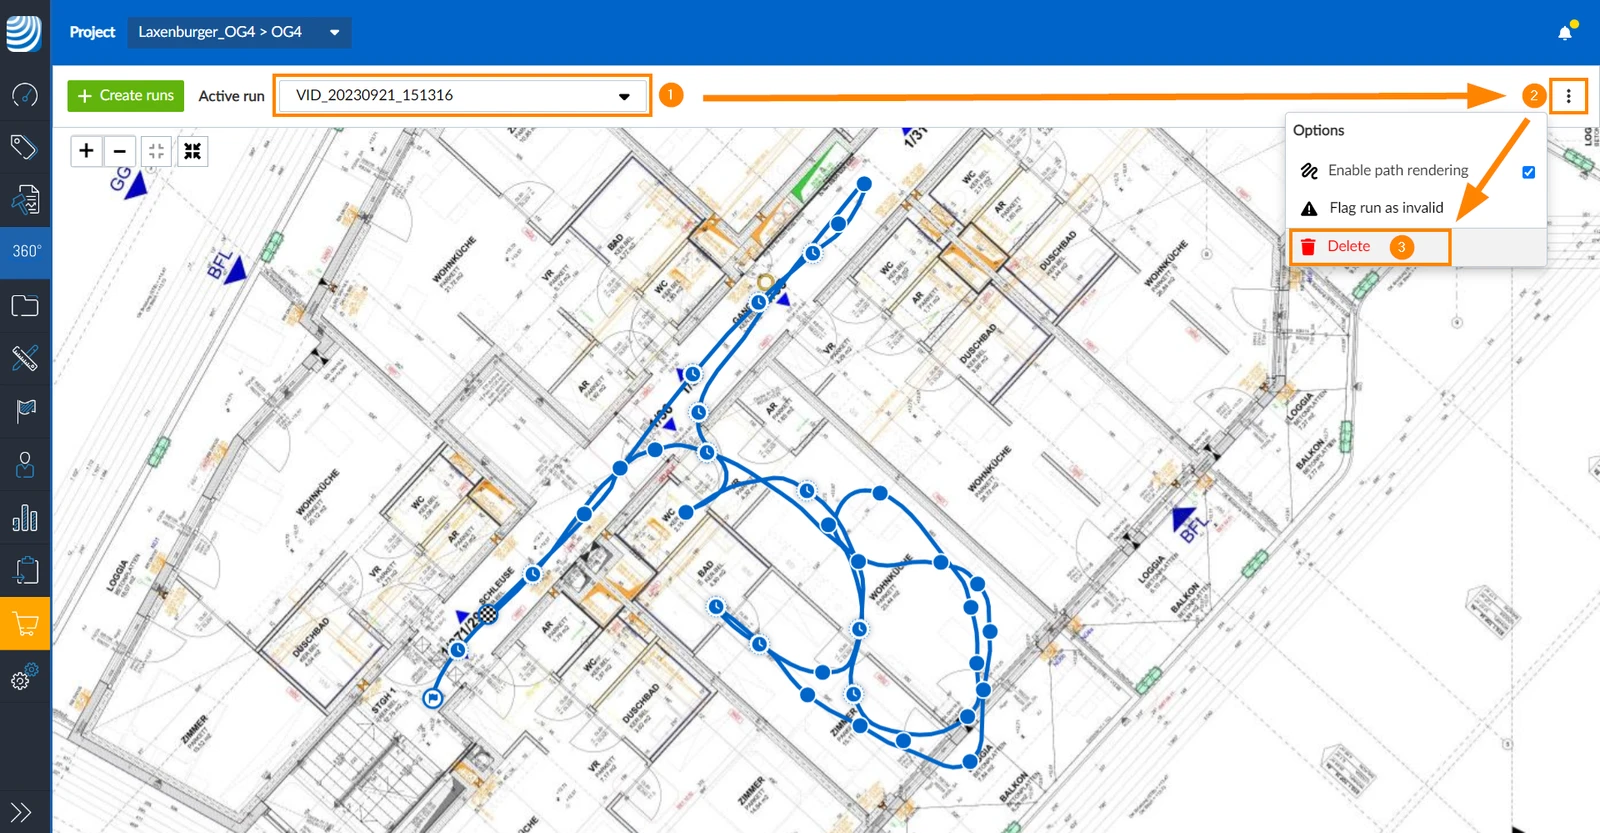
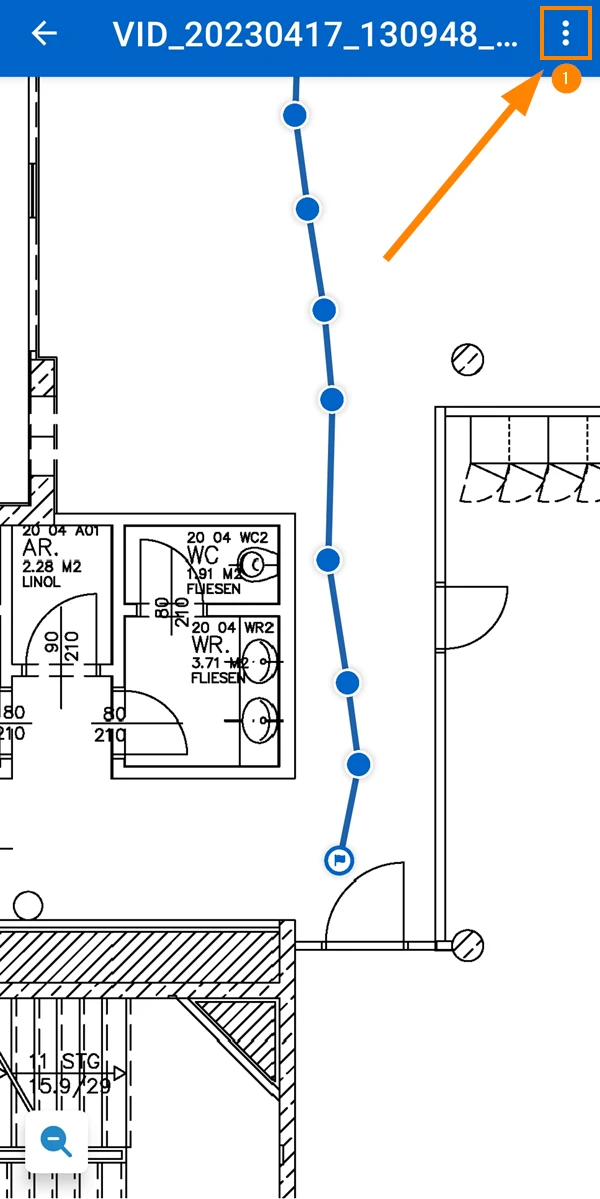
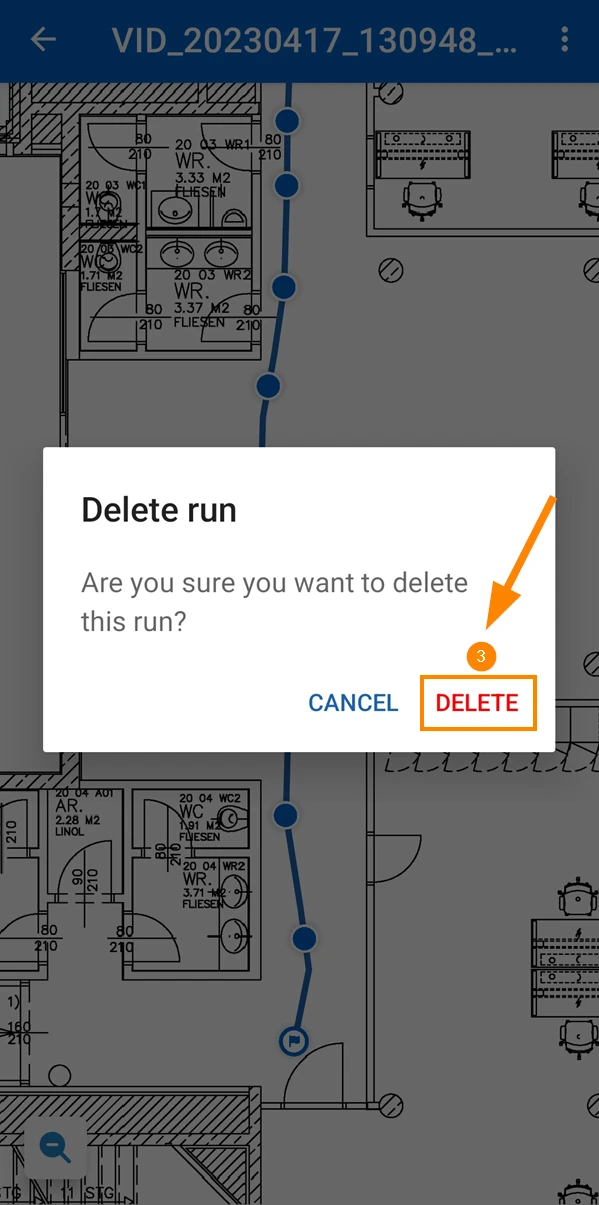
To permanently delete a run:
- Select the run in the Active run drop-down
- Open the more menu
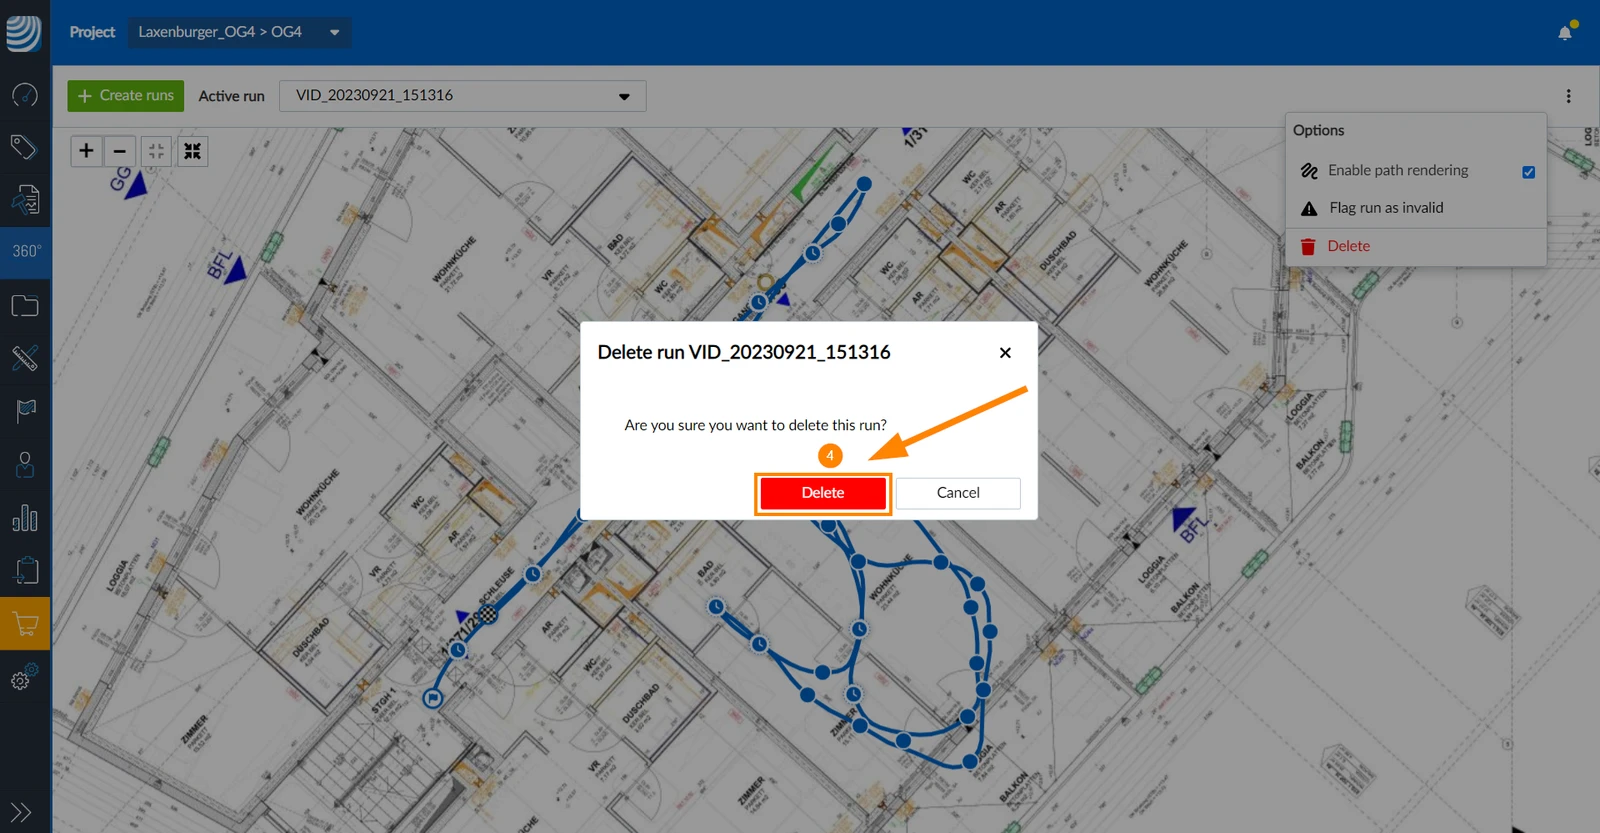
- Click Delete
- Click Delete to confirm
- Tap More
- Tap Delete
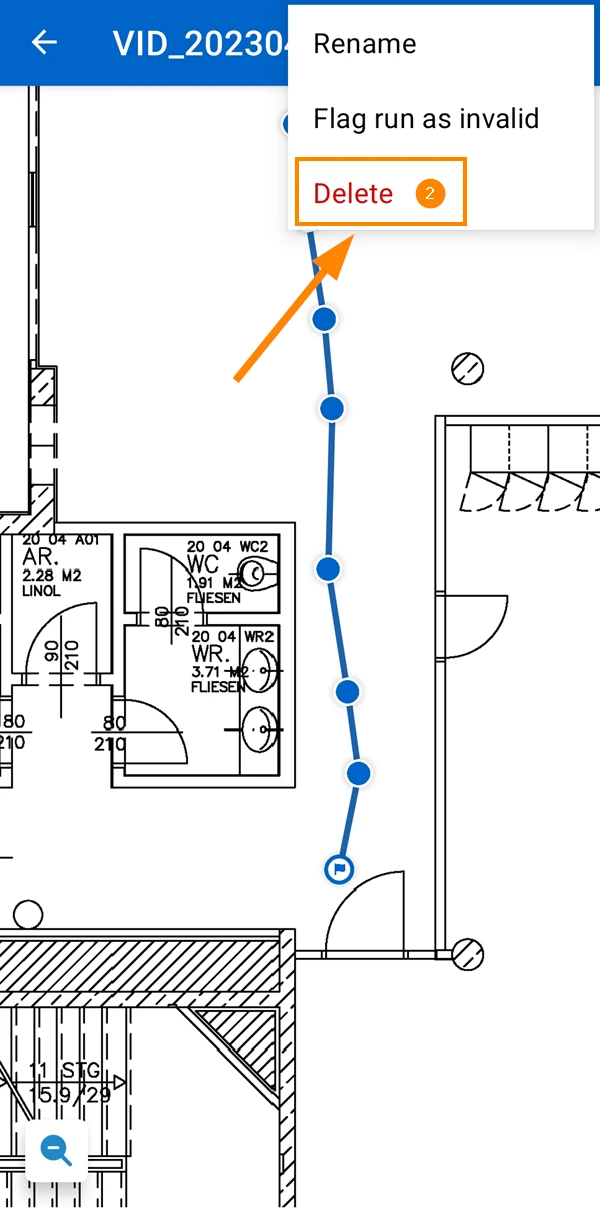
- Tap Delete to confirm
Rename a Run
Renaming a run is currently only possible in the mobile app.
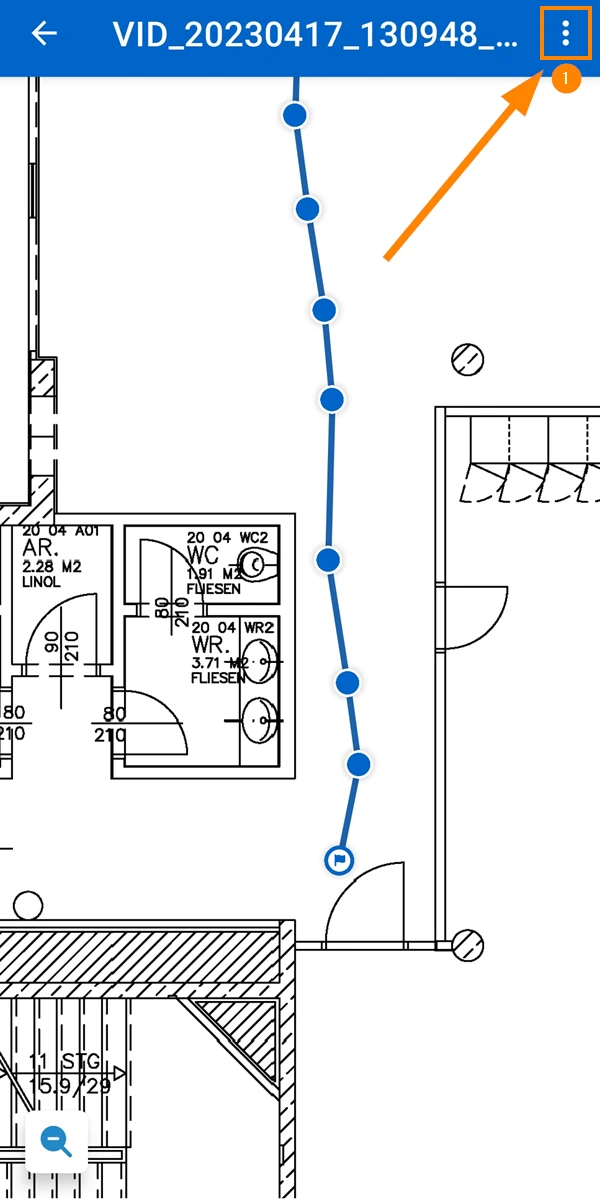
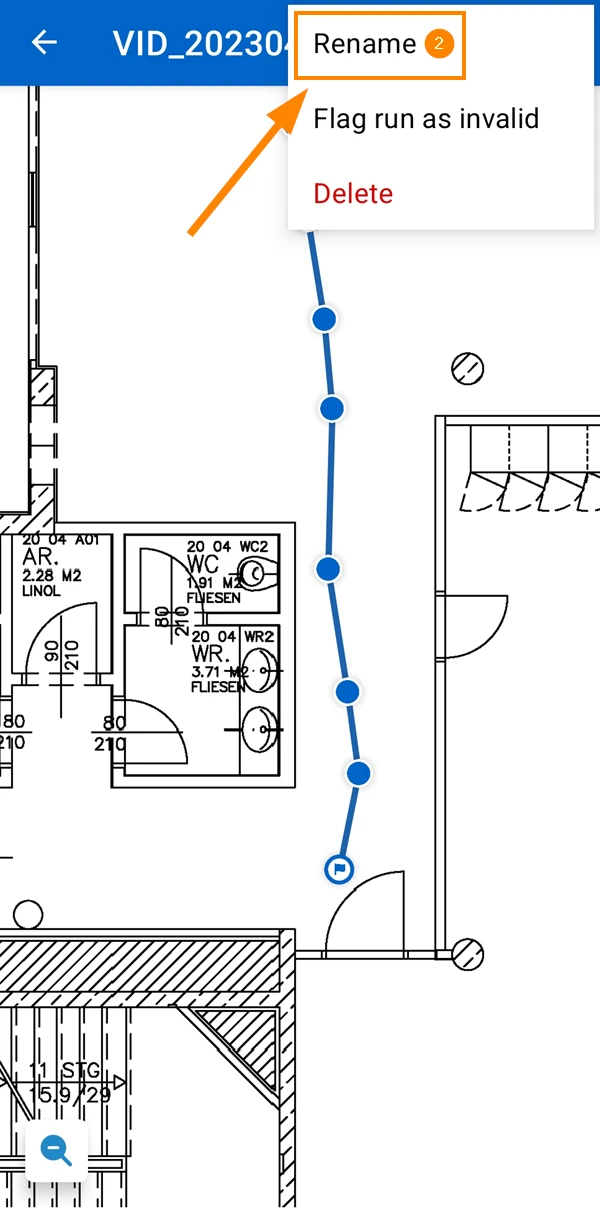
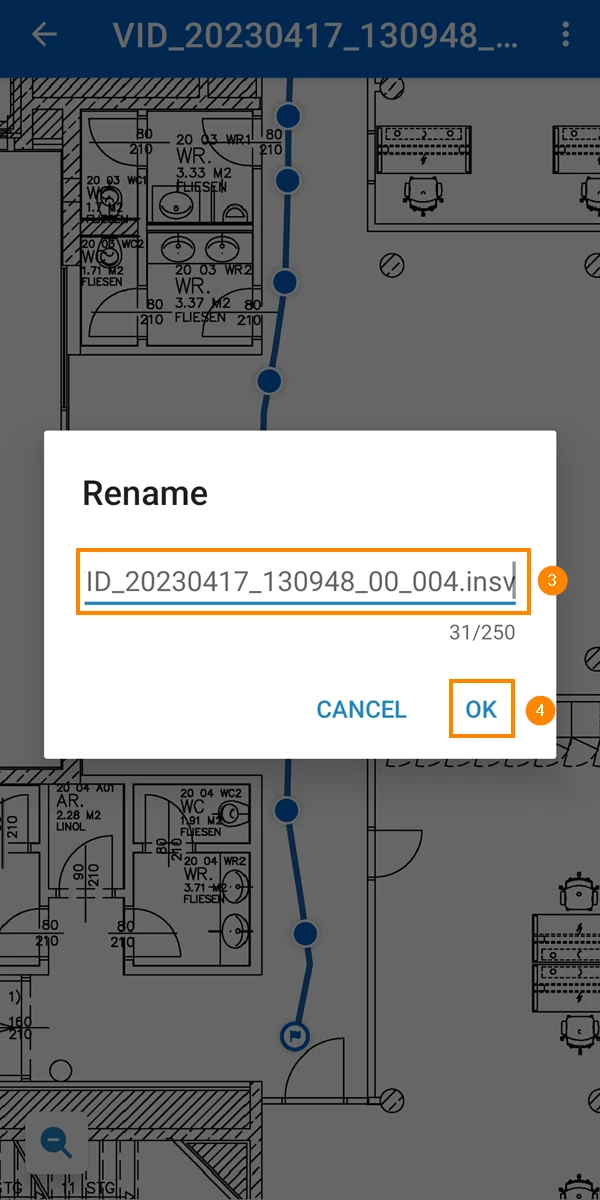
To rename a run:
- Tap More
- Tap Rename
- Enter the new name
- Tap OK
Updated August 12, 2026