

 Deutsch
 Español
 Français
 Hrvatski
 Italiano
 Polski
 Português (BR)
View Tickets of a Location in the Mobile App
Overview
View all tickets of a location — a folder or a plan — in the tickets plan view or list view in the mobile app.
Location Selection
The location selection works like a filter to show only the tickets of that folder or plan. It works the same way in the ticket list and in the plan view. Initially no location is selected and you see all tickets of the project.
A folder opens in list view. A plan can be shown as a plan or as a list.
Select a Location
To select a location:
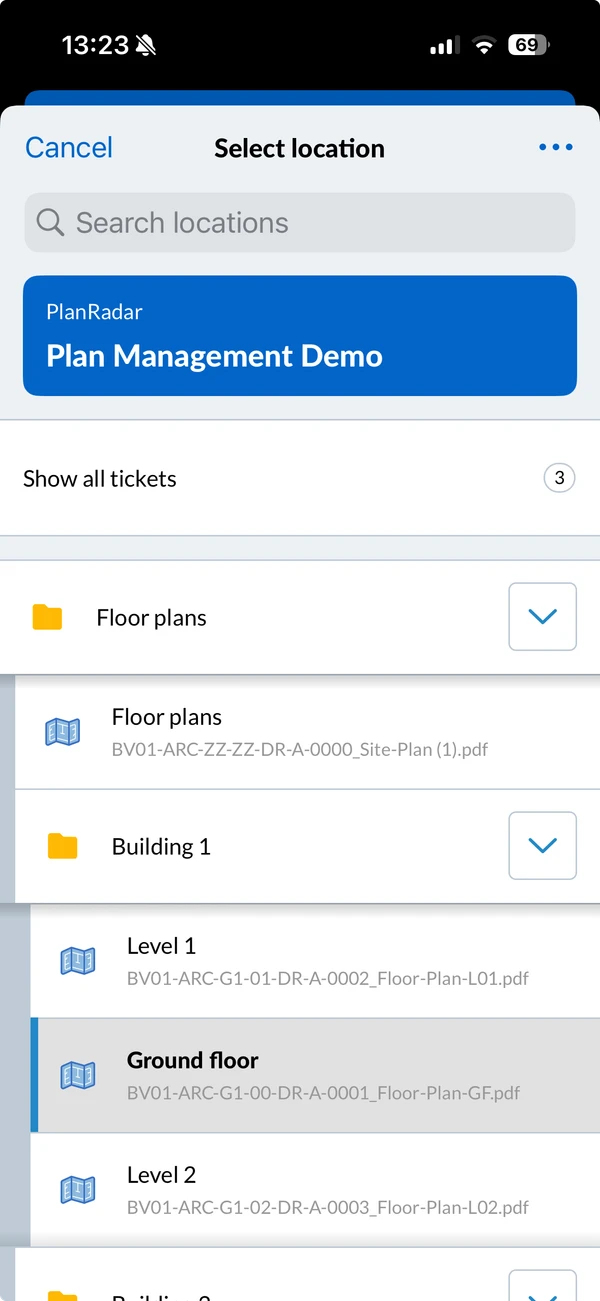
- Tap the location selector.
- Tap the folder or plan you want.
The icon in front of each item tells you what it is: a folder, a plan — green once its scale is calibrated, otherwise blue — or a BIM model. When the selector is closed it shows the icon of your current selection.
To find a location without browsing the tree, use the search in the selector. Each result shows the folder path it sits in.
Show and Hide Subfolders
To show the contents of a folder while you are in the selector:
- Tap the arrow button next to it.
To hide them again:
- Tap the arrow button.
To open or close the whole structure at once, open the More menu in the selector and tap Expand all or Collapse all.
Show All Tickets
To show all tickets of the selected project:
- Tap the location selector.
- Tap Show all tickets.
Change the Selector View Settings
You can change how much the selector shows, to fit more items on the screen. The Detailed view is selected by default and shows the names of the items and their plan file names.
Available settings:
- Detailed view: Shows several lines per item and plan file name.
- Compact view: Shows a single line per item.
To change the settings:
- Tap the location selector.
- Open the More menu.
- Tap the setting you want, for example Compact view.
Manage Plans and Folders From Here
If you have edit rights on the project, the selector's More menu also has Manage Locations, where you can add plans and folders and rearrange them.
Updated September 3, 2026