

 Deutsch
 Español
 Français
 Hrvatski
 Italiano
 Polski
 Português (BR)
SiteView 360° Still Images
Overview
SiteView high-resolution 360° still images are photos you take with your 360° camera and place on the plan manually — they are not extracted from a video recording of a run. (See also Create a Run with the PlanRadar Mobile App).
Still images deliver the highest quality: 72MP resolution, no motion blur, and sharp detail even in challenging lighting conditions.
This article explains how to take still images using a smartphone connected to an Insta360 X4 or X5 camera (the process is the same for tablets).
Access & Permissions
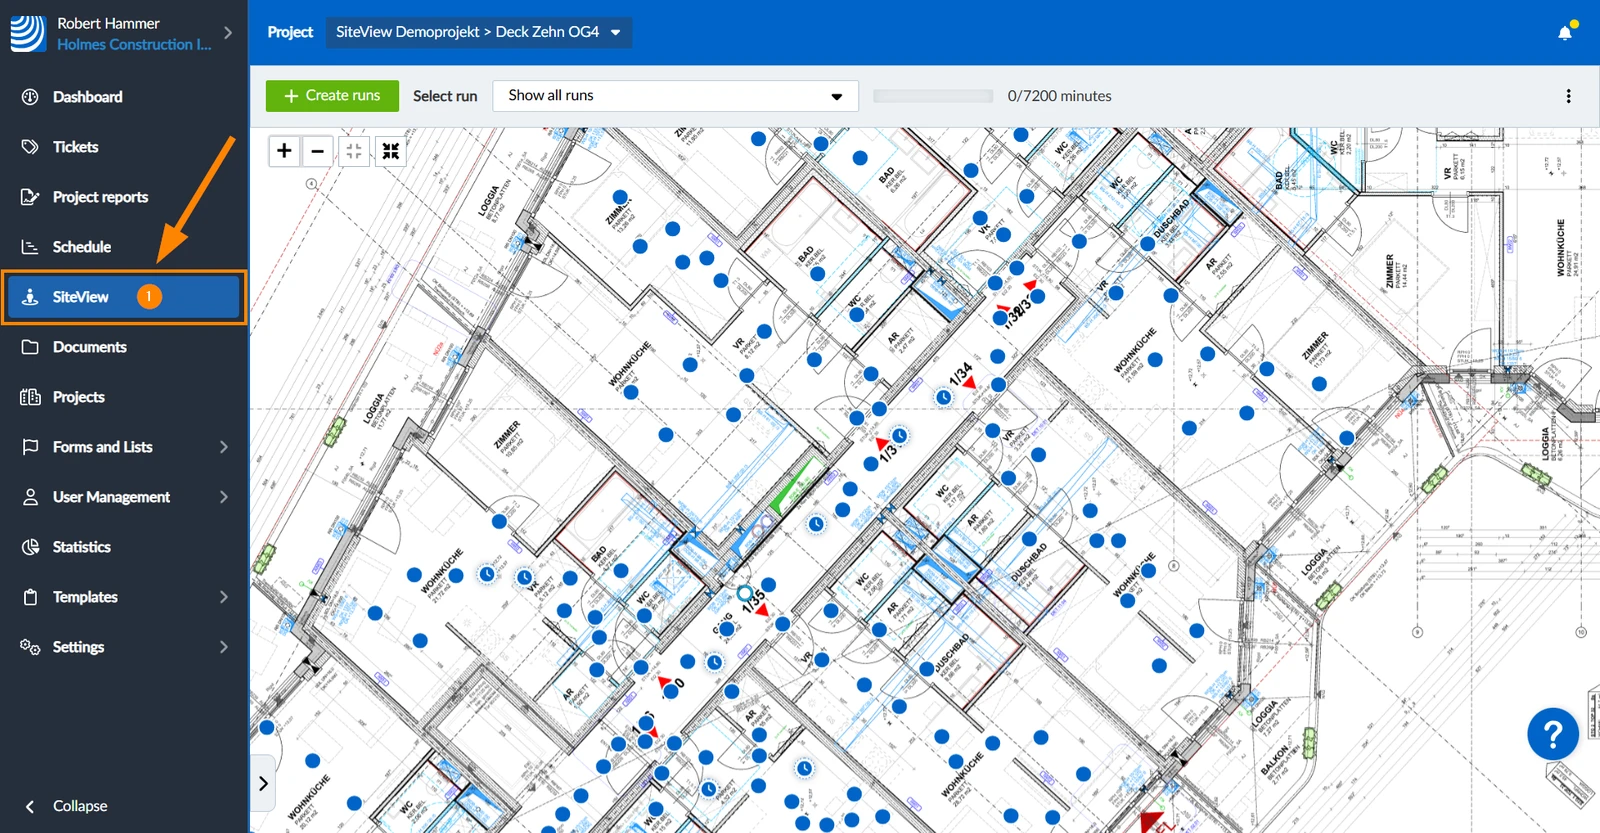
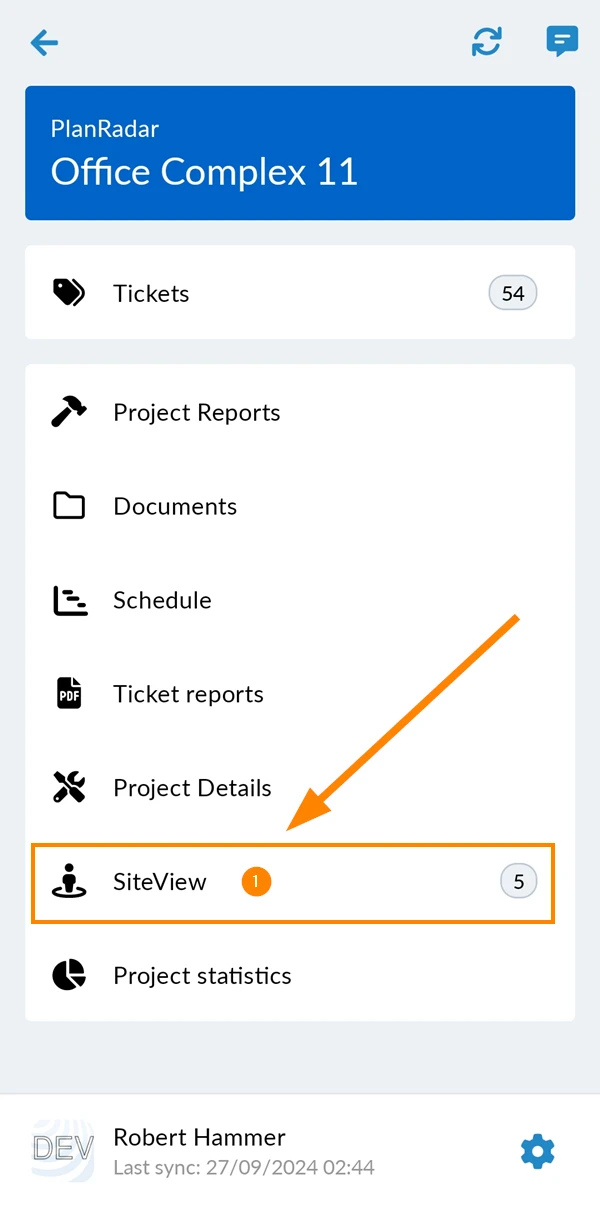
How to Access SiteView
- Click SiteView
- Tap SiteView
Take a Still Image
Make sure your app is connected to the camera (see Create a Run with the PlanRadar Mobile App > Connect your Camera).
Follow these steps:
- Step 1: Select a Location
- Step 2: Set the Plan Position
- Step 3: What are you capturing?
- Step 4: Take the Image
- Step 5: Saving and Uploading the Image
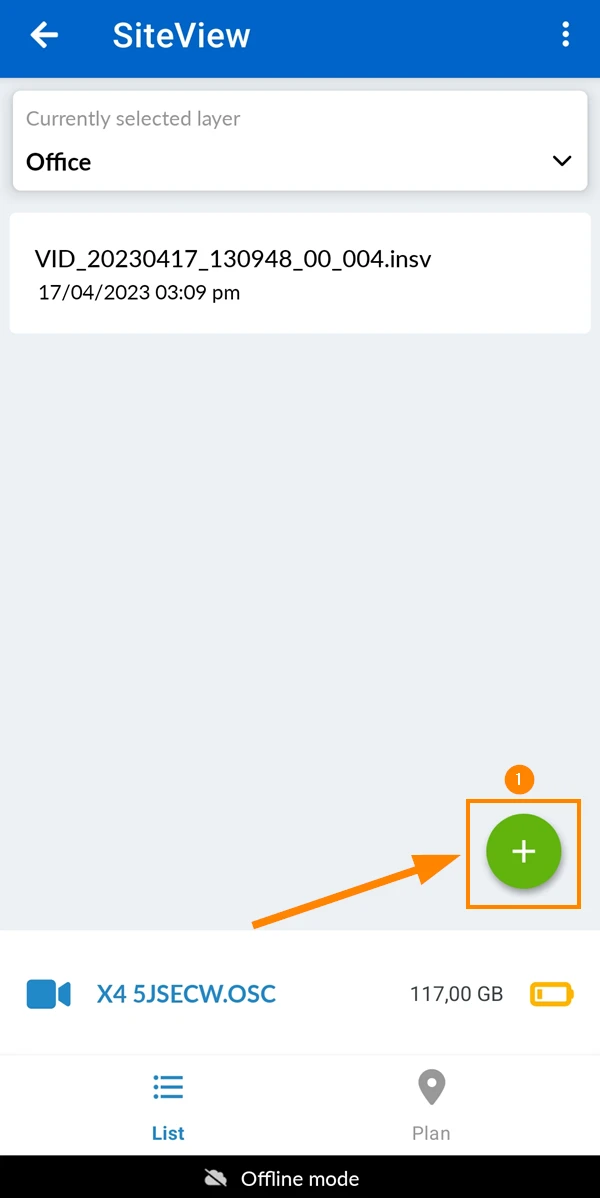
1. Select a Location
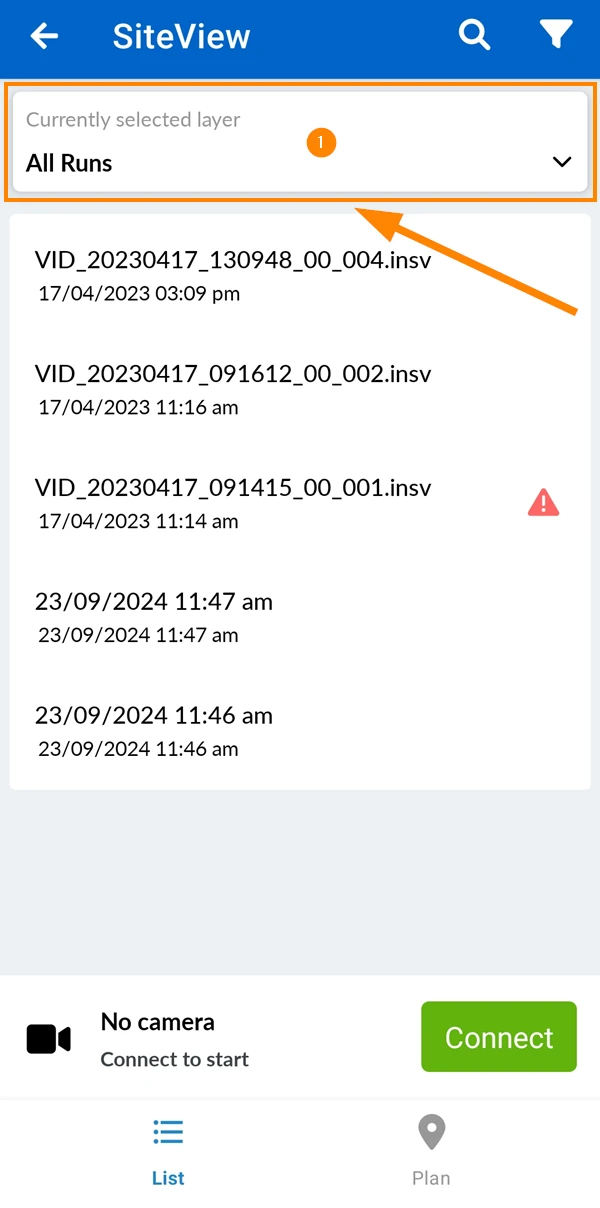
Select the target location — only locations with calibrated plans can be used.
The location selector works same like for tickets (see View Tickets of a Location in the Mobile App).
To select a location:
- Tap on the location selector
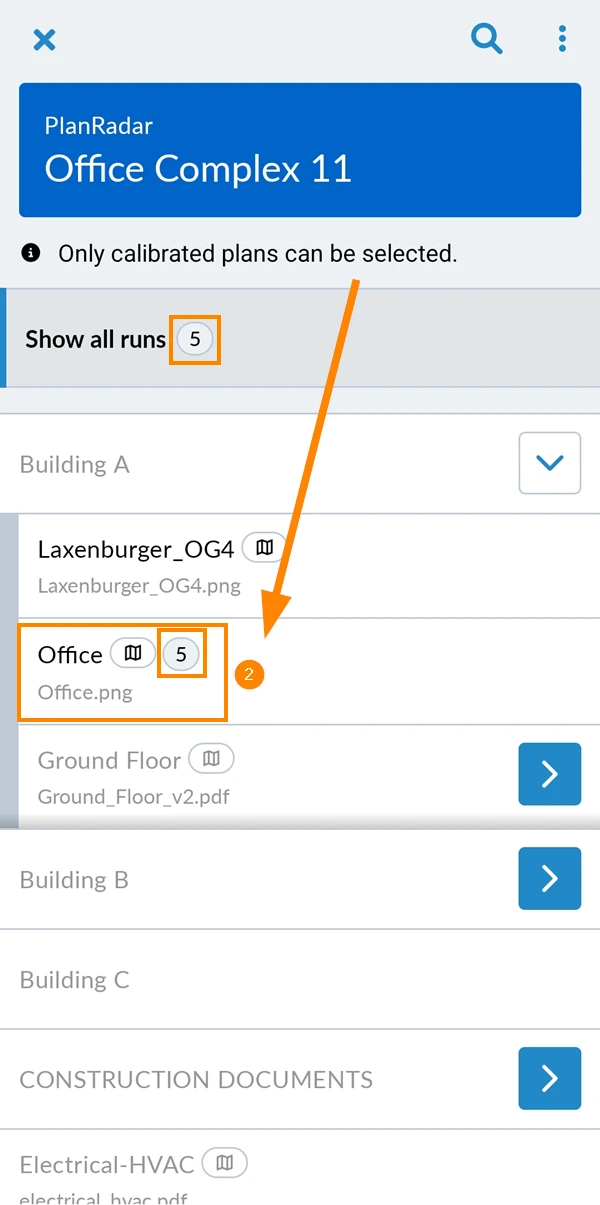
- Tap the location e.g. Office.
See the number of runs at that location e.g. 5.
To start taking a still image:
- Tap the + button
2. Set the Plan Position
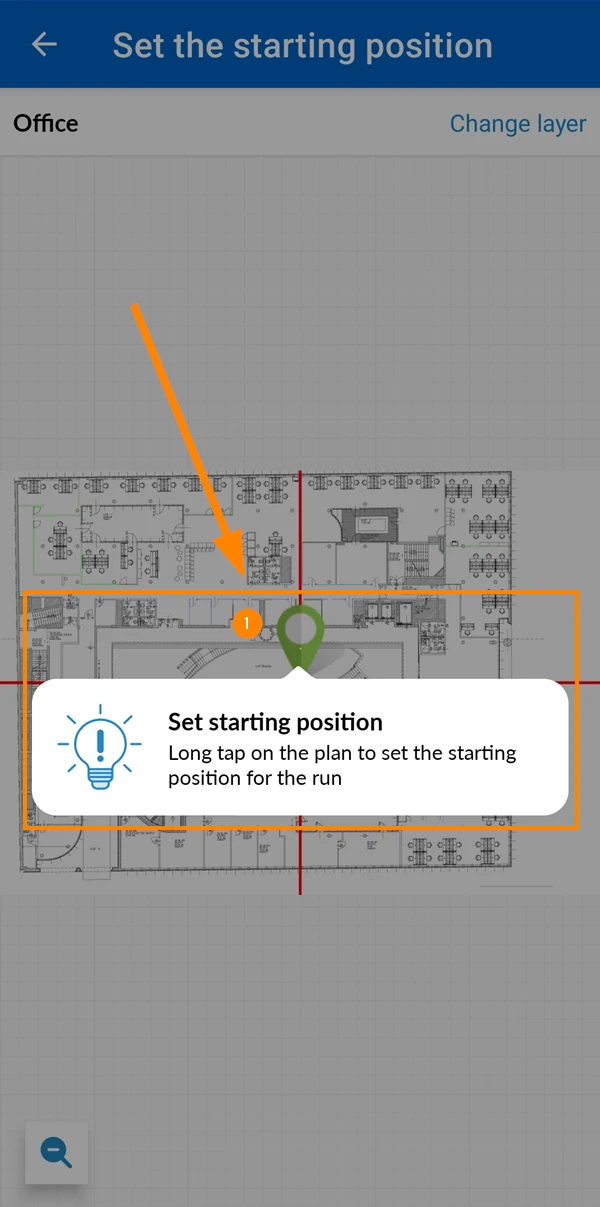
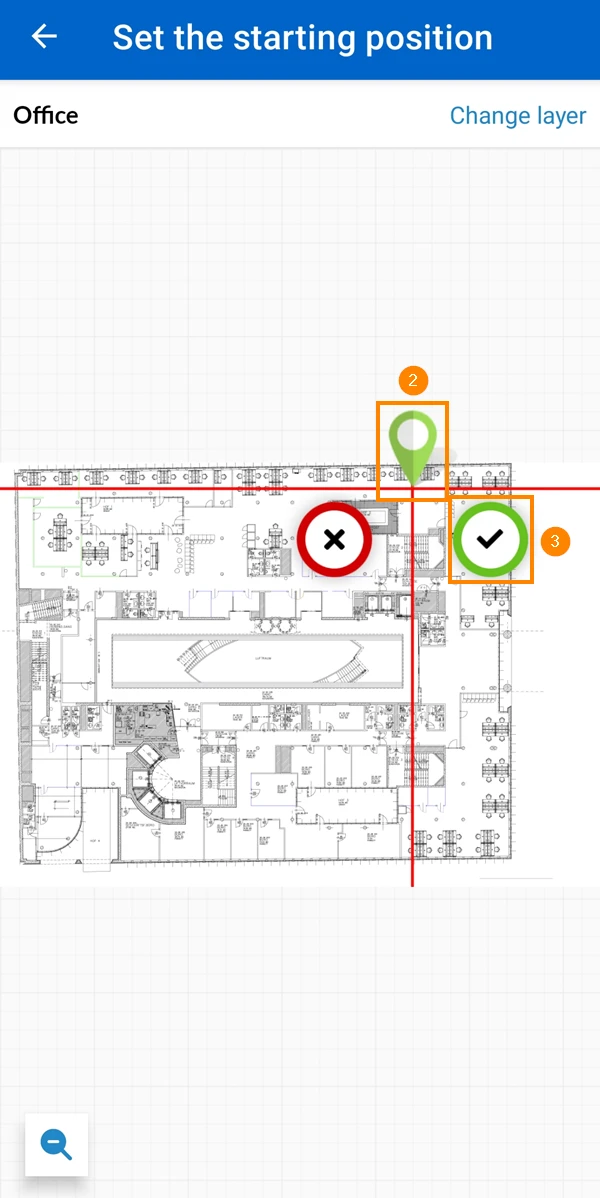
Set the plan position the same way as the starting position of a run. Unlike runs, still images require no processing, so you can change the position later without any waiting time.
To set the starting position:
- Tap to confirm the explanation
- Drag and drop the pin for the starting position
- Tap ✔ to confirm
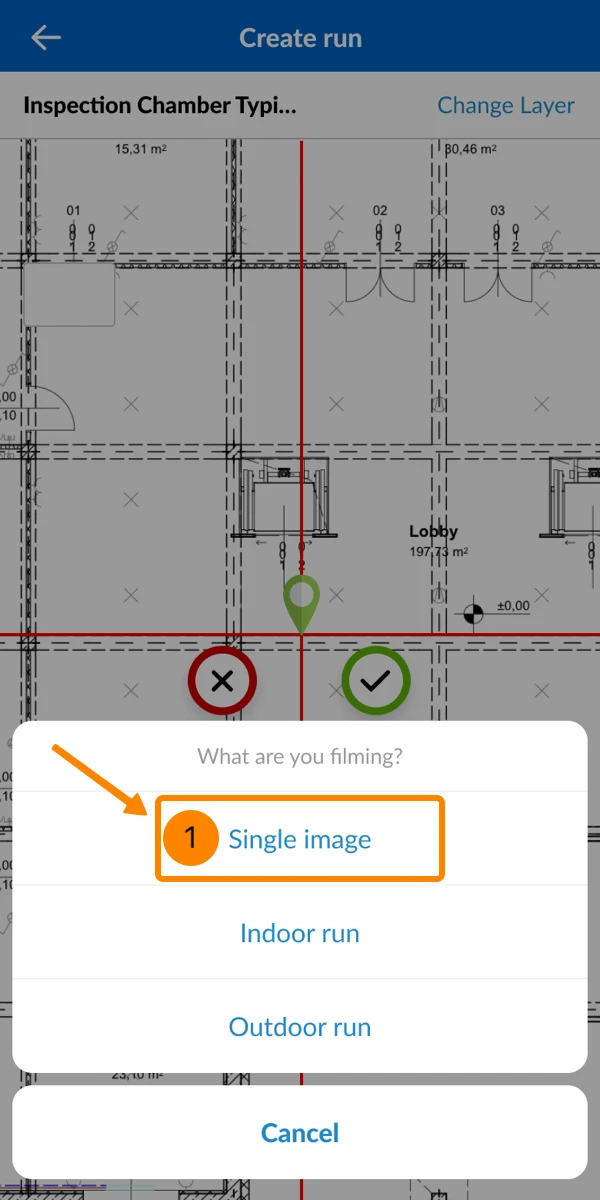
3. What are you capturing?
To take a single still image instead of recording a run:
- Tap Single image
4. Take the Image
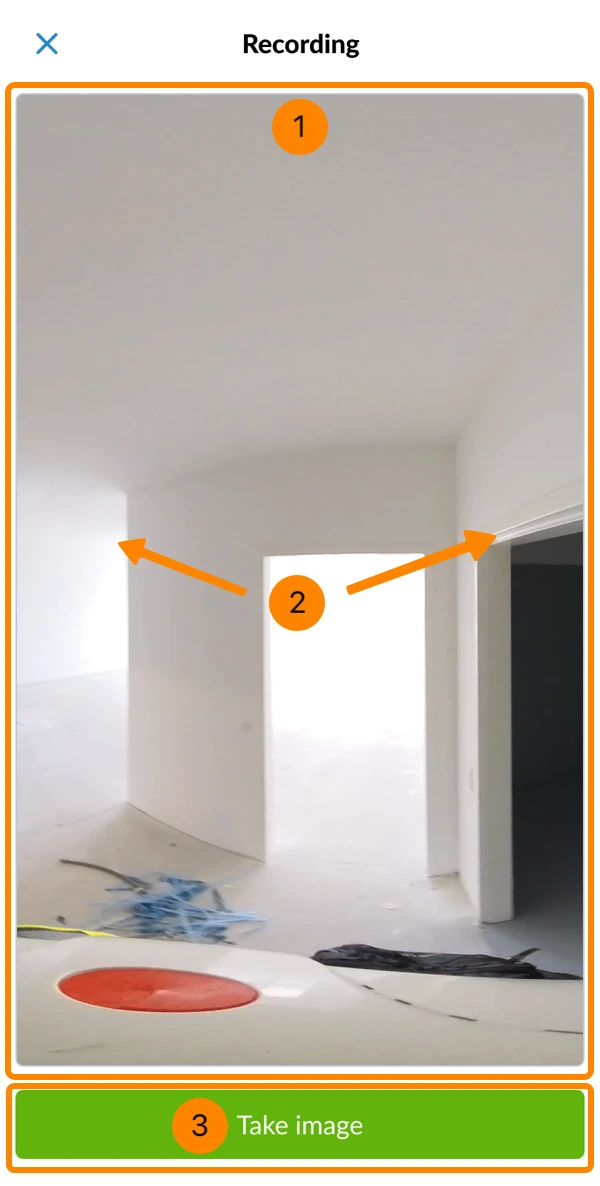
- The live stream from the camera appears on your phone.
- Drag to adjust the view and preview all angles of the 360° still image.
- Tap Take image
5. Saving and Uploading the Image
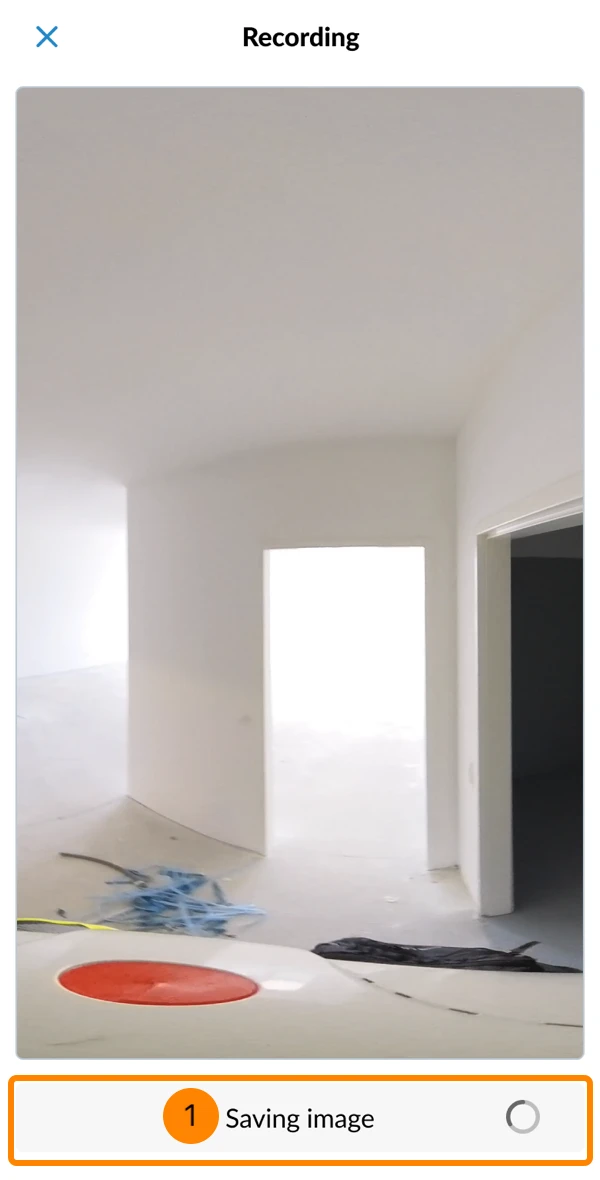
After you take the image, it is automatically transferred to your phone and saved in the PlanRadar app’s local storage.
- You see Saving image and a loading icon until complete.
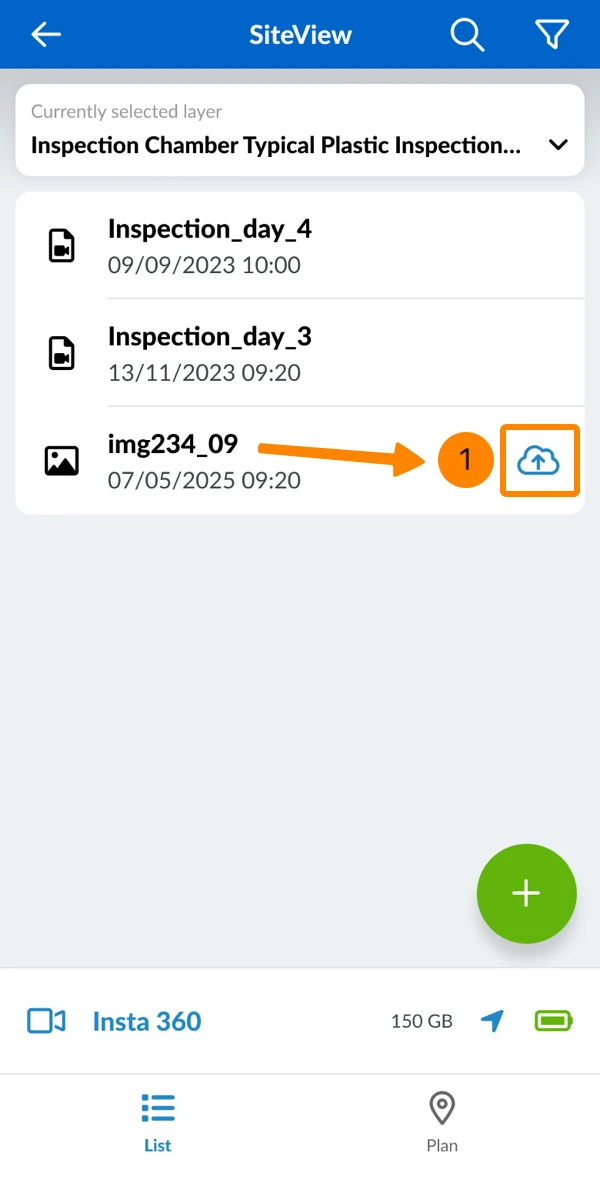
When your phone is connected to the internet (and not to the camera), images are uploaded automatically to the PlanRadar server.
- A cloud icon appears next to images that are not yet uploaded.
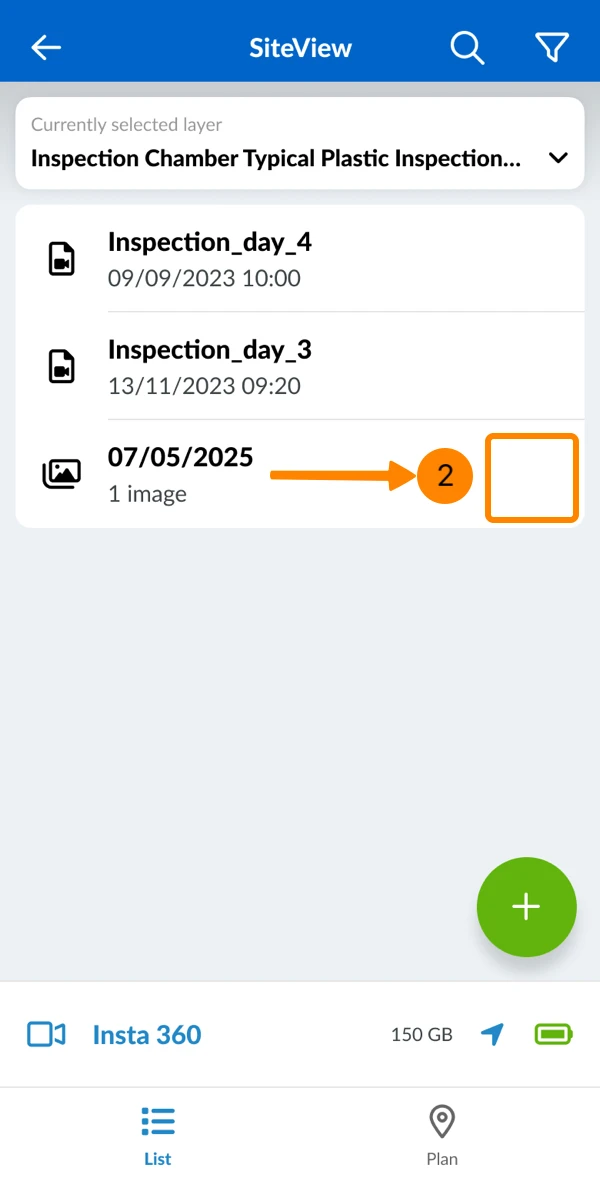
- Once uploaded, the cloud icon disappears.
View Still Images
Still images are automatically grouped by day. Groups appear alongside runs in the list and are marked with a different icon.
Select a Group/Day
To select a group/day of still images:
- Open the Select drop-down
- Click the desired group/day
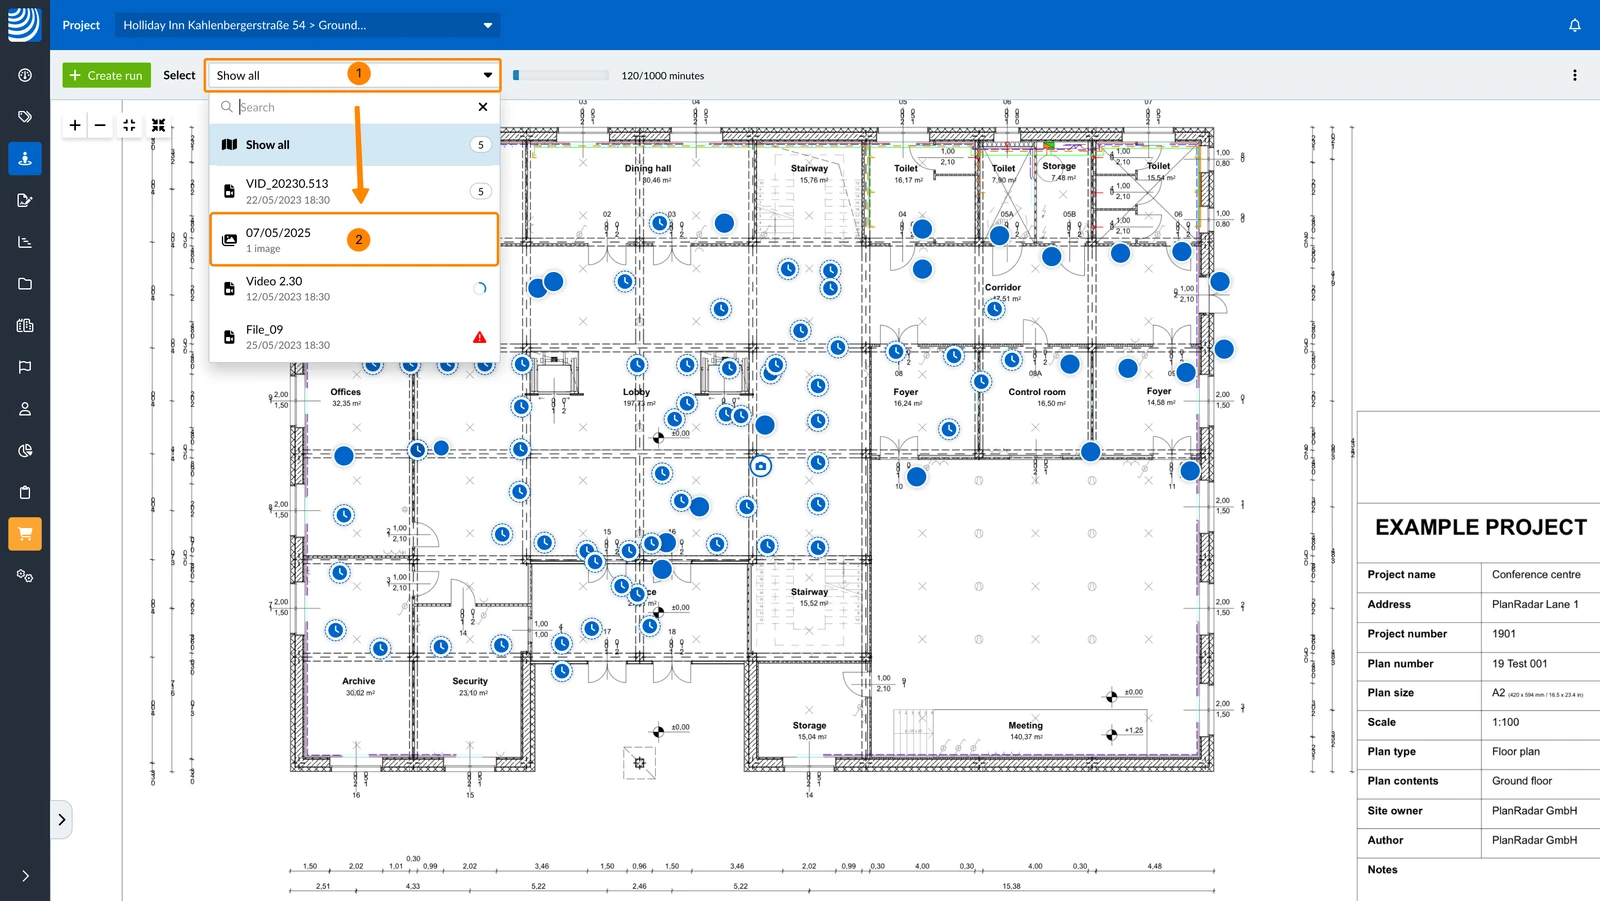
- Tap the desired group/day
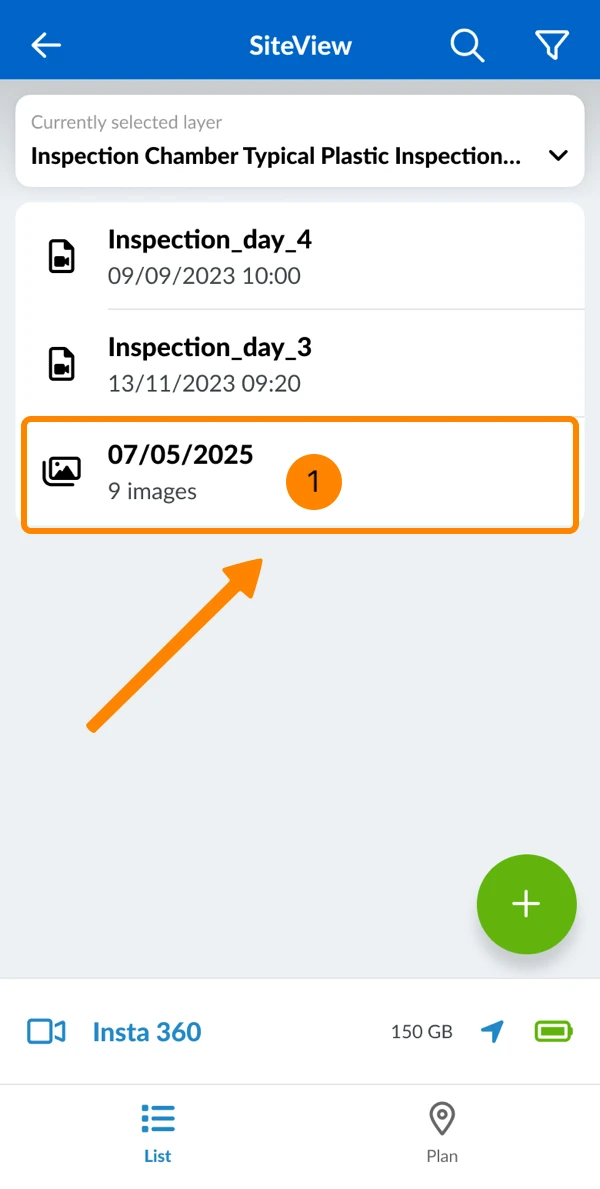
View & Navigate Still Images
Viewing and navigating still images works the same as with other 360° images from a run — except there is no Jump to Next/Previous image point of a Run.
If still images from different days share the same plan position, you can open them side-by-side in Compare mode for a direct comparison.
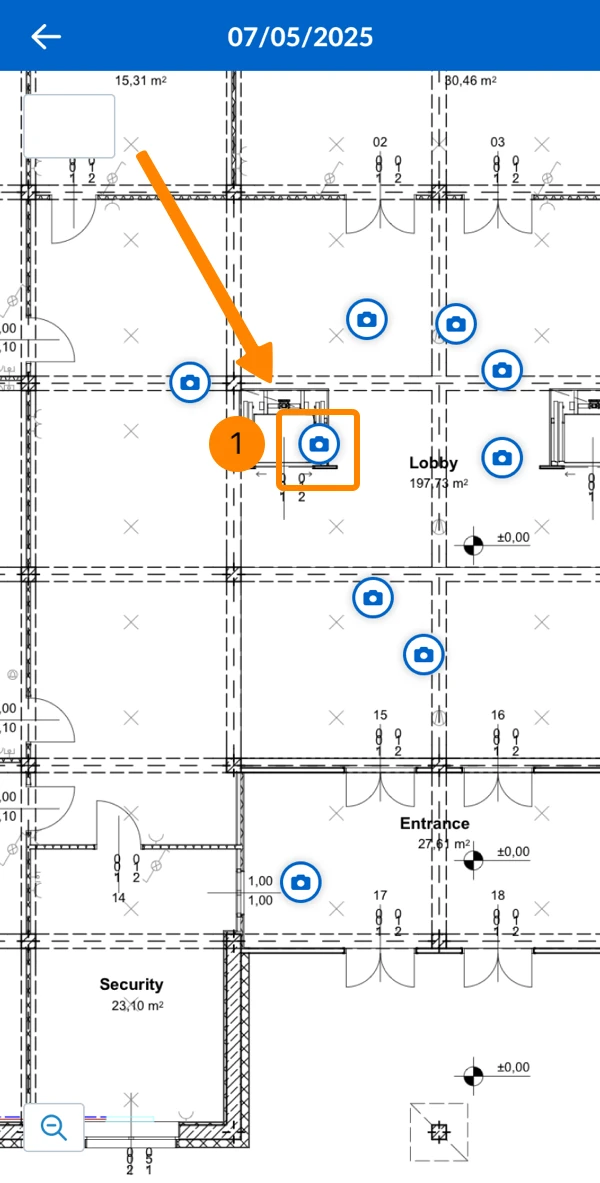
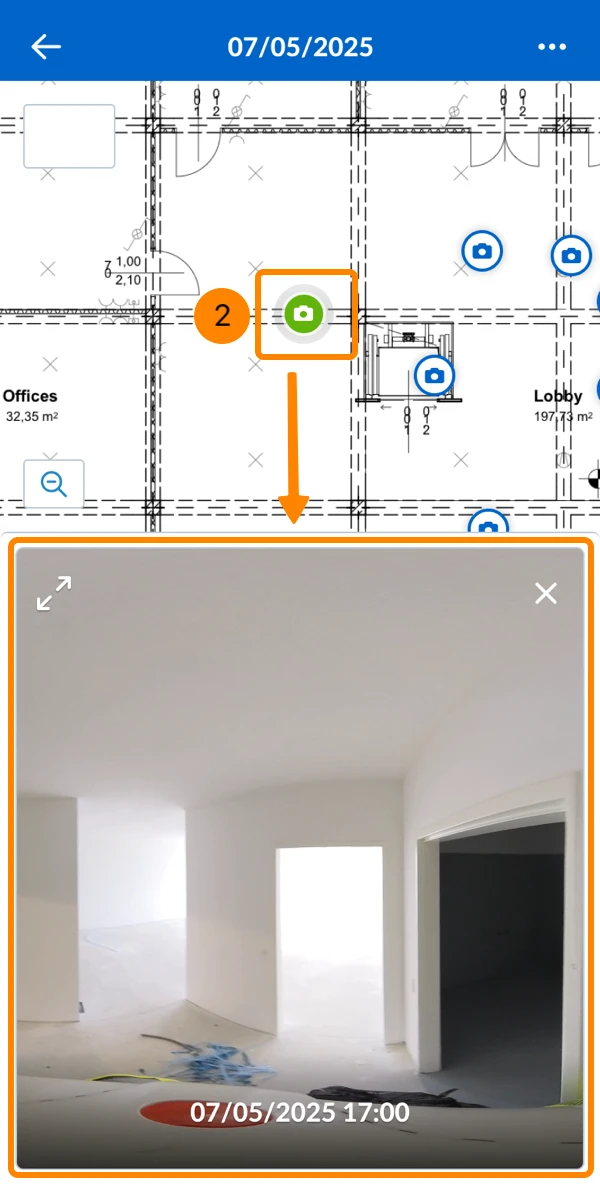
To view a still image:
- Click on the blue still image icon
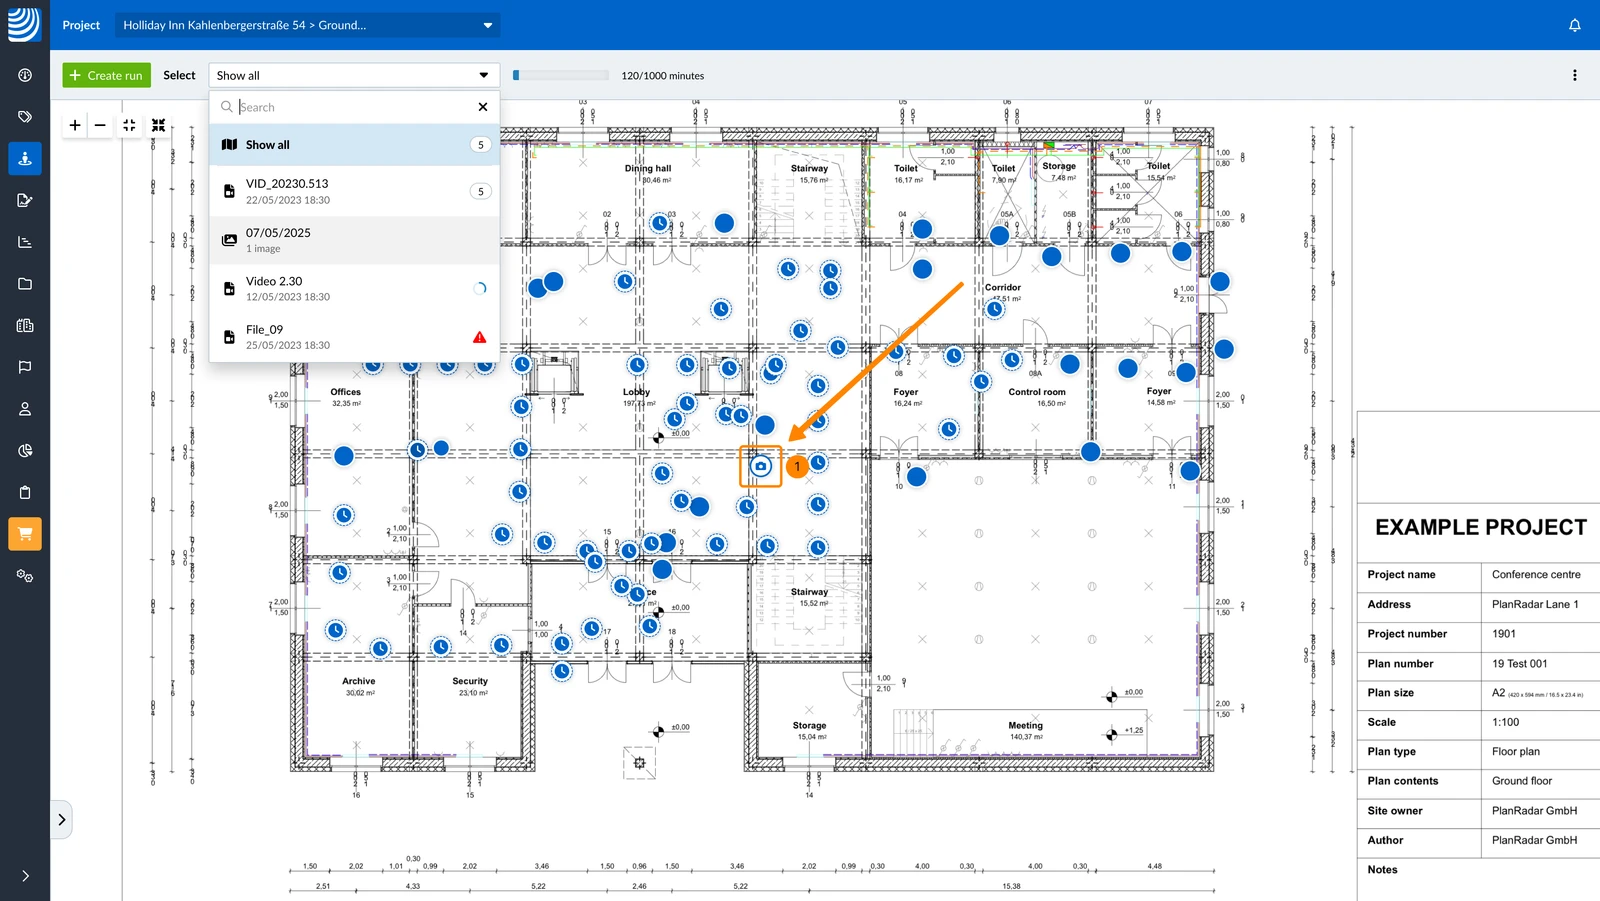
- You see the selected green still image icon and the 360° still image
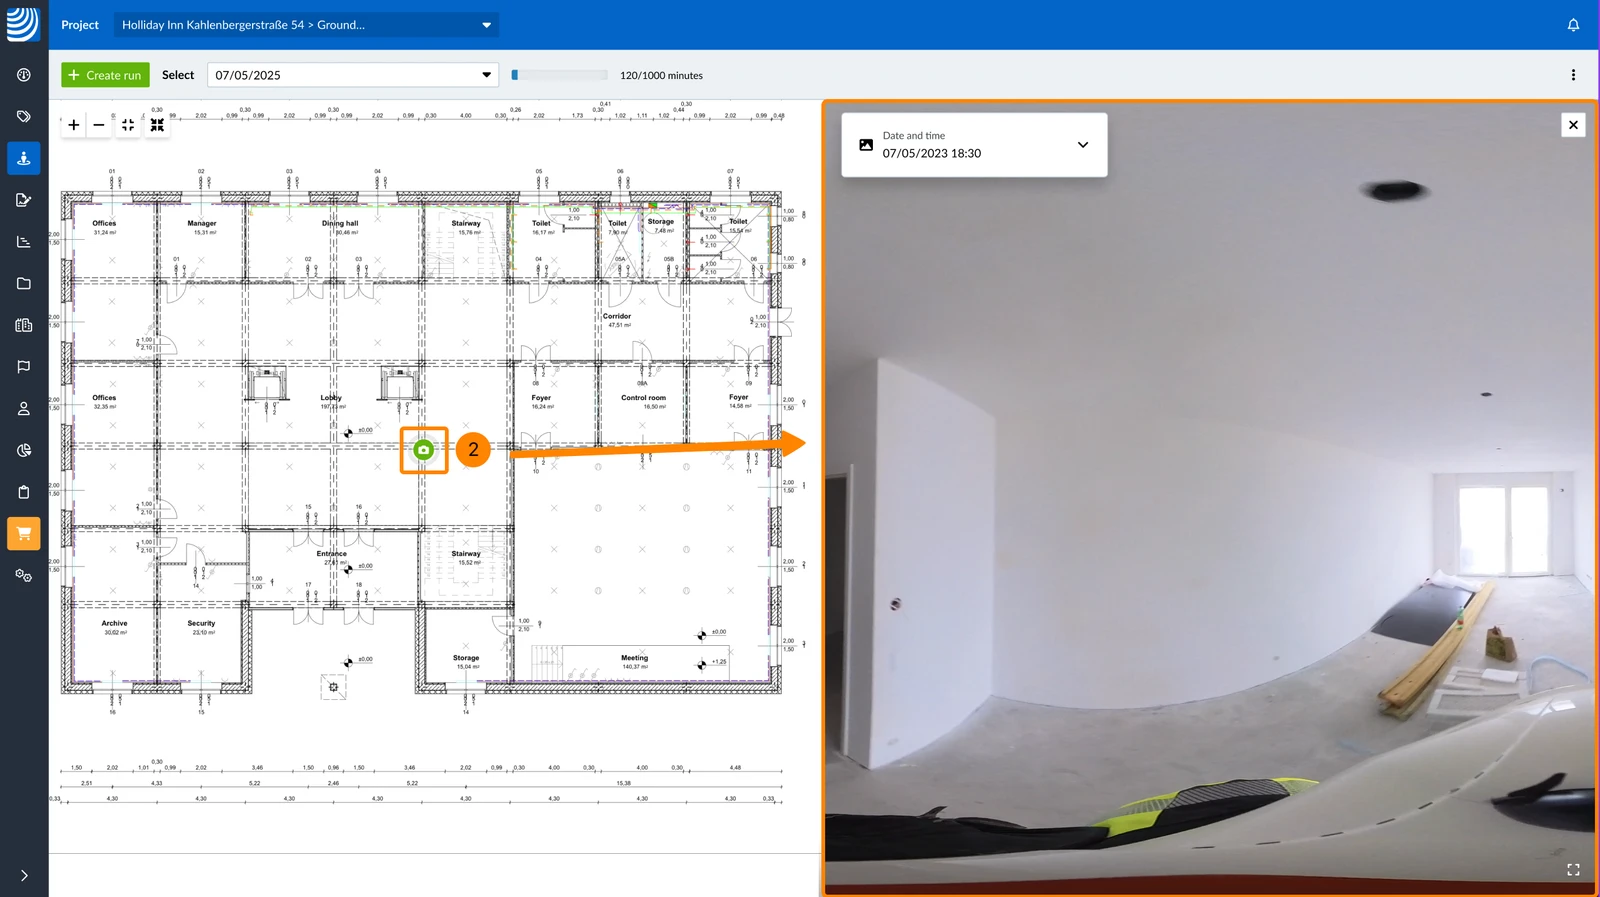
- Click on the blue still image icon
- You see the selected green still image icon and the 360° still image
Updated August 12, 2026