

 Deutsch
 Español
 Français
 Hrvatski
 Italiano
 Polski
 Português (BR)
Import & Update Tickets
Overview
Import tickets from an Excel or CSV file to create many tickets at once. You can also use an import to update tickets that already exist, for example to change costs or statuses in bulk.
Access & Permissions
How to Access Ticket Import
To open ticket import:
- Click Tickets
- Select the project you want to import tickets to from the Project drop-down
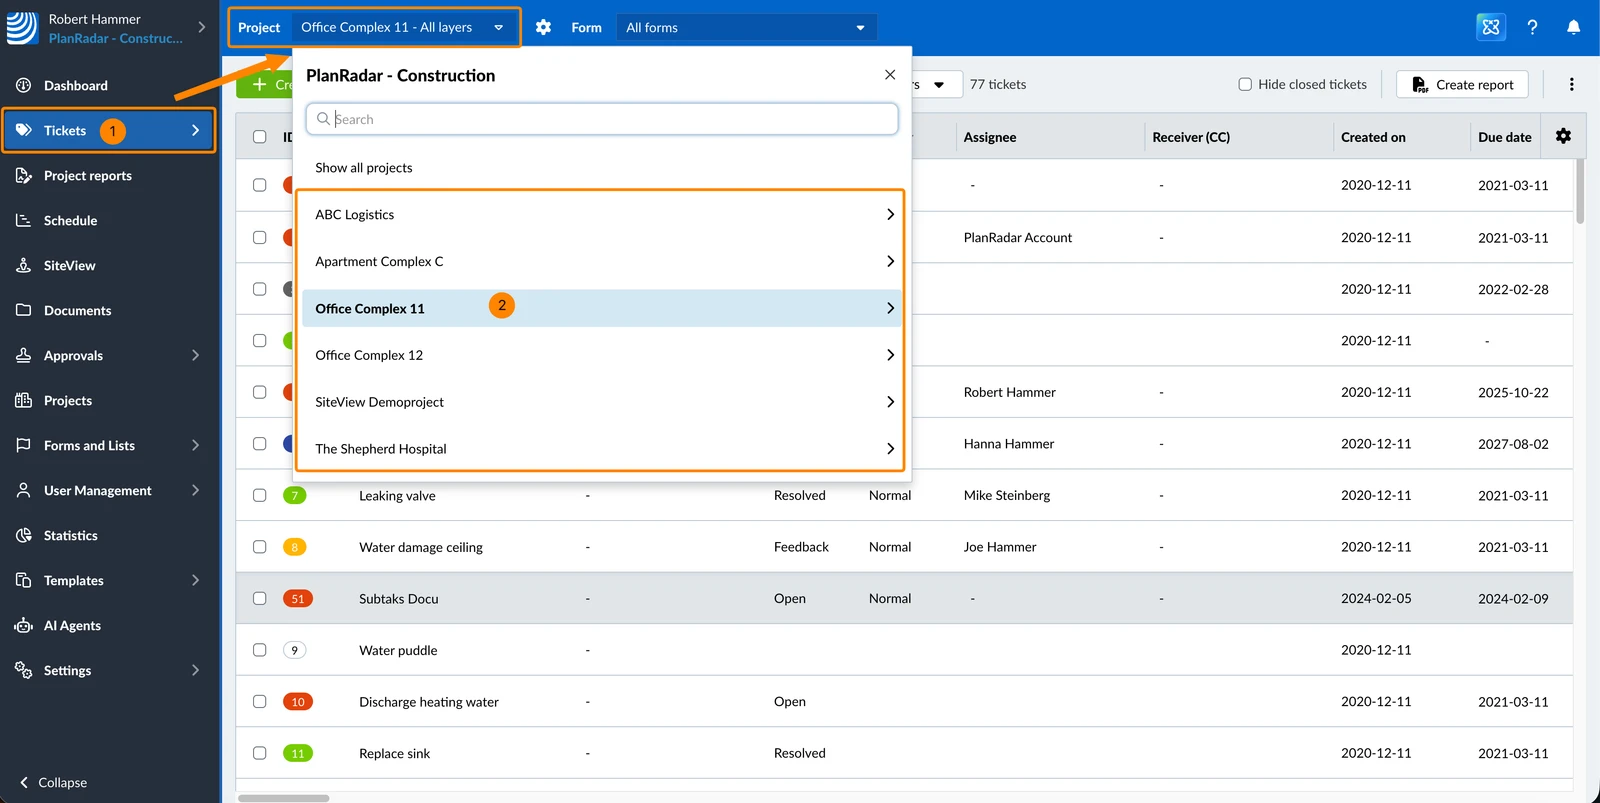
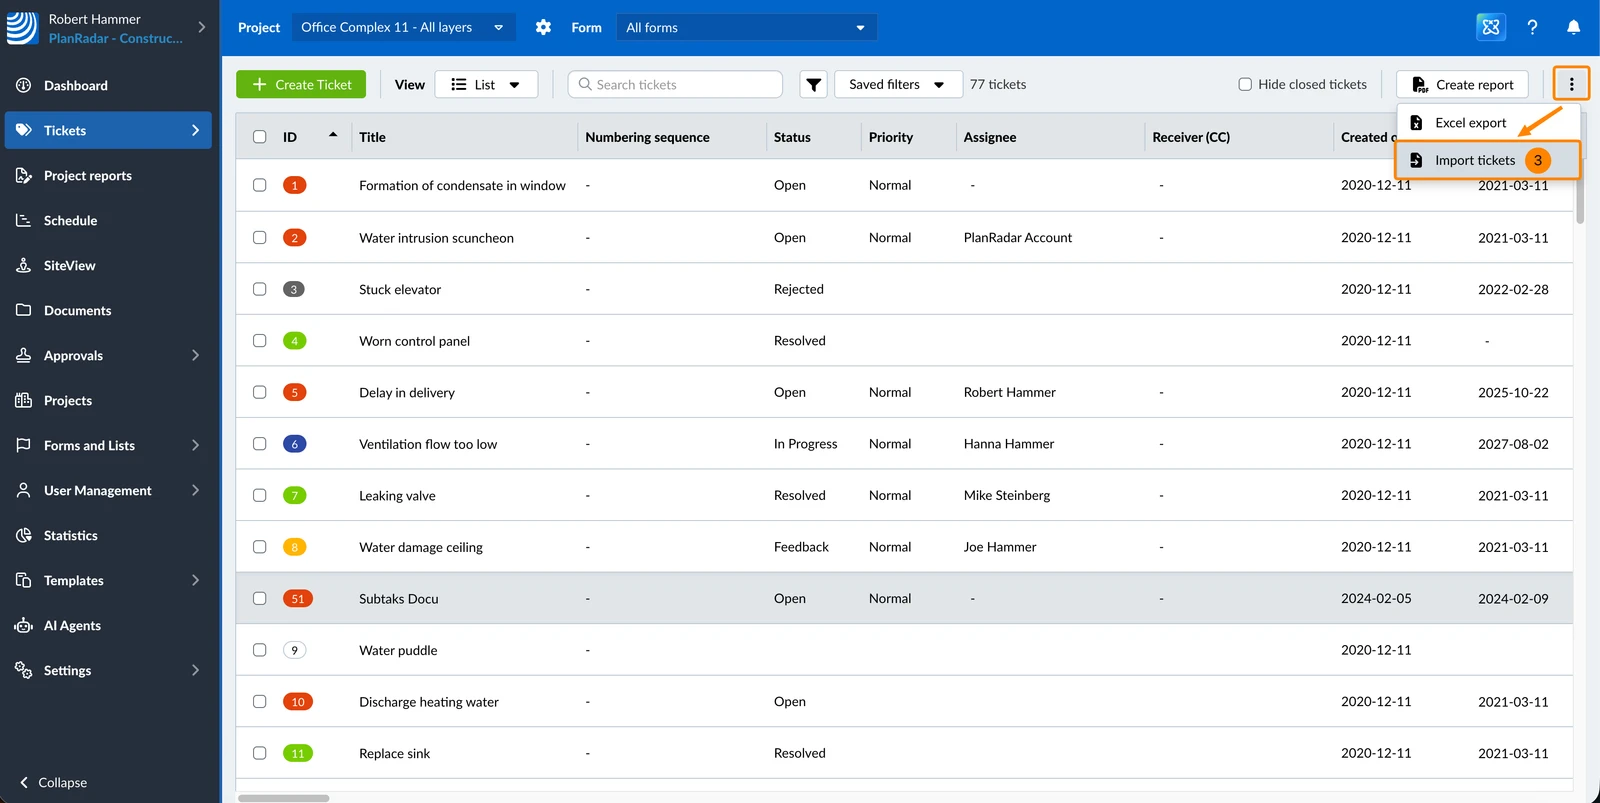
- Open the More menu, then click Import tickets
Prepare the Import File
The import file must meet the following criteria:
- Only XLSX and CSV files are supported.
- Each import covers a single ticket form. To import tickets for several forms, use one file per form.
- Each row represents a ticket and each column represents a ticket form field.
- Every ticket belongs to a layer, so the file needs a layer column.
Update Tickets by Including the UUID
Every ticket has a UUID, its unique identifier. When a row in your file carries a UUID that matches an existing ticket, that ticket is updated. Rows without a UUID create new tickets, so one file can do both.
To prepare a file for updating tickets:
-
Export the tickets you want to change to Excel, using a template that includes the UUID attribute
-
Change the values you want to update and leave the UUID column untouched
-
Import the file and map the UUID column to the UUID form attribute
Import Tickets
To import tickets:
-
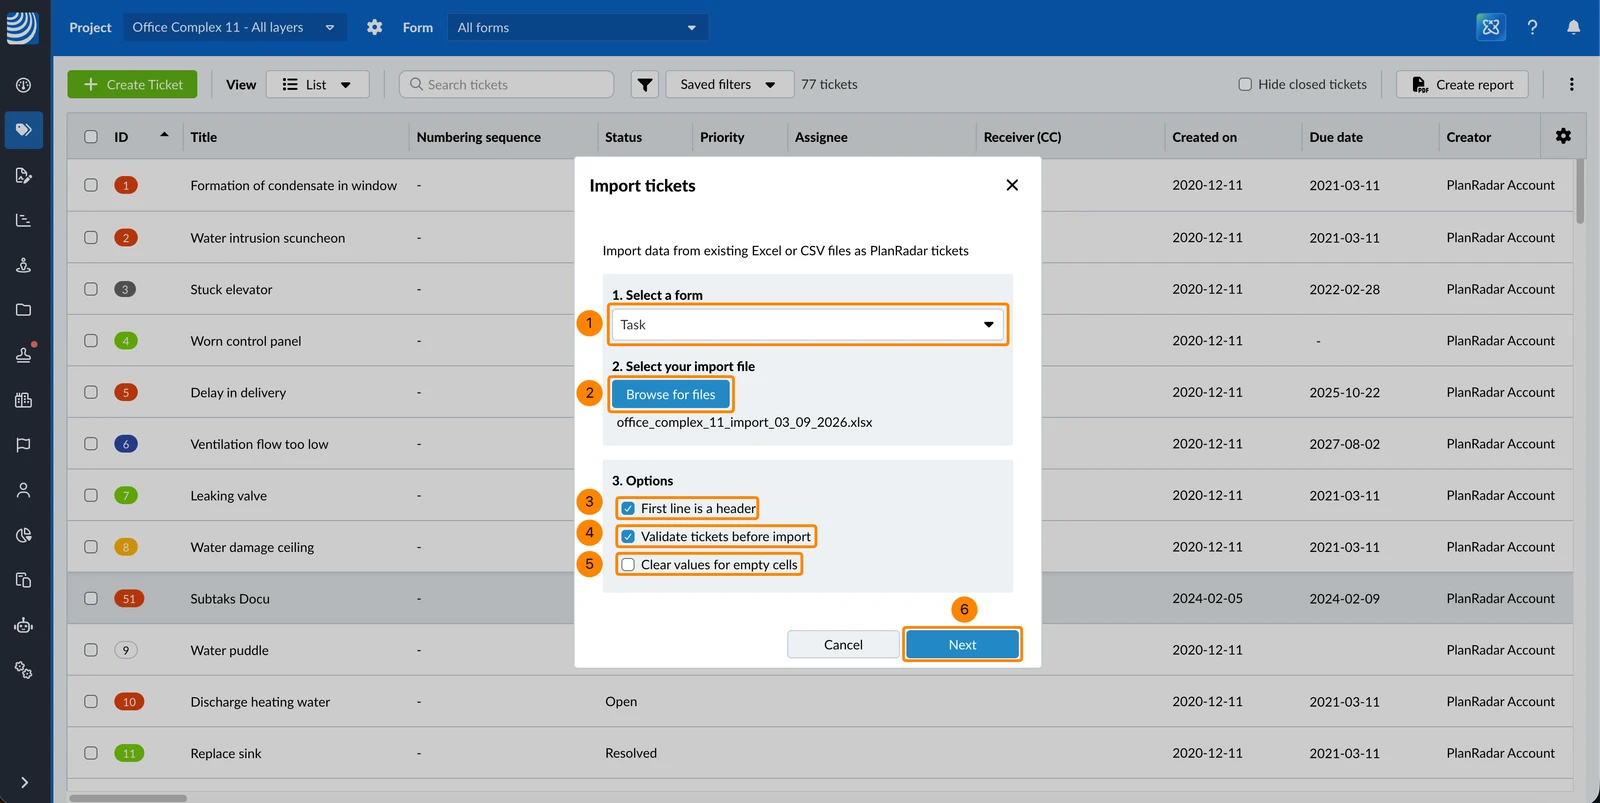
Select a ticket form for the imported tickets from the drop-down
-
Click Browse for files to upload the ticket file from your device
-
Select the First line is a header checkbox if the first row of your file contains column titles
-
Leave the Validate tickets before import checkbox selected to check the file before anything is imported, or clear it to import straight away
-
Optional: Select the Clear values for empty cells checkbox to let empty cells erase the values they are mapped to
-
Click Next
-
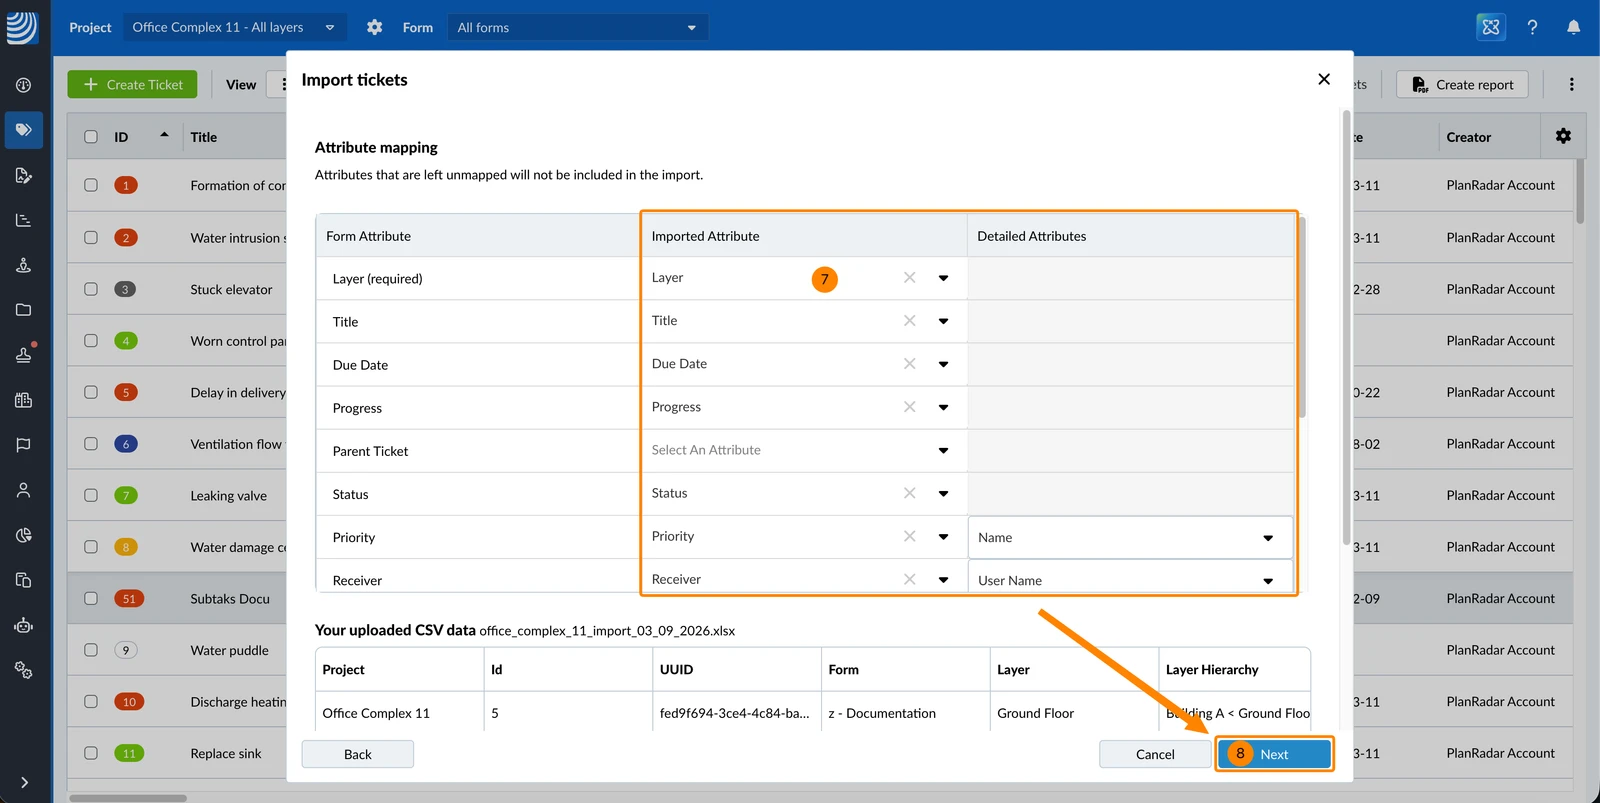
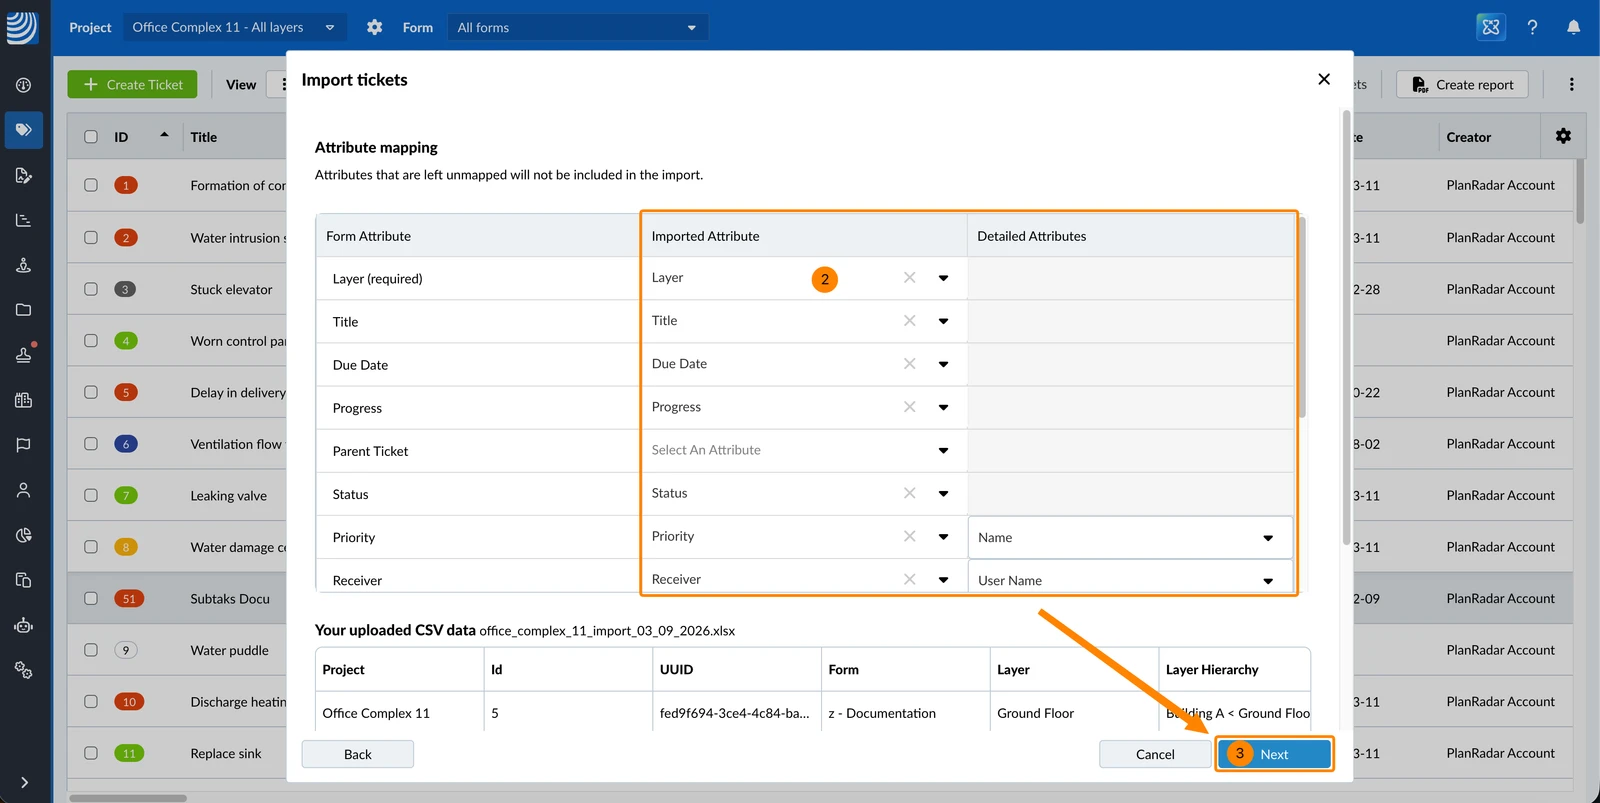
Map the attributes from the XLSX or CSV file to the attributes of the ticket form you selected.
Read more below in Map Columns to Form Fields. -
Click Next
-
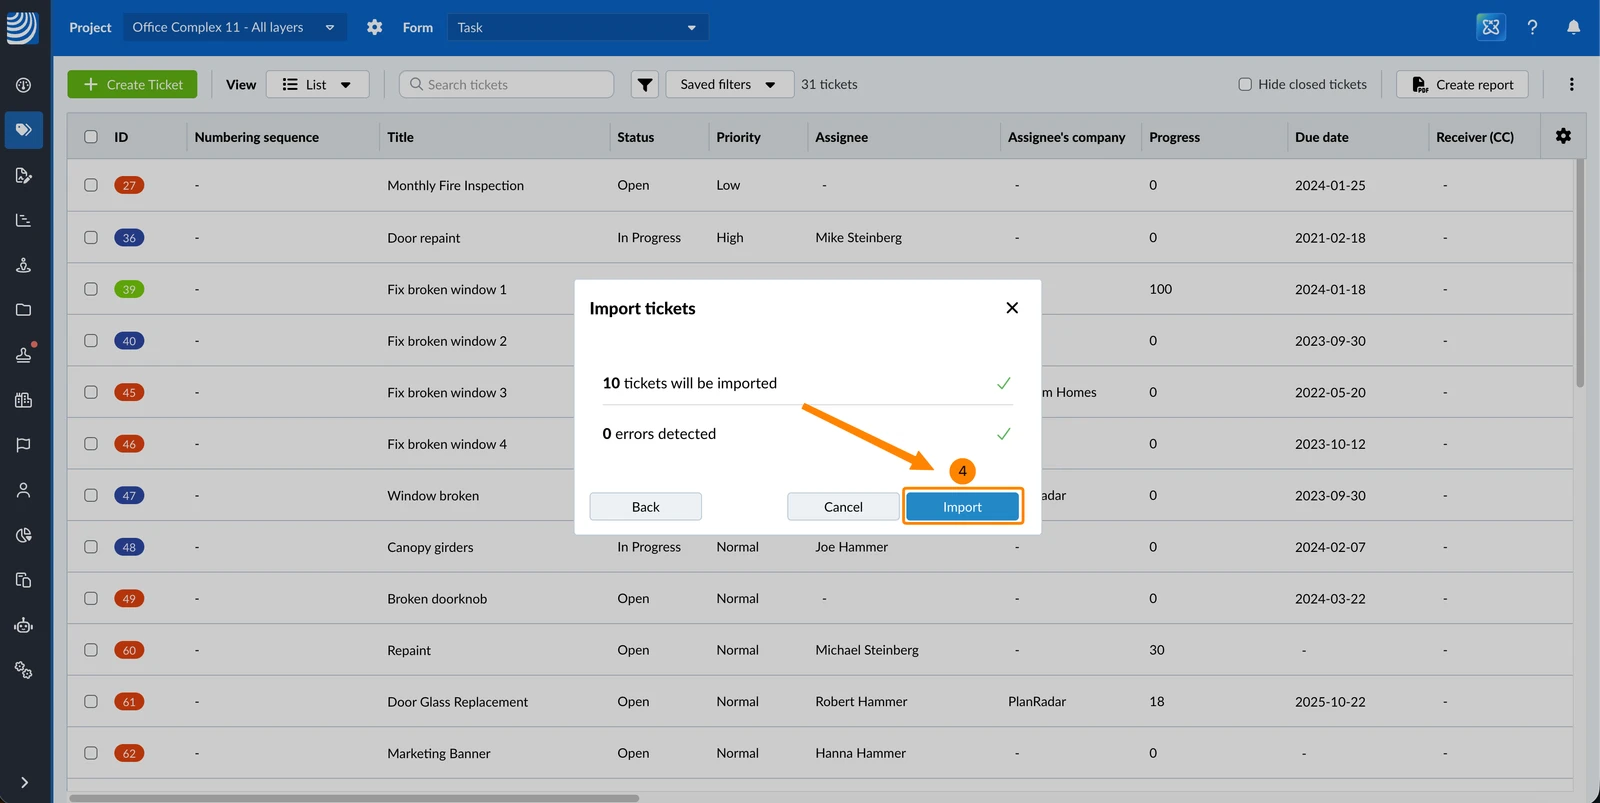
Review what the import will do, then click Import.
Read more below in Validate Imported Tickets.
Map Columns to Form Fields
Mapping attributes allows you to place the content of each column in your file in its correct form field in the ticket.
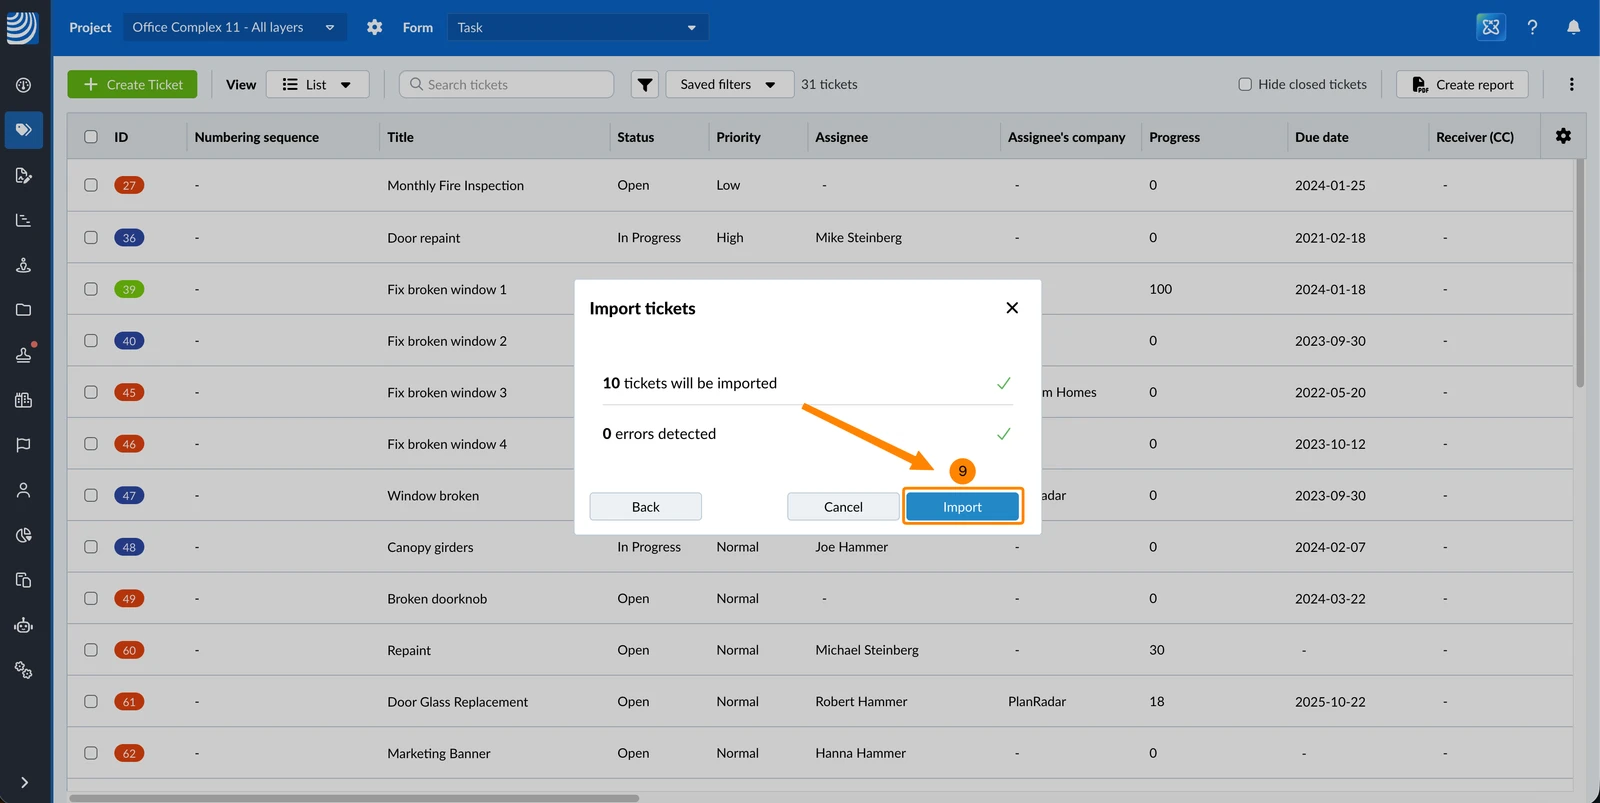
In the attribute mapping window, the top part has a table for the mapping while the bottom part shows the table in the file you've uploaded:
- The Form Attribute column lists all the fields of the previously selected form, plus UUID.
- The Imported Attribute column allows mapping your file to the form fields.
- The Detailed Attribute column is only required for user fields, such as author or uploaded by.
- The rows from your file are shown underneath to help you find the right columns, in case you didn't use column headers matching the form field names.
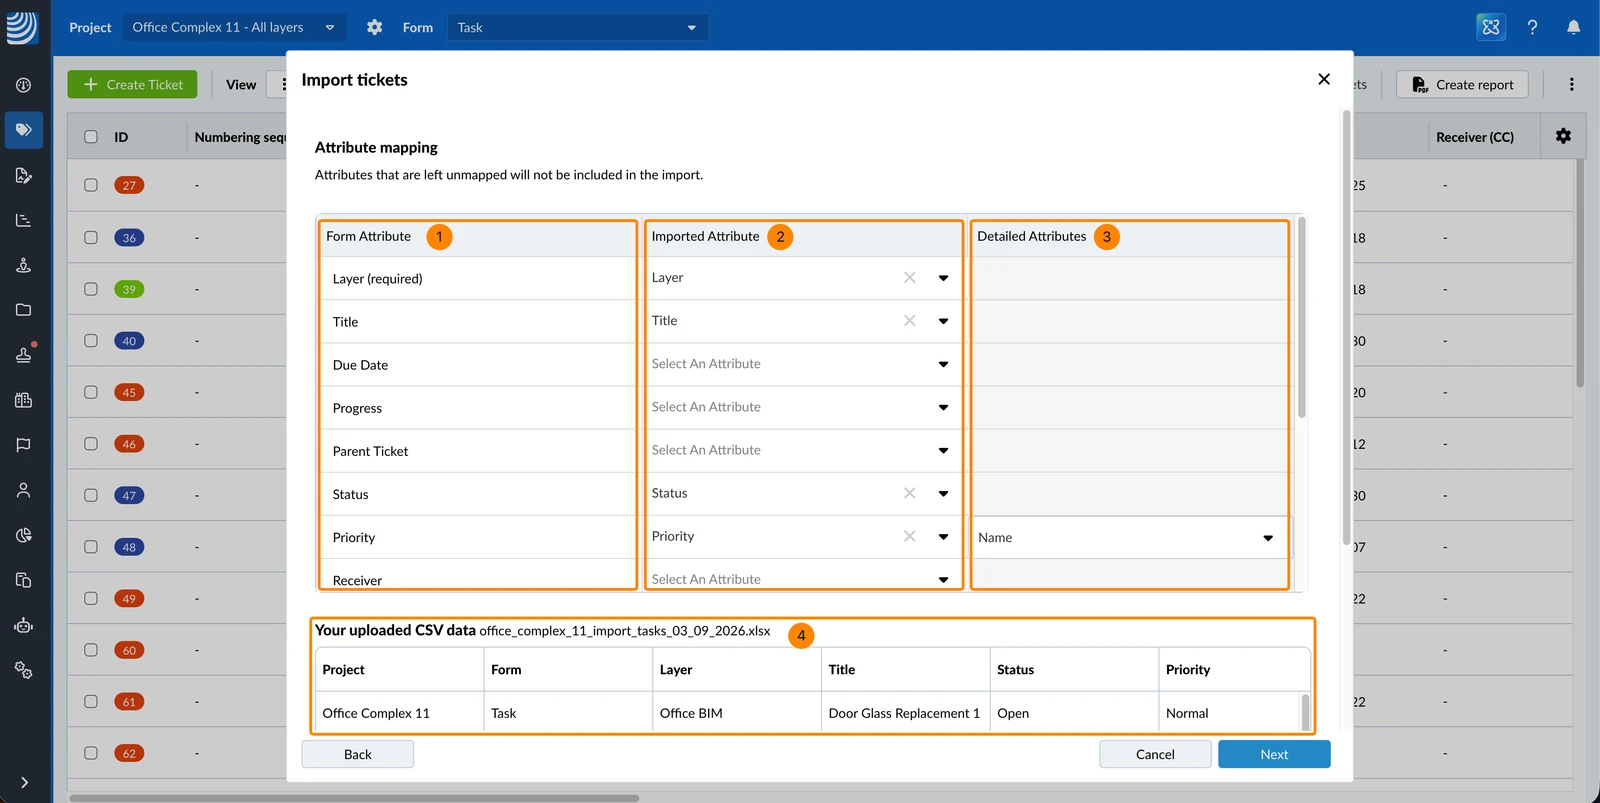
To map attributes:
-
In the Imported Attribute column, enter the value or select from the drop-down menu the column that belongs to the field in the Form Attribute column
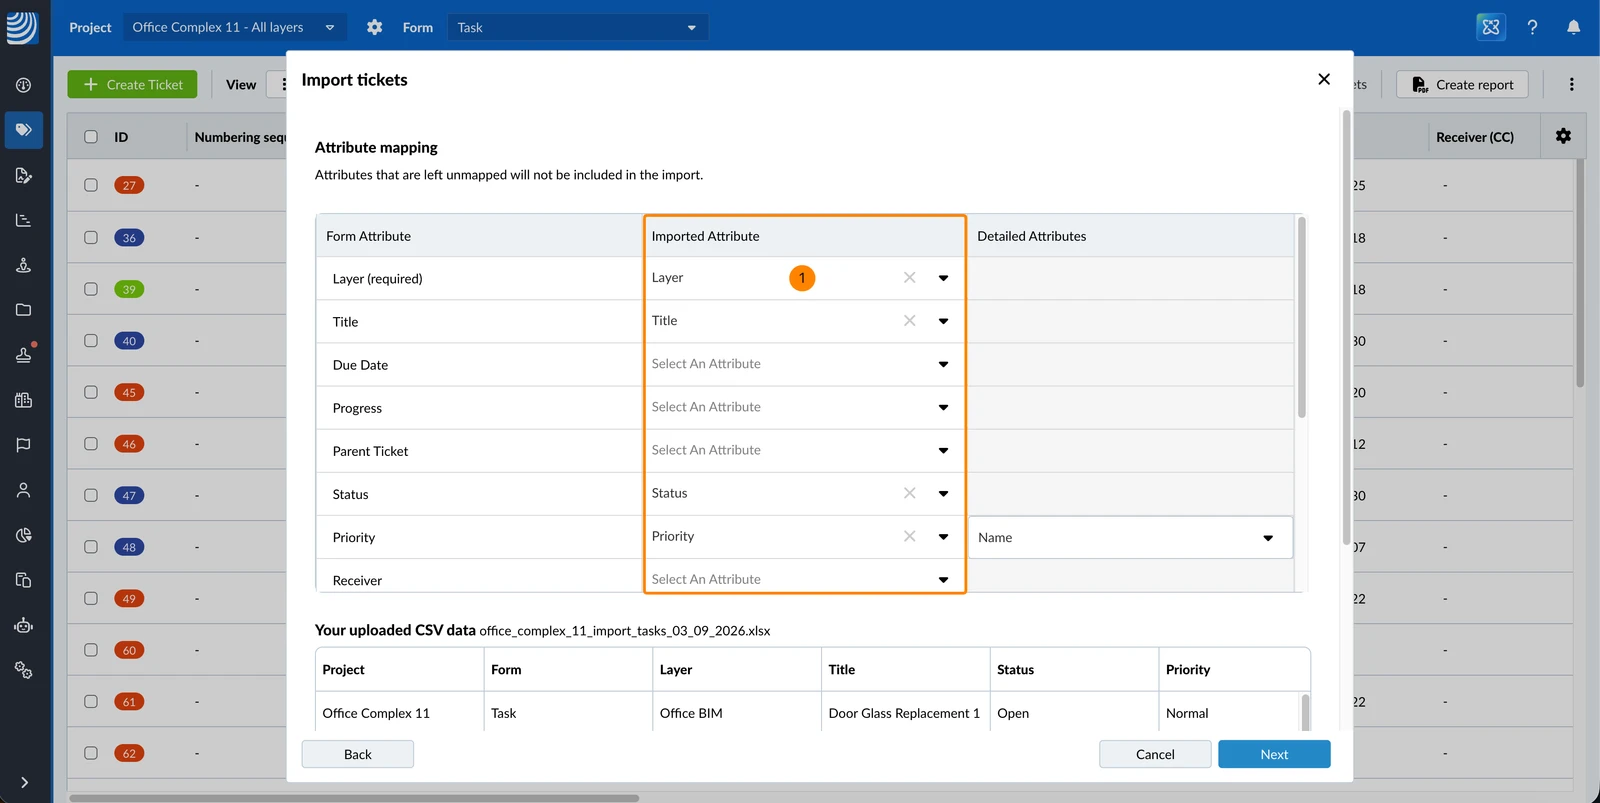
-
For form fields that refer to a user, such as author or assignee, enter the value or select from the drop-down menu in the Detailed Attribute column the value type to be posted, such as the user name, ID, company or email
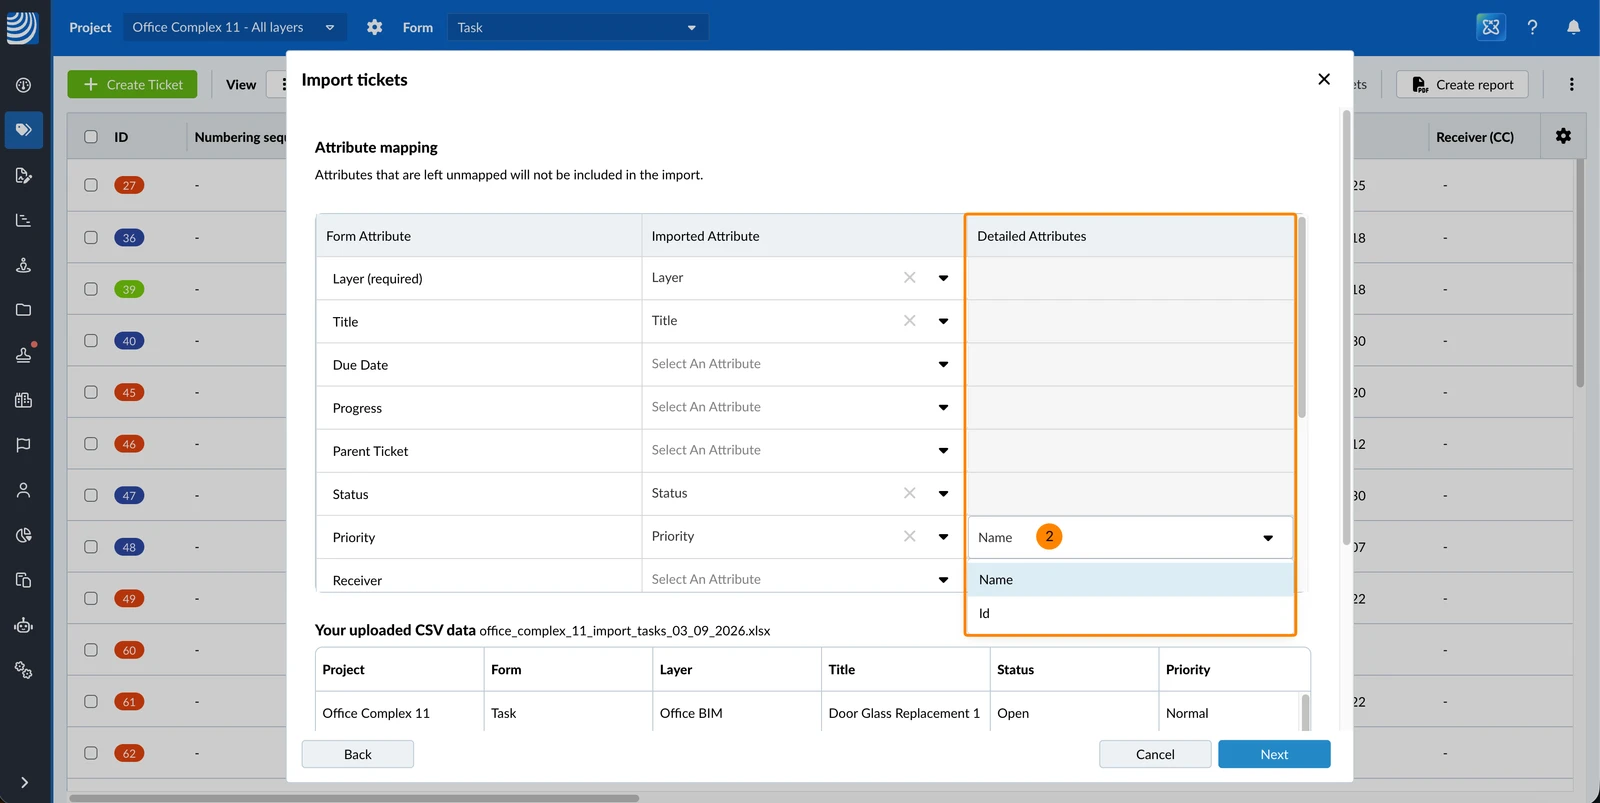
Validate Imported Tickets
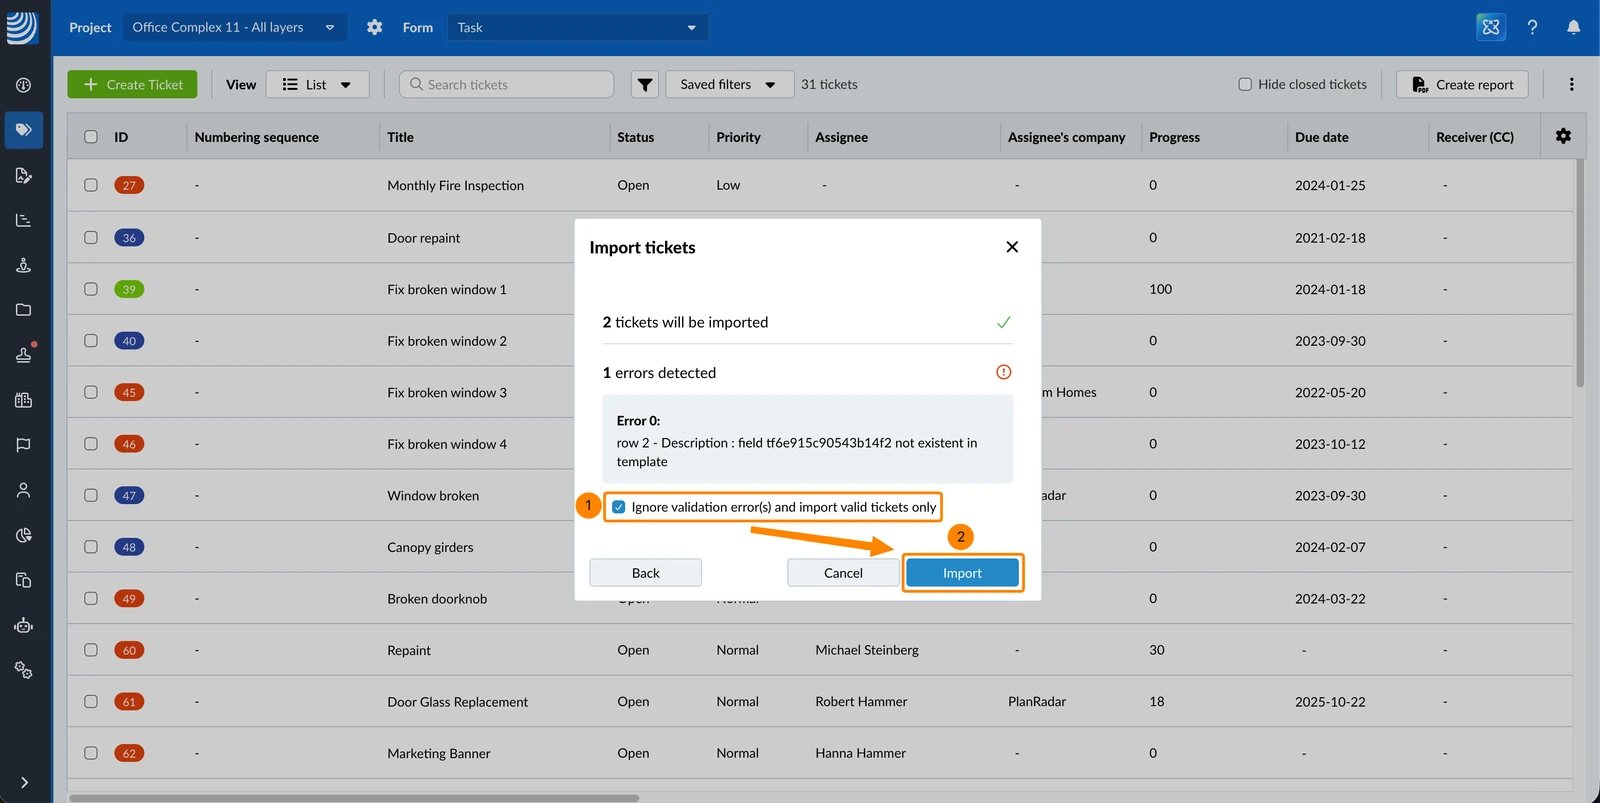
With the Validate tickets before import checkbox selected, a window appears after the attribute mapping and shows what the import will do. It tells you how many tickets will be created, how many will be updated, and how many rows have errors, followed by the errors themselves.
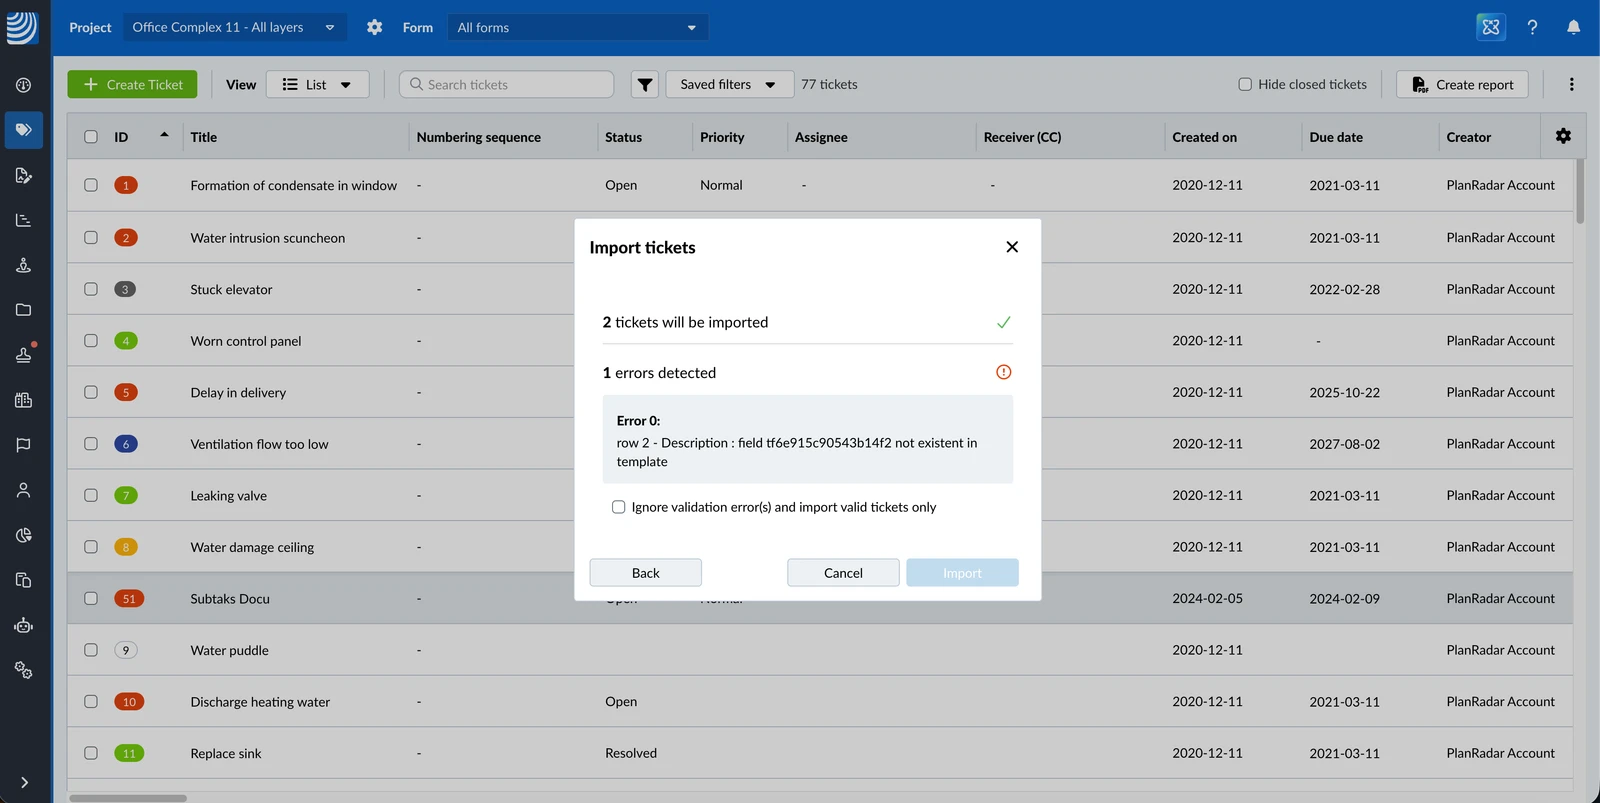
A row can fail for these reasons:
| Message | Reason |
| does not match any ticket in this project | The UUID doesn't belong to any ticket in the project. You can create new tickets for these rows instead. |
| uses a different form and cannot be updated | The ticket exists but was created with another form than the one selected for this import. |
| You are not allowed to update the ticket | The ticket exists but your permissions don't let you change it. |
| This ticket is locked and cannot be edited. | The ticket is locked. Unlock it to change it by import. |
| The user assigned can't edit tickets | Your role does not allow you to edit this ticket, so the row is not imported. |
Correct Errors
To correct errors:
- Click Back
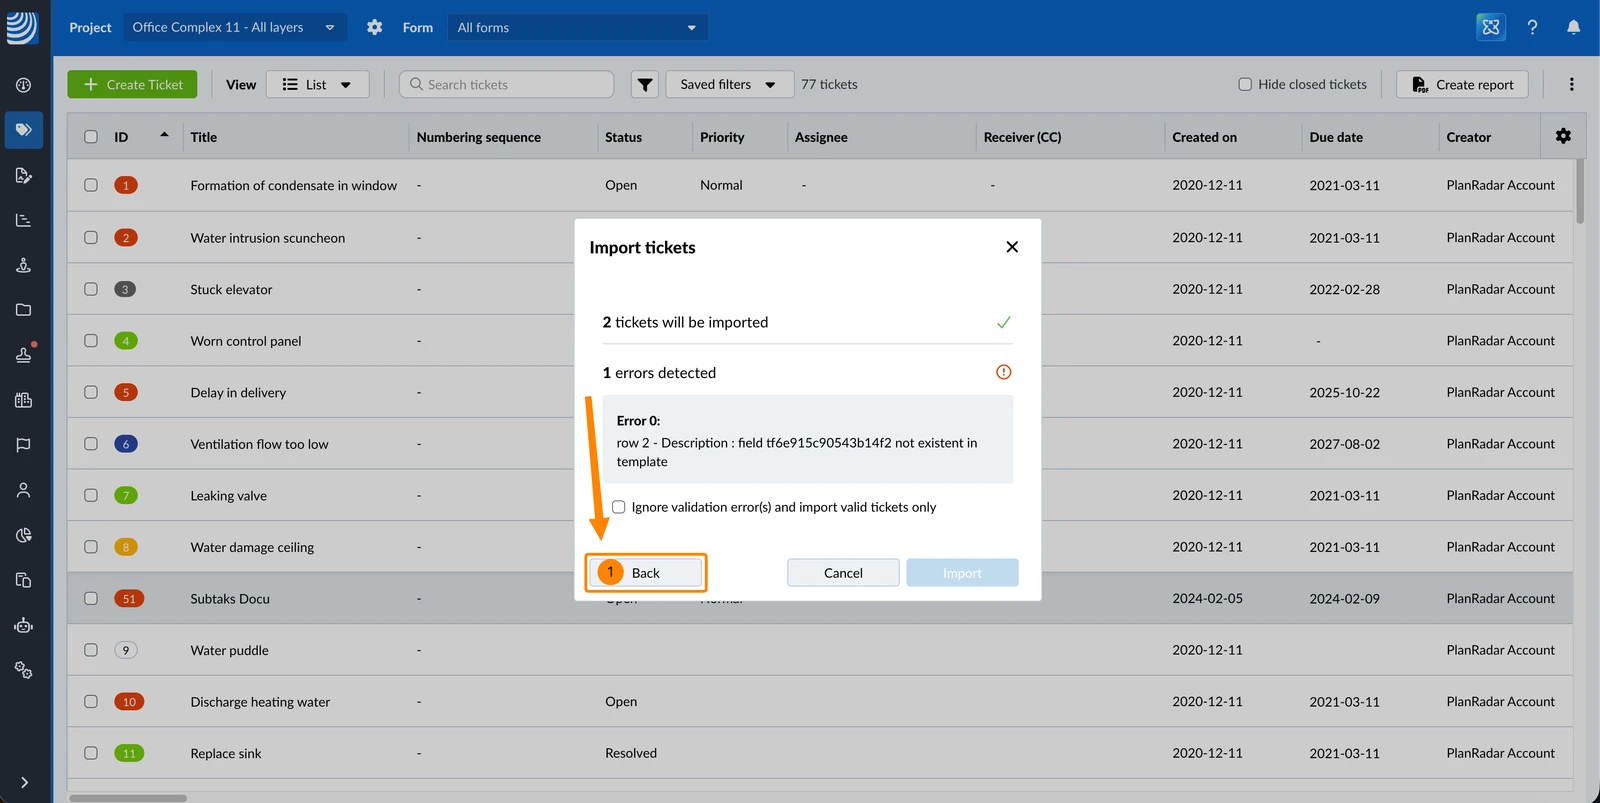
- Correct the attribute mapping, or click Back again to upload a corrected file
- Click Next
- Once there are no errors, click Import
Import Valid Rows Only
To import everything that has no errors and leave the rest out:
- Select the Ignore validation error(s) and import valid tickets only checkbox
- Click Import
Create Tickets for Unmatched UUIDs
Rows whose UUID matches no ticket in the project can become new tickets instead of being skipped. This is useful when you import a file that was exported from a different project.
To create tickets for unmatched UUIDs:
- Select the Ignore validation error(s) and import valid tickets only checkbox
- Select the Import Non-Matching UUIDs and create new UUIDs checkbox
- Click Import
What an Update Changes
When a row updates an existing ticket:
- Mapped columns that contain a value overwrite the ticket's current value.
- Columns you didn't map are left unchanged.
- Empty cells are skipped, unless you selected Clear values for empty cells.
- The layer never changes, even when the layer column holds a different value.
- The ticket keeps its creation date, its creator and its ticket number. You become the last person to have edited it.
Updated September 10, 2026