

 Deutsch
 Español
 Français
 Hrvatski
 Italiano
 Polski
 Português (BR)

Activate Single Sign-On (SSO) with SAML
Overview
Single Sign-On (SSO) allows users of your PlanRadar account to log in using your existing SAML-enabled ID provider, such as Active Directory, OneLogin, and many more. This means users do not have to keep track of yet another email and password.
It also makes it easier to provision new users:
- You can create users who log in with SSO right away, with their user type, permissions and projects already set. Read more in Create Users Who Log In With SSO.
- If Create users automatically on first sign-in is on, people from your identity provider who do not have a PlanRadar user yet are created as free subcontractors when they first log in. The user type and permissions can be changed later by another user with the permission to manage users.
Access & Permissions
Prepare SAML Identity Provider
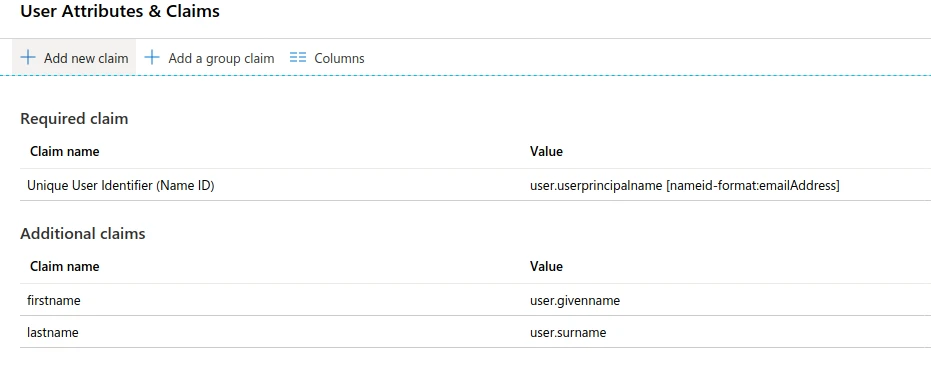
The SAML identity provider must be configured to provide three attributes: Email Address as nameid, firstname, and lastname. These attributes allow PlanRadar to properly identify the user and automatically provision them.
Activate SAML with Azure Example
Basic SAML Configuration
- Sign in to the Azure portal as a cloud application admin, or an application admin for your Azure AD tenant.
- Navigate to Azure Active Directory > Enterprise applications > New Application > Non Gallery Application, Add the name “PlanRadar” and then click add.
- Under the Manage section, select Single sign-on.
- Select SAML.
- The Set up Single Sign-On with SAML - Preview page will pop-up.
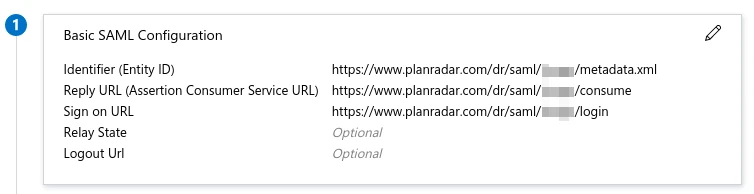
To edit the basic SAML configuration options:
- Select the Edit icon (a pencil) in the upper-right corner of the Basic SAML Configuration section.
- Update the Basic SAML Configuration based on the data provided by PlanRadar.
Configure User attributes and claims
- In the User Attributes and Claims section, select the Edit icon (a pencil) in the upper-right corner.

- Verify the Name Identifier Value and set the value to user.userprincipalname and the format to emailAddress.
To modify the Name Identifier Value:
-
Select the Edit icon (a pencil) for the Name Identifier Value field
-
Make the appropriate changes to the identifier format and source, as needed.
-
Save the changes once you're done.
To add a claim:
-
Select Add new claim at the top of the page.
-
Enter the Name and select the appropriate source.
-
If you select the Attribute source, you'll need to choose the Source attribute you want to use.
-
If you select the Translation source, you'll need to choose the Transformation and Parameter 1 you want to use.
-
Save the changes when you're done.
-
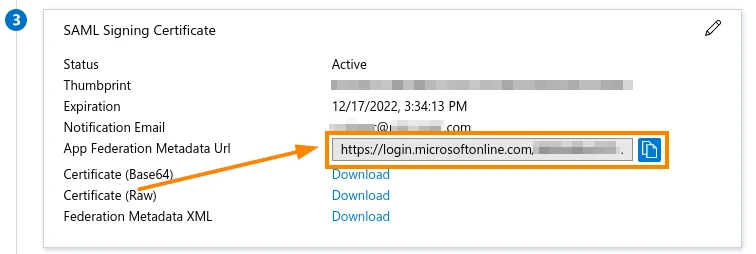
Finally, go to the SAML Signing Certificate section and share the App Federation Metadata URL
Activate SSO on PlanRadar Account
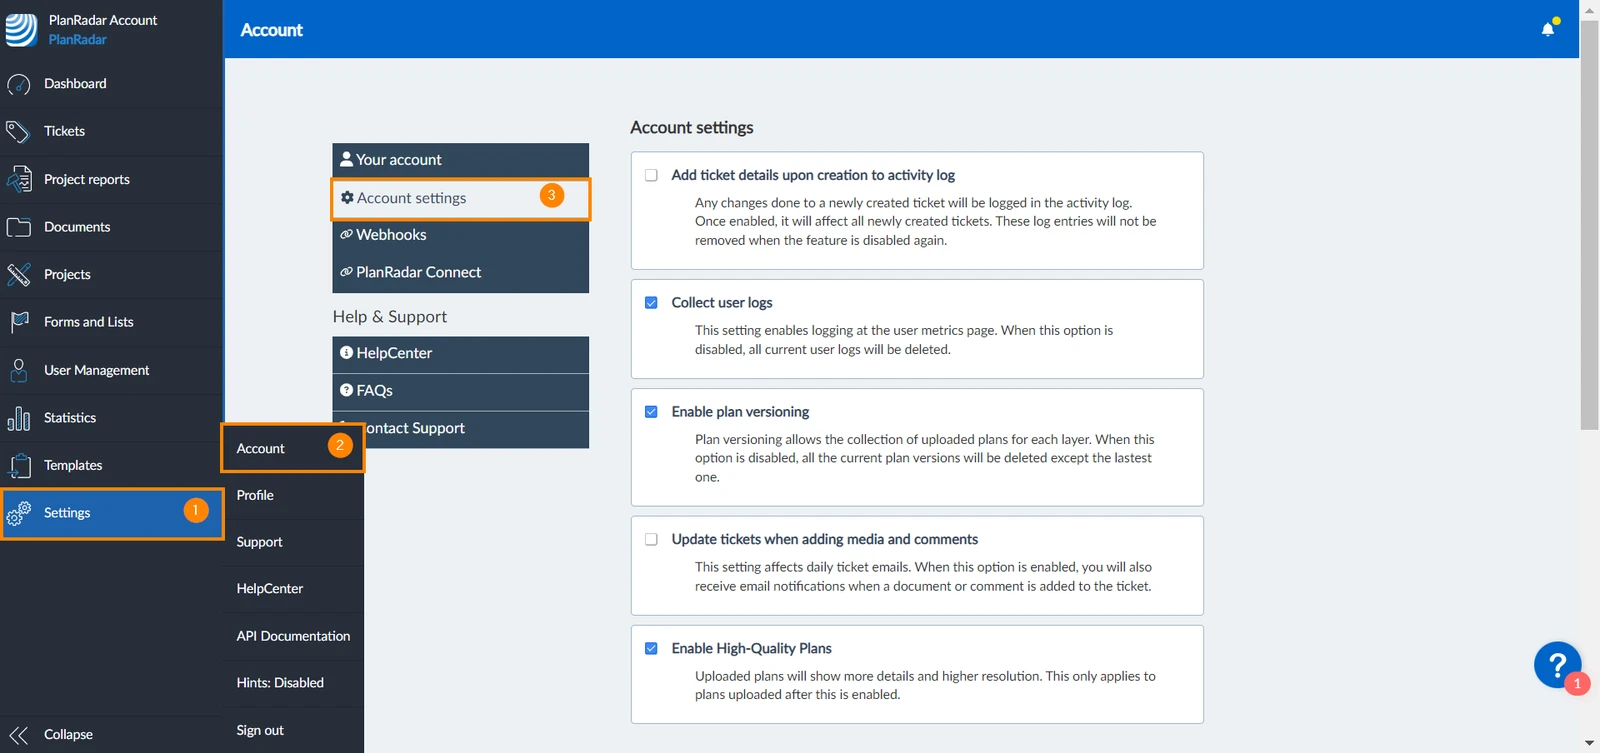
To activate SSO:
- Click Settings
- Click Account
- Click Account settings
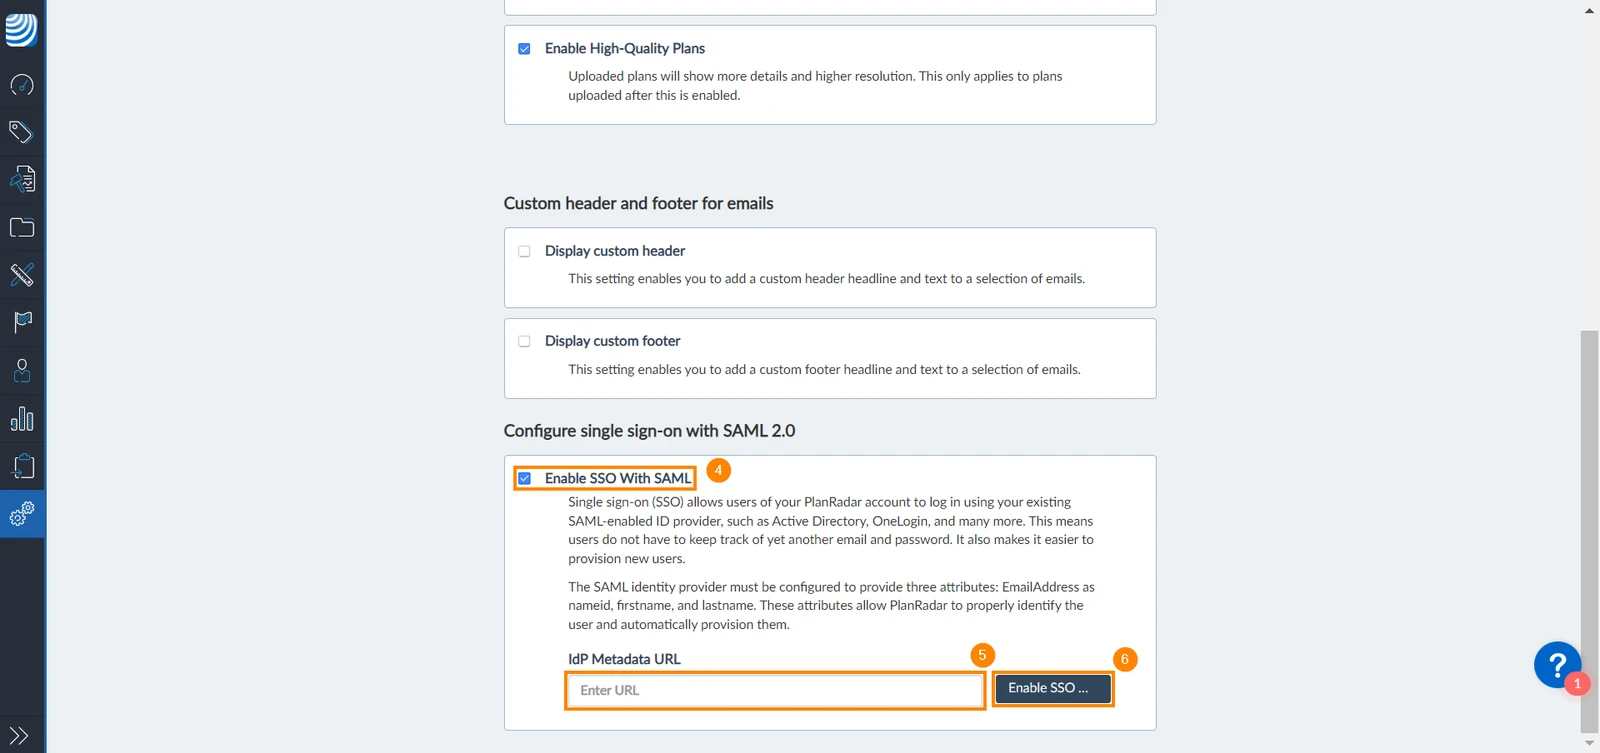
- Select the Enable SSO With SAML checkbox
- Enter your IdP Metadata URL
- Click Enable SSO With SAML
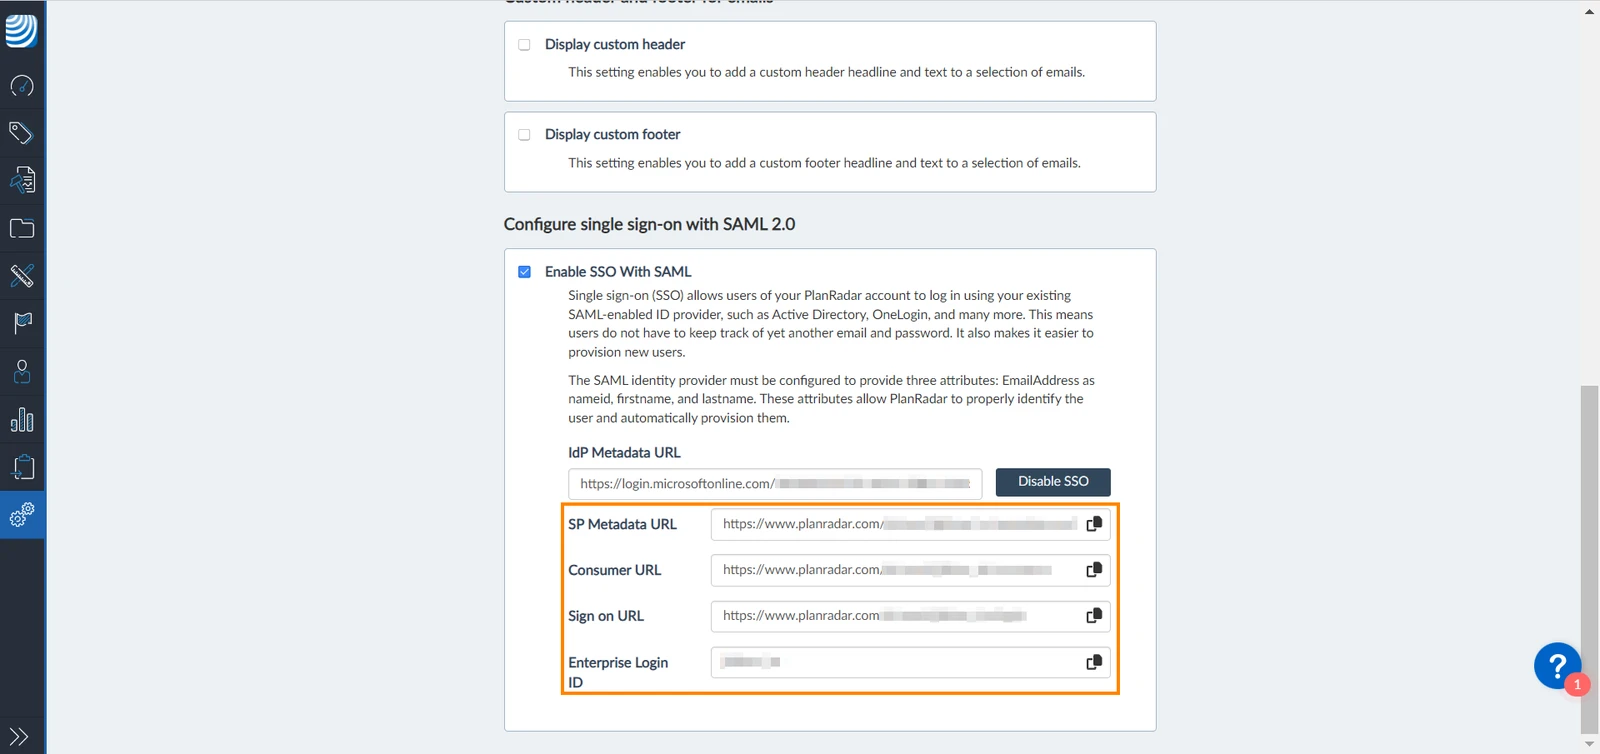
Once SSO is enabled, the page shows the details your identity provider needs:
SP Metadata URL, Consumer URL, Sign on URL, Logout URL and
Enterprise Login ID.
Signing Certificate
PlanRadar signs its SAML messages with a certificate. In the Signing certificate panel you see when it expires. Click Download certificate to give it to your identity provider, and Renew certificate before it expires.
SSO Options
Under SSO options, choose how PlanRadar works with your identity provider:
- Create users automatically on first sign-in (on by default): people without a PlanRadar user are created as free subcontractors when they first log in.
- Update profiles from your identity provider (on by default): the name, contact details and custom user details are updated from your identity provider at every sign-in.
- Single logout (on by default): logging out of PlanRadar also logs the user out of your identity provider. The Logout URL is only used while this is on.
- Allow encrypted assertions (off by default): accept encrypted SAML responses from your identity provider.
Create Users Who Log In With SSO
Once SSO is active, you can create users who log in through your company's single sign-on right away. They get no PlanRadar password.
- Create user: select Log in with SSO next to the email address. The password fields disappear. Read more in Create & Invite Users.
- Import users: map a column with true or false to Log in with SSO. Read more in Import Users.
- Users API: set
login_with_samltotruewhen you create the user.
If an email domain is set up for SSO only, Log in with SSO is selected automatically and cannot be cleared.
The new user gets an email with their username and a Login button that opens your company's sign-in page. After signing in, they have the user type, permissions and projects you set.
How it Works
SAML Single Sign-On (SSO) works by transferring your identity from one place (the identity provider) to another (PlanRadar). This is done through an exchange of digitally signed XML documents.
For example, if you are logged into a system that acts as an identity provider (e.g. Microsoft Azure, OneLogin, etc.) and want to log into PlanRadar, the following happens:
- You access PlanRadar
- PlanRadar identifies your origin (by application subdomain, user IP address, or similar) and redirects you back to the identity provider, asking for authentication. (This is the authentication request)
- You either have an existing active browser session with the identity provider or establish one by logging into the identity provider.
- The identity provider builds the authentication response in the form of an XML-document containing your username or email address, signs it using an X.509 certificate, and posts this information to PlanRadar.
- PlanRadar, which already knows the identity provider and has a certificate fingerprint, retrieves the authentication response and validates it using the certificate fingerprint.
- Your identity is established and you get granted app access.
Related Articles
Updated June 10, 2026