

 Deutsch
 Español
 Français
 Hrvatski
 Italiano
 Polski
 Português (BR)
Create a Ticket
Overview
Tickets are used to create tasks with instructions to resolve issues and more.
Access & Permissions
Select Project and Location
Every ticket is saved to a Location — the term PlanRadar uses for a folder or a plan — in a specific project. A ticket on a folder has no pin position and appears in the list view only. You can move a ticket to a different location later, but not to a different project.
Select a project and location before creating a ticket:
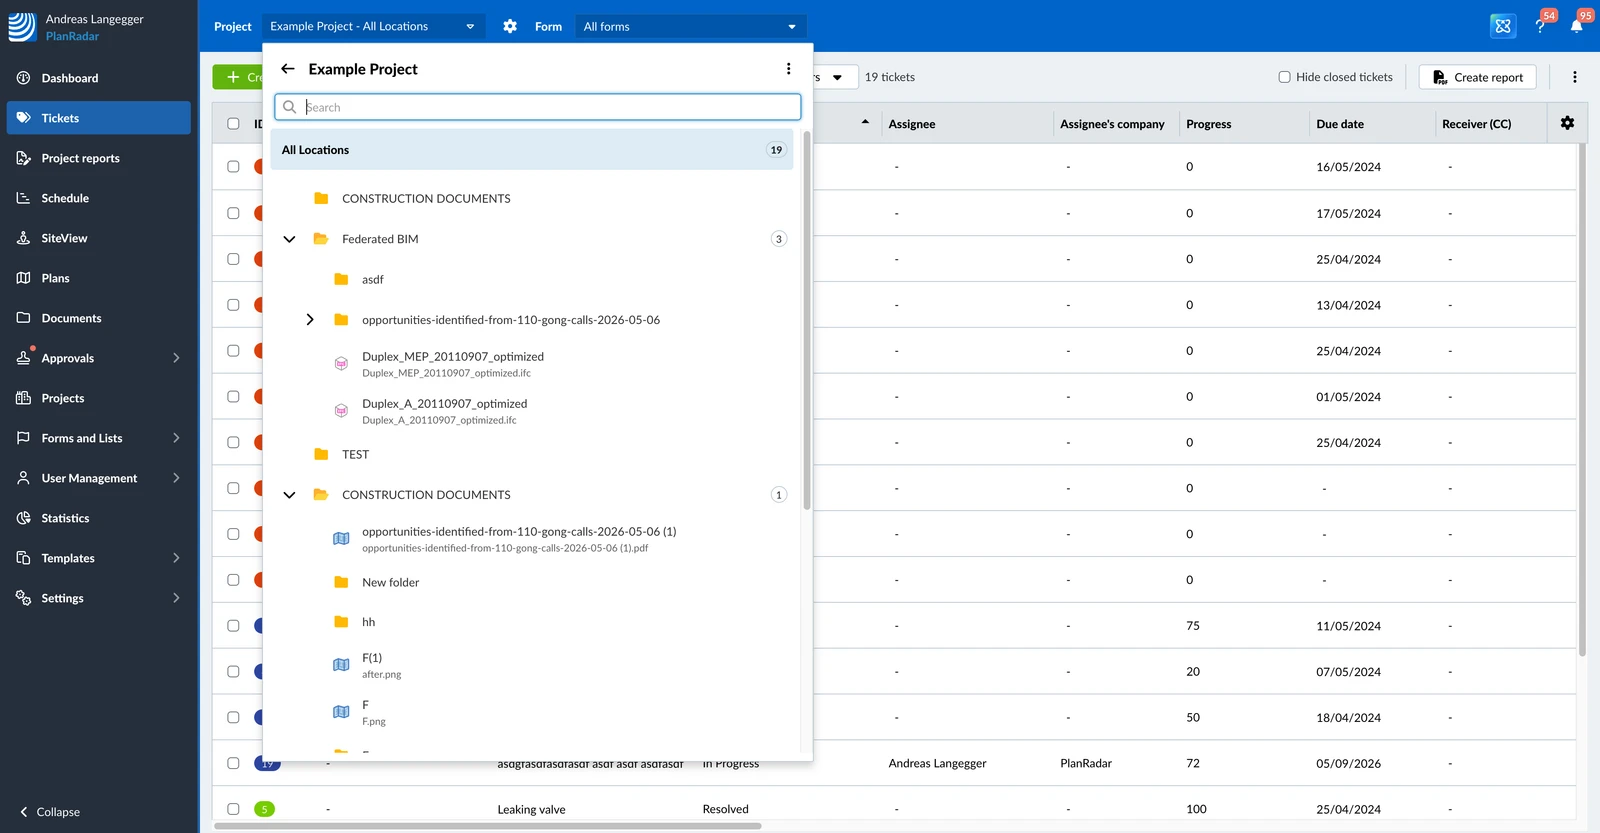
- Open the Project and location selection menu
- Click Change project and select a different project
- Click the folder or plan the ticket belongs to, e.g. Ground Floor
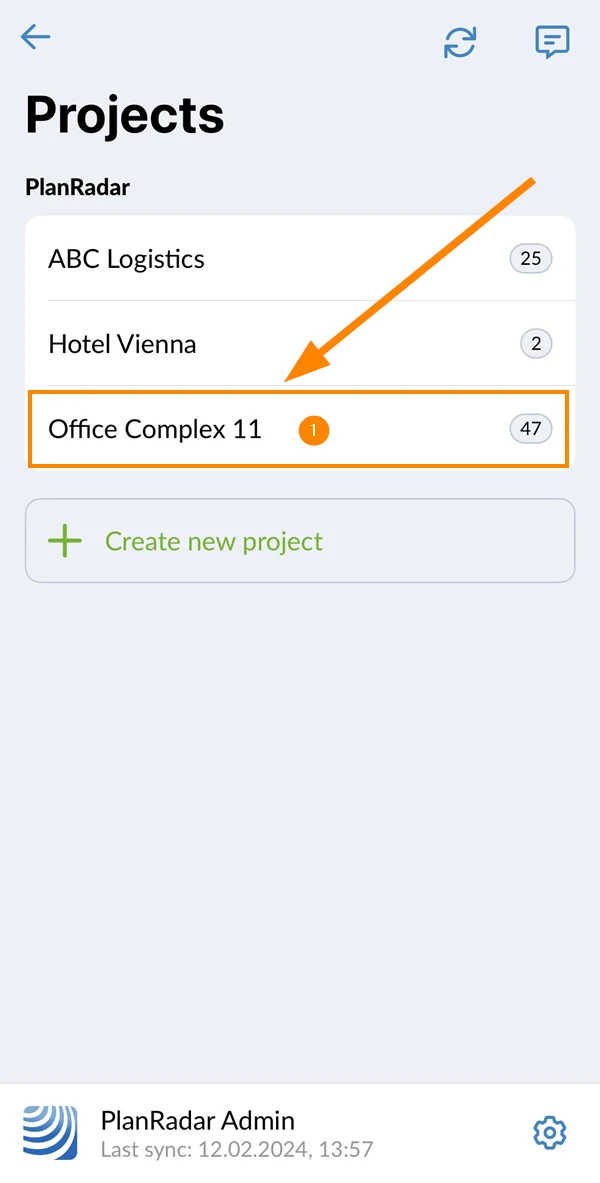
- Tap the project name e.g. Office Complex 11
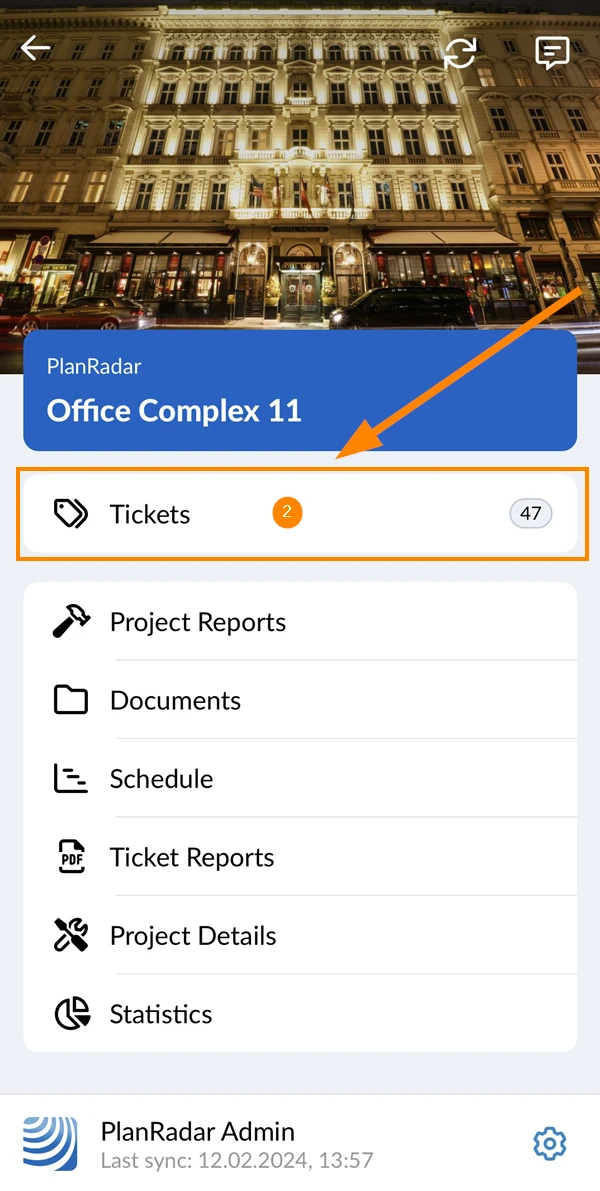
- Tap Tickets
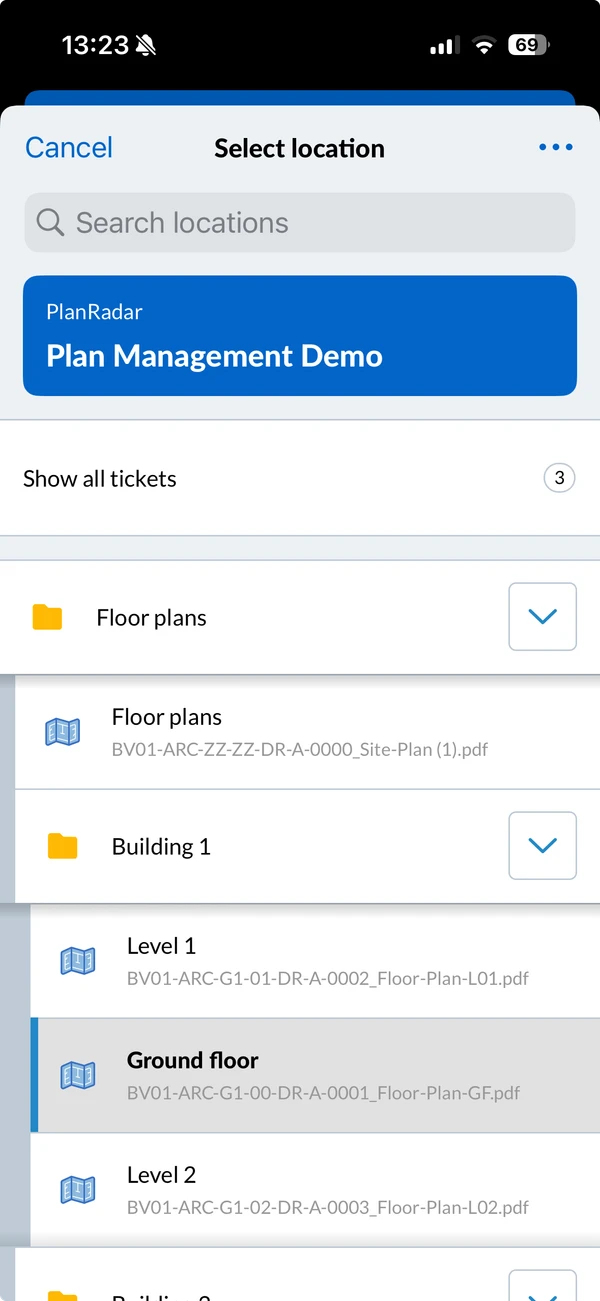
- Tap the location selector
- Tap the folder or plan the ticket belongs to, e.g. Ground Floor
Create a Ticket with a Plan Position
To create a ticket with a plan position:
- Click Tickets
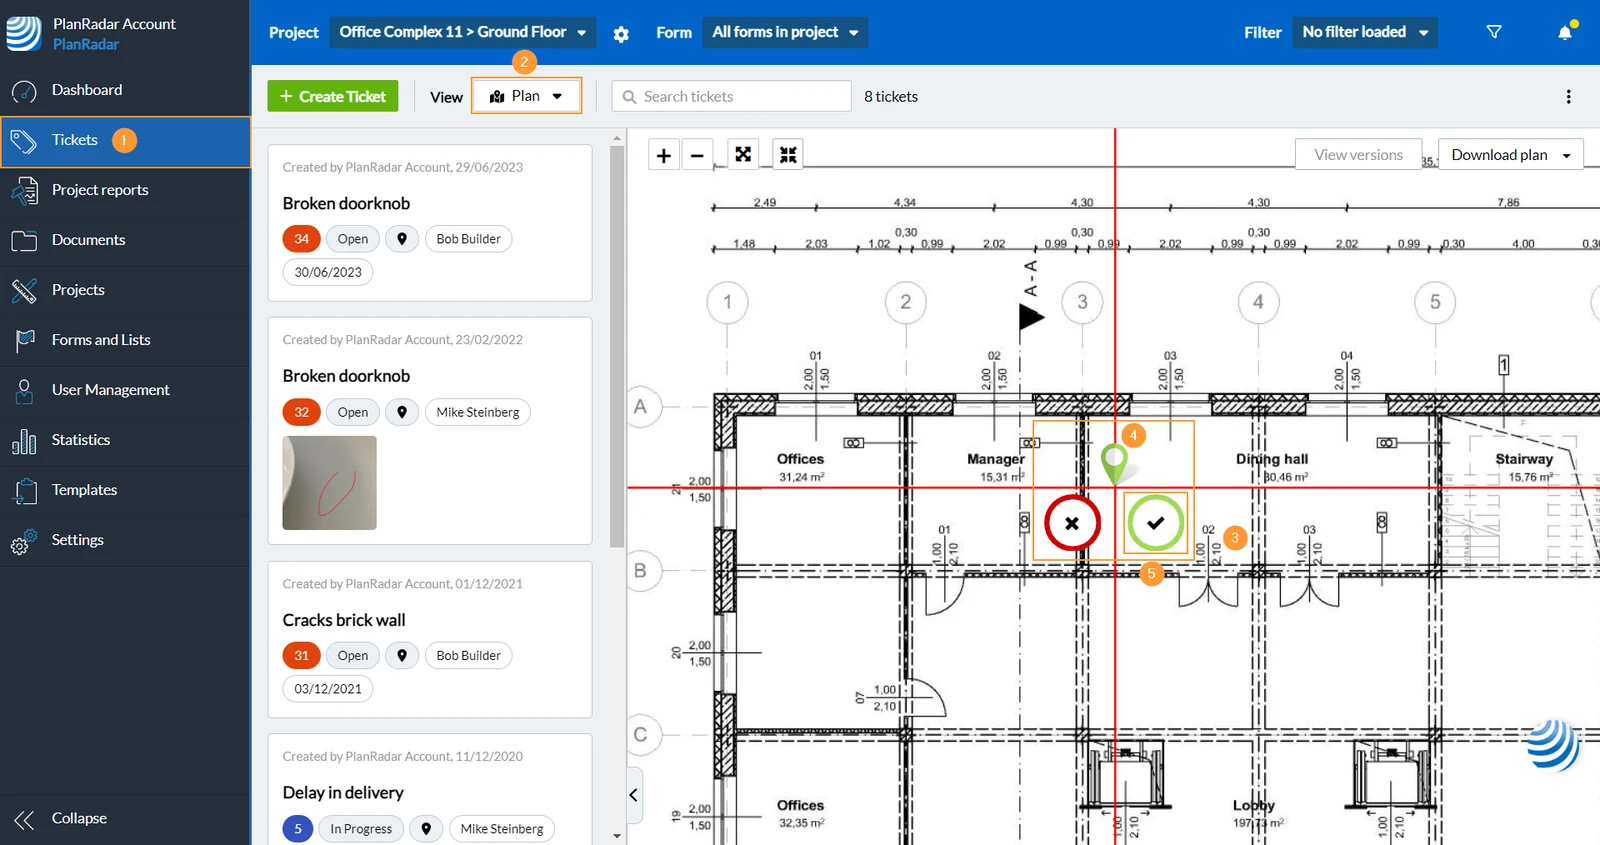
- In the View drop-down, click Plan.
- Right click on the plan to place the ticket pin.
- Drag & drop the ticket pin to adjust the plan position if necessary.
- Click the green check mark button to confirm the plan position and continue in the ticket creation form.
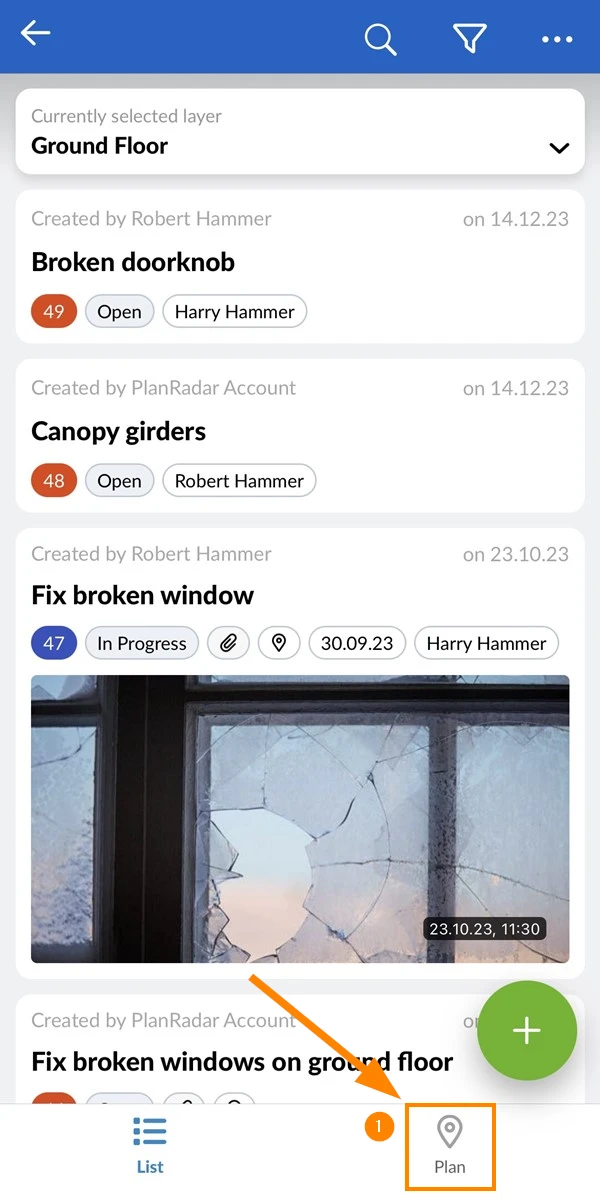
- Tap Plan
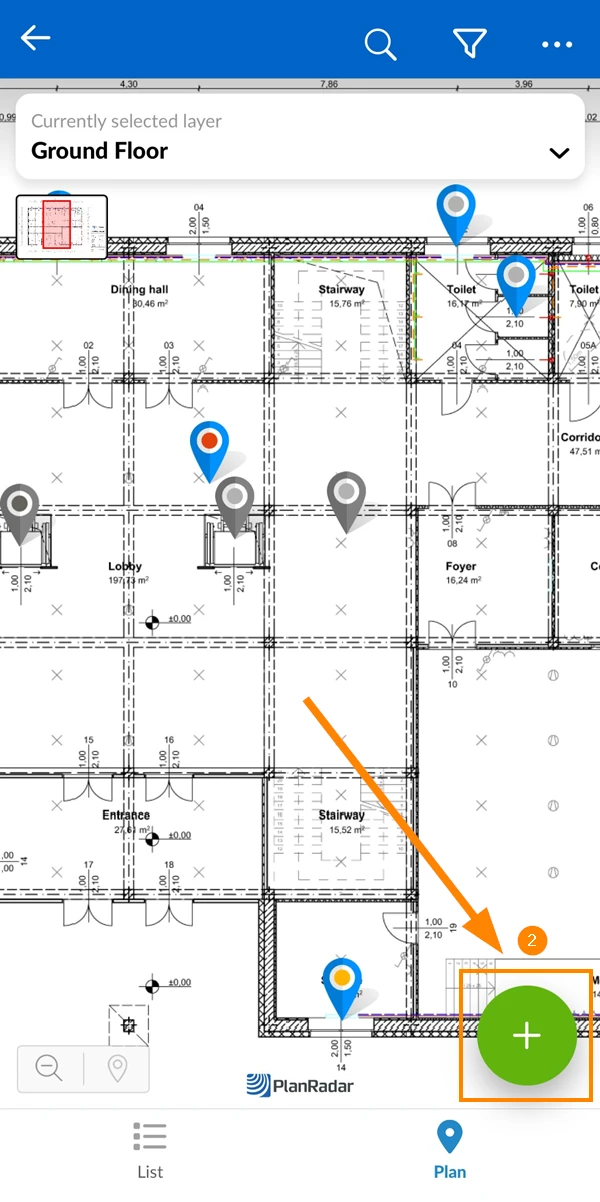
- Tap + OR long-tap on the plan to place the ticket pin
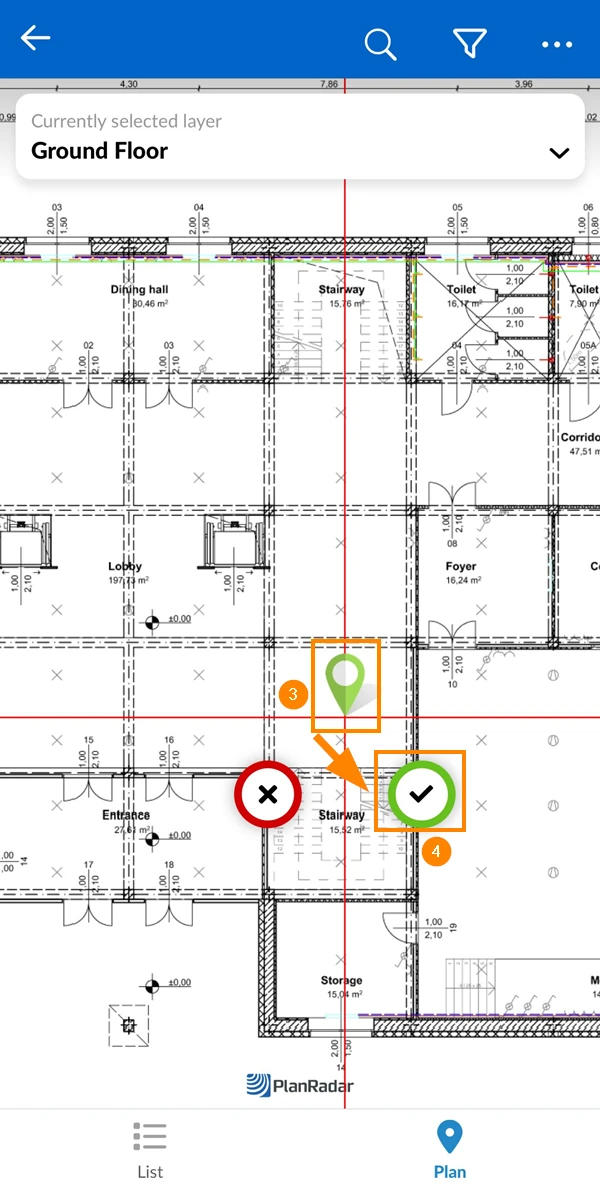
- Drag & drop the ticket pin to adjust the plan position if necessary.
- Click the green check mark button to confirm the plan position and continue in the ticket creation form.
Create a Ticket without a Plan Position
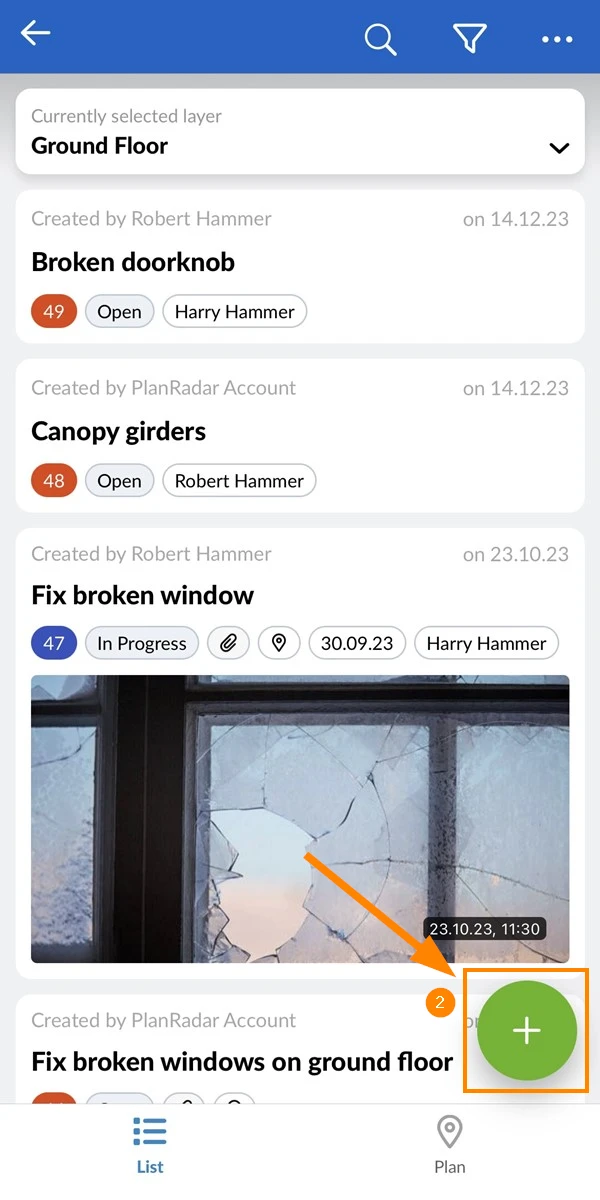
If there is no plan you can instead use the + Create Ticket button:

- Tap List
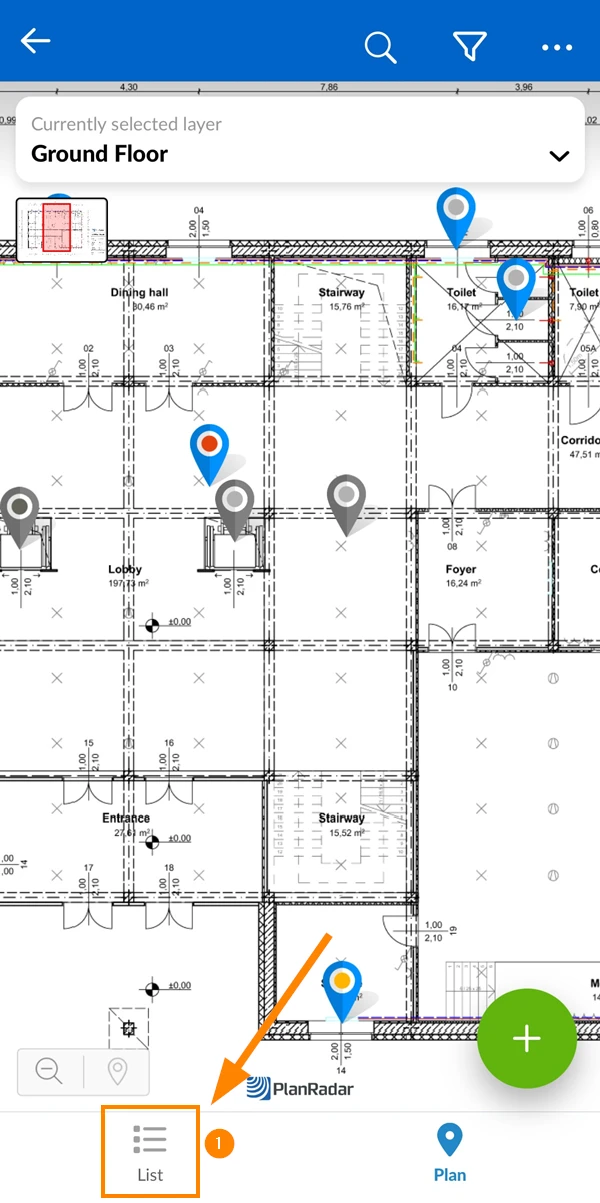
- Tap +
Select a Form
Tickets are based on a form. Depending on the form a ticket can have different input fields and features.
To select a form:
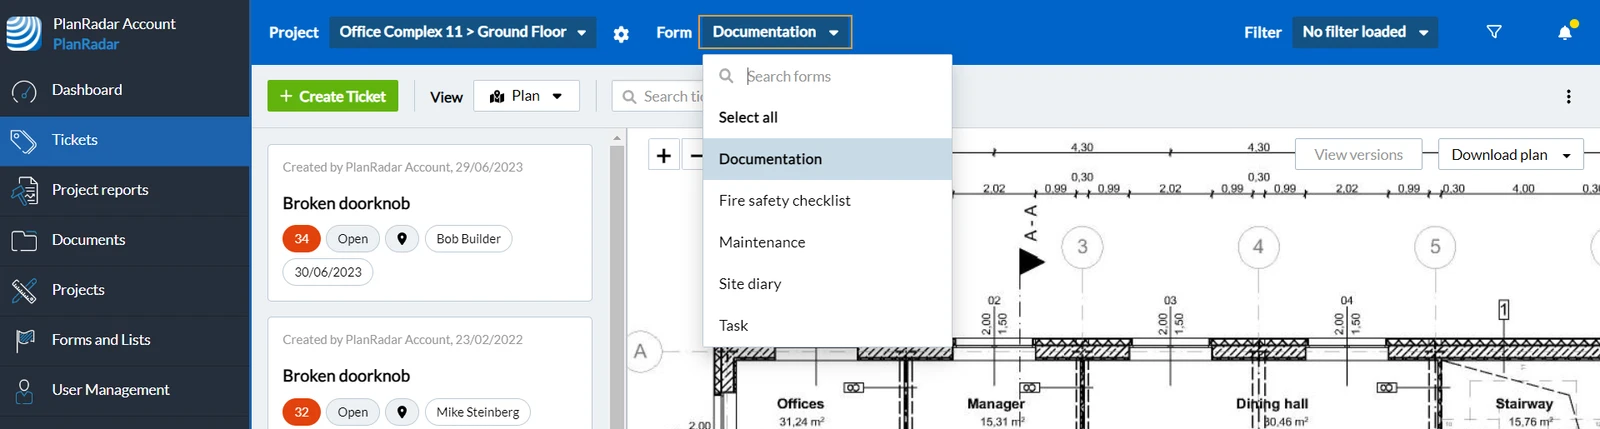
In the Form drop-down, click on the form.
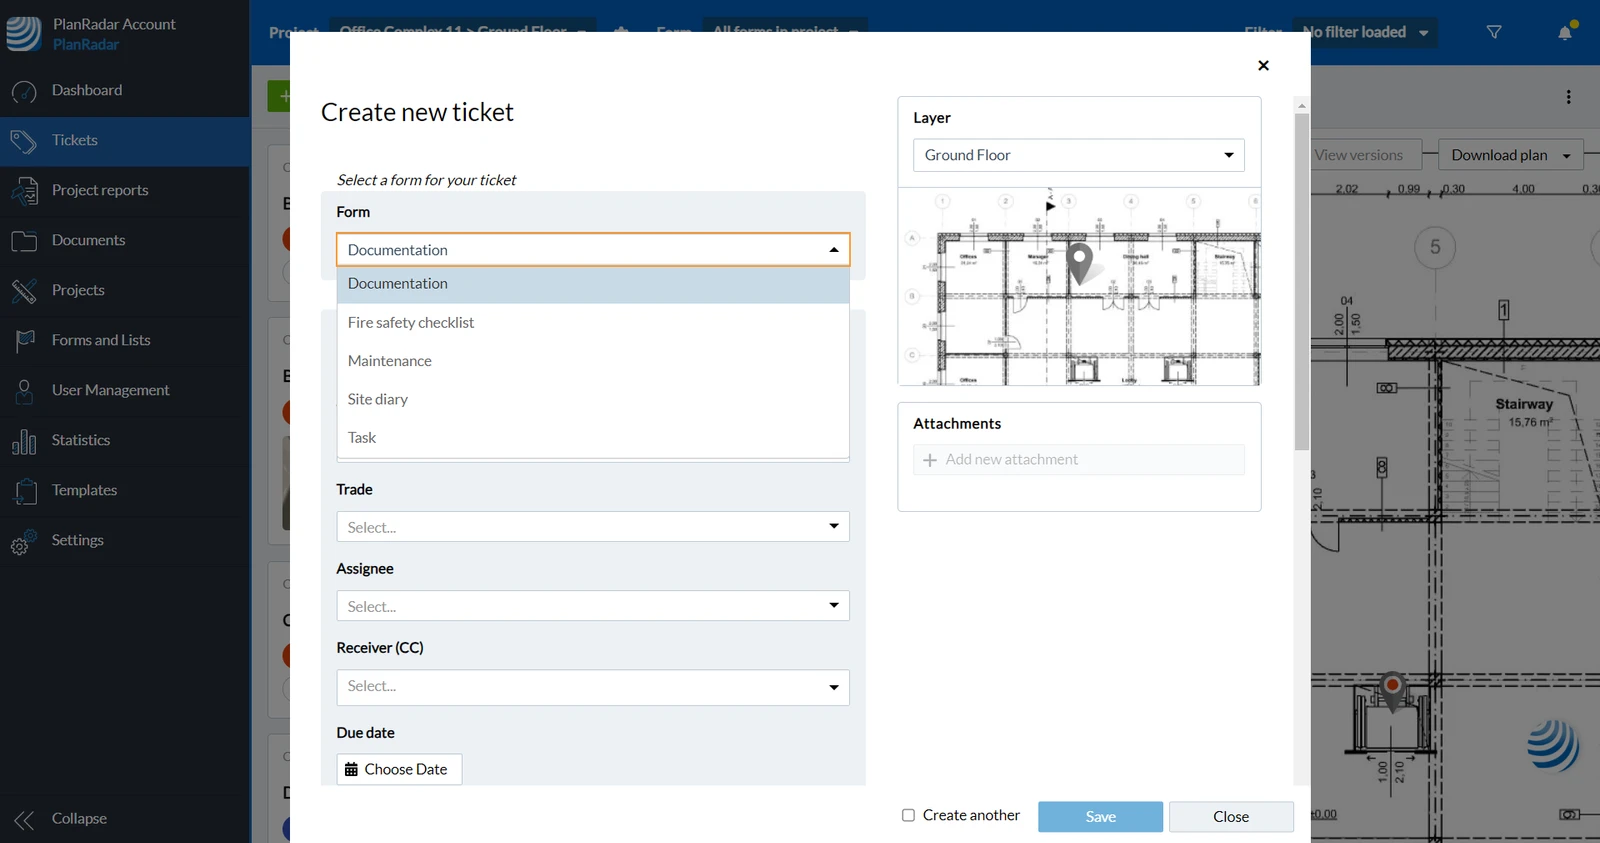
The form you selected for the previous ticket creation will be pre-selected.
If you use the Form filter drop down, it will always define the pre-selected form in the ticket creation.
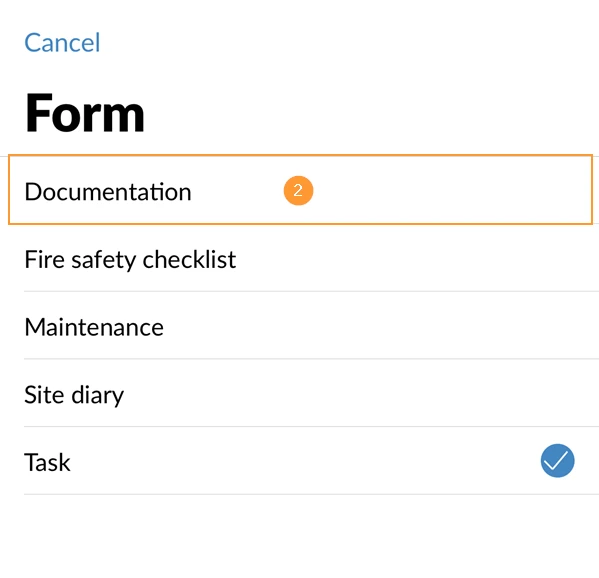
- Tap on the Form field
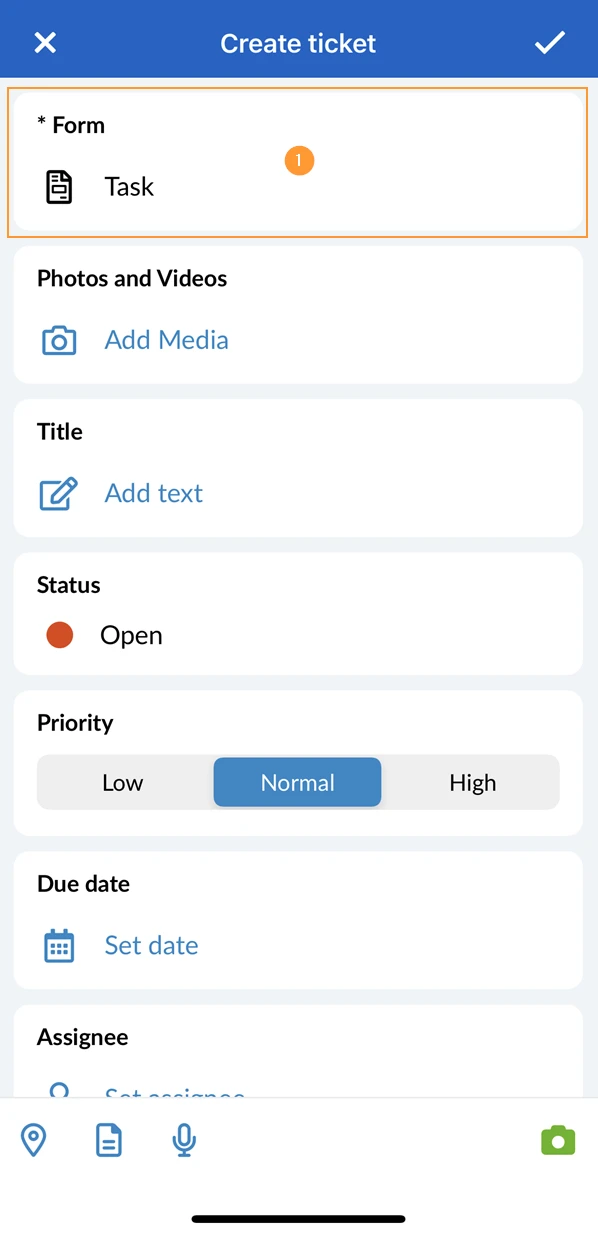
- Tap Documentation e.g. to select the form
- Tap on the Form field
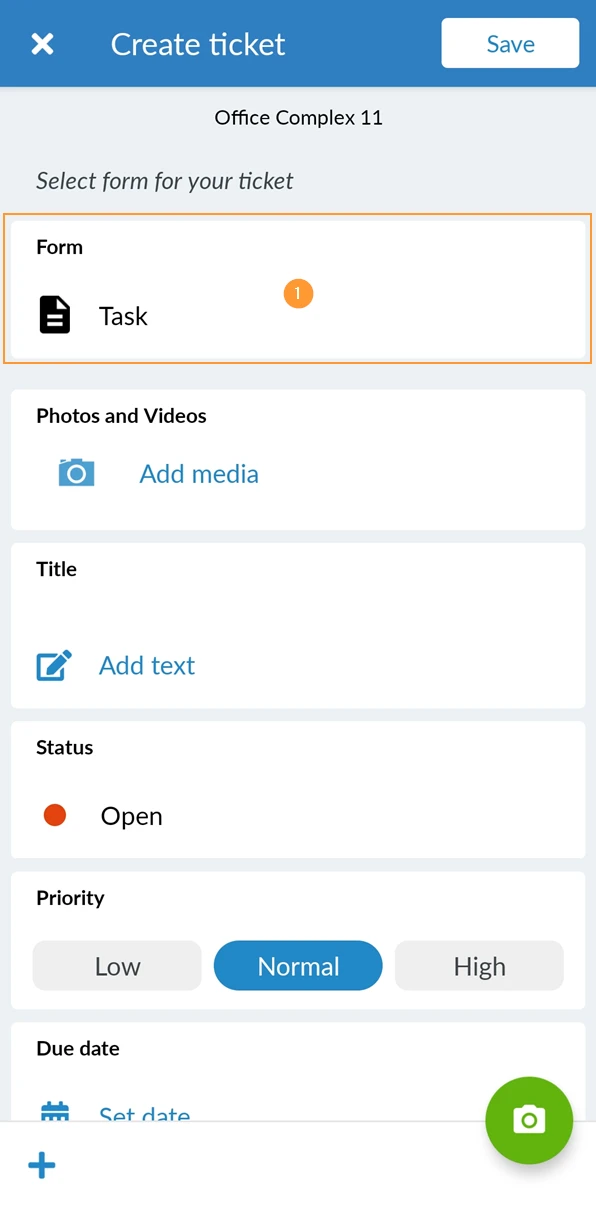
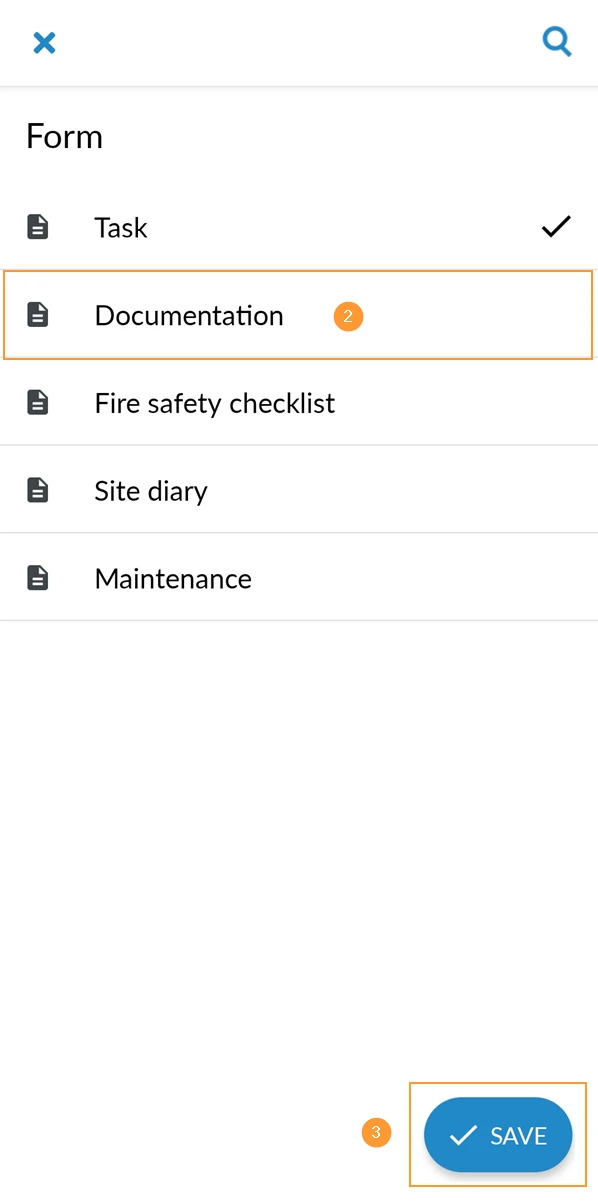
- Tap Documentation e.g. to select the form
- Tap Save
Fill out Ticket Fields
Fill out the ticket fields as they are defined in the selected form. This might include a title, assignee, due date and more.
Possibilities for Tickets
It is optional to add attachments and more to tickets. It can be done during ticket creation or after the new ticket is saved.
Add Photos, Videos and Audio
Add media files to tickets as an addition alongside text and descriptions or for documentation purposes.
It is also possible to edit photos and add annotations.
Add Documents
Add PDFs, MS Word and Excel documents, emails, and CAD files.
Add Plan Annotations
Take a screenshot of a plan, add annotations and attach the image to a ticket.
Add a GPS Position
If enabled in the ticket form, it is possible to add the GPS position to a ticket.
Add Sub-Tickets
Use sub-tickets if you want to create smaller tasks and link them to a parent-ticket.
Create Tickets in Schedules
When managing the schedule of a project, it is possible to create new tickets directly in the schedules feature.
Set a Repetition Date
For tickets that need to be done regularly, such as weekly or monthly, it is possible to schedule a repetition date to automatically reopen those tickets.
Save a new Ticket
A ticket can be saved at any time if all mandatory fields are filled. Additionally, it may be required to include a photo or video.
To save a new ticket:
- Fill out all mandatory fields
- Click Save to save the ticket and keep it open
- Optional: Click Save and close to save the ticket and close it
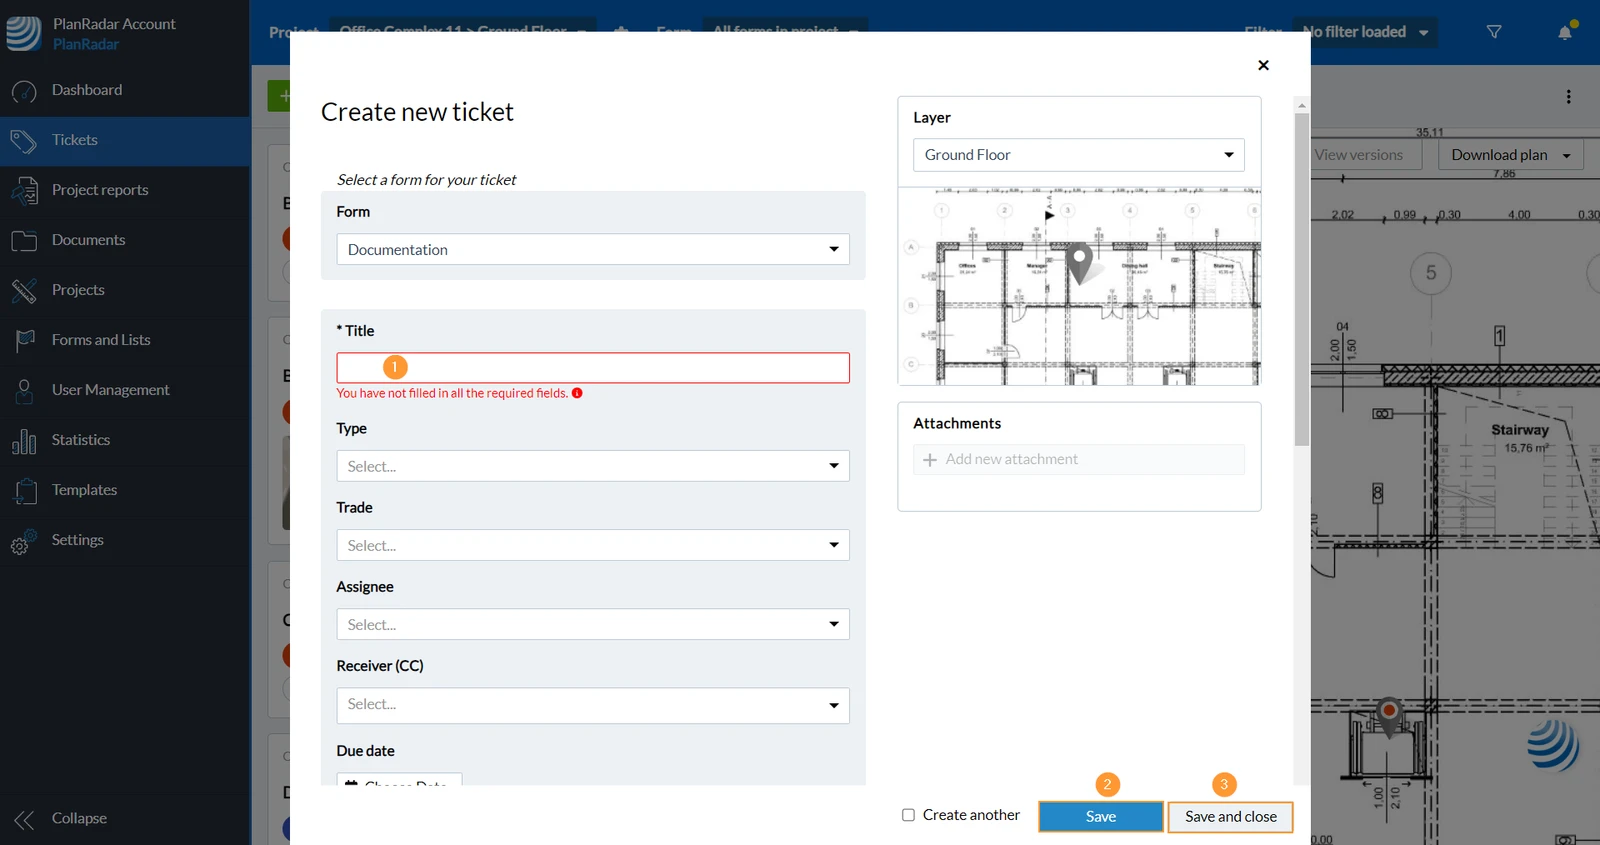
- Fill out all mandatory fields
- Click the Check mark to save the ticket and close it
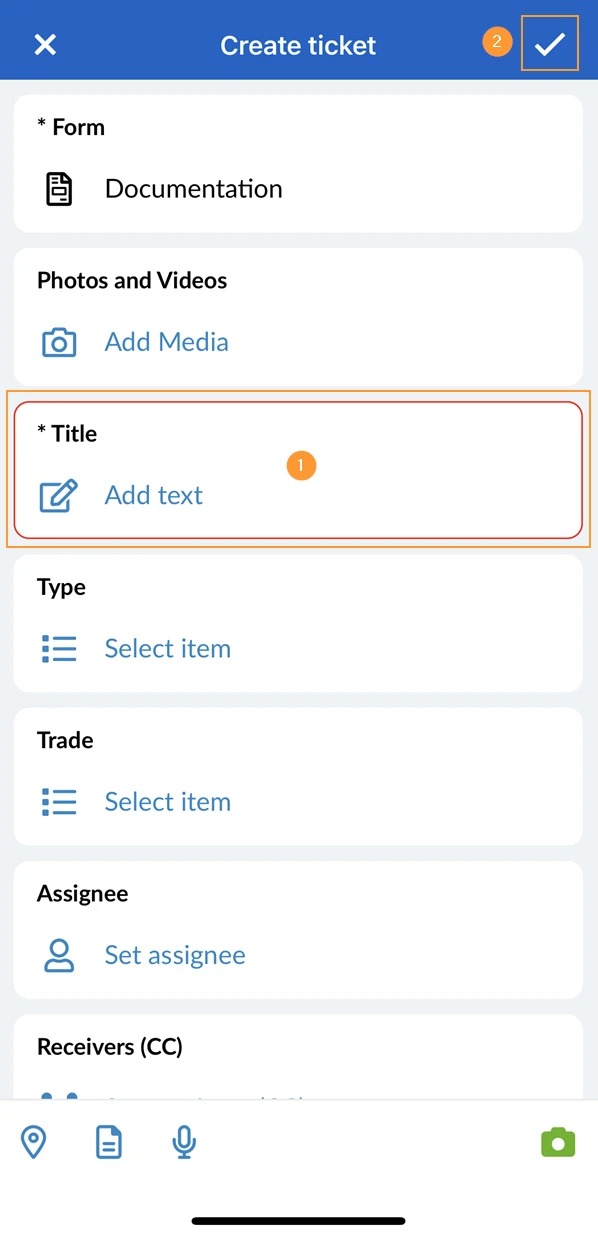
- Fill out all mandatory fields
- Click Save to save the ticket and close it
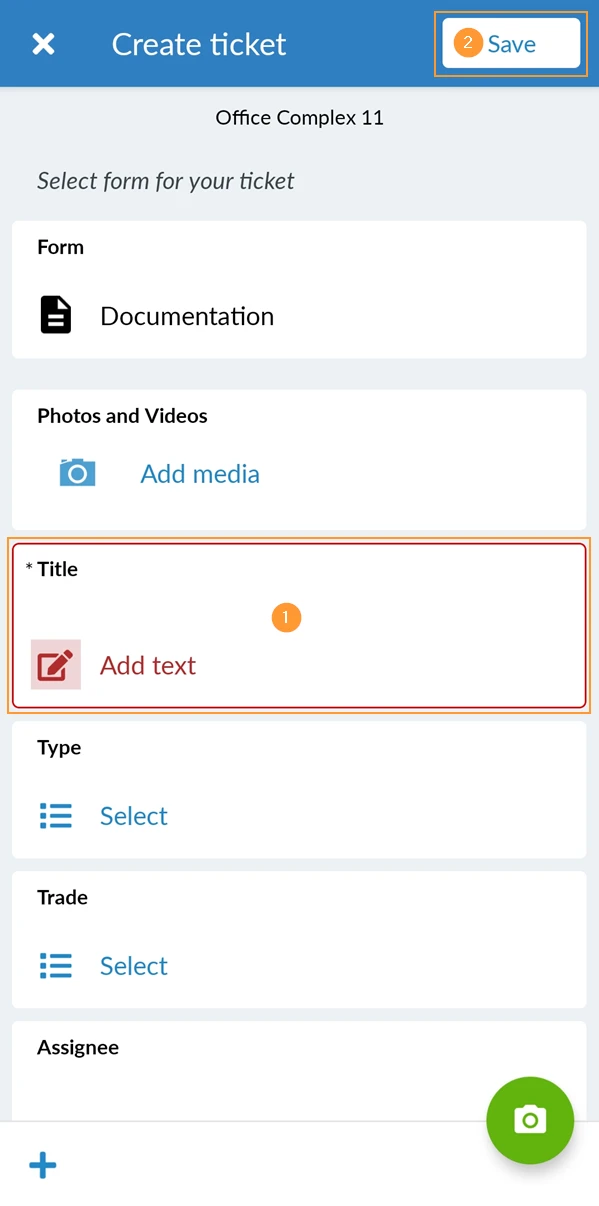
Once saved, tickets are instantly synced across devices if you are online.
Create Another Ticket in the Webapp
Use 'Create Another' to reuse the ticket fields from your previously created ticket in the Webapp.
Attachments, comments, plan position, GPS position and sub-tickets are NOT included.
-
Select the Create another check box.
-
Click Save and a new ticket will open with the same fields prefilled.
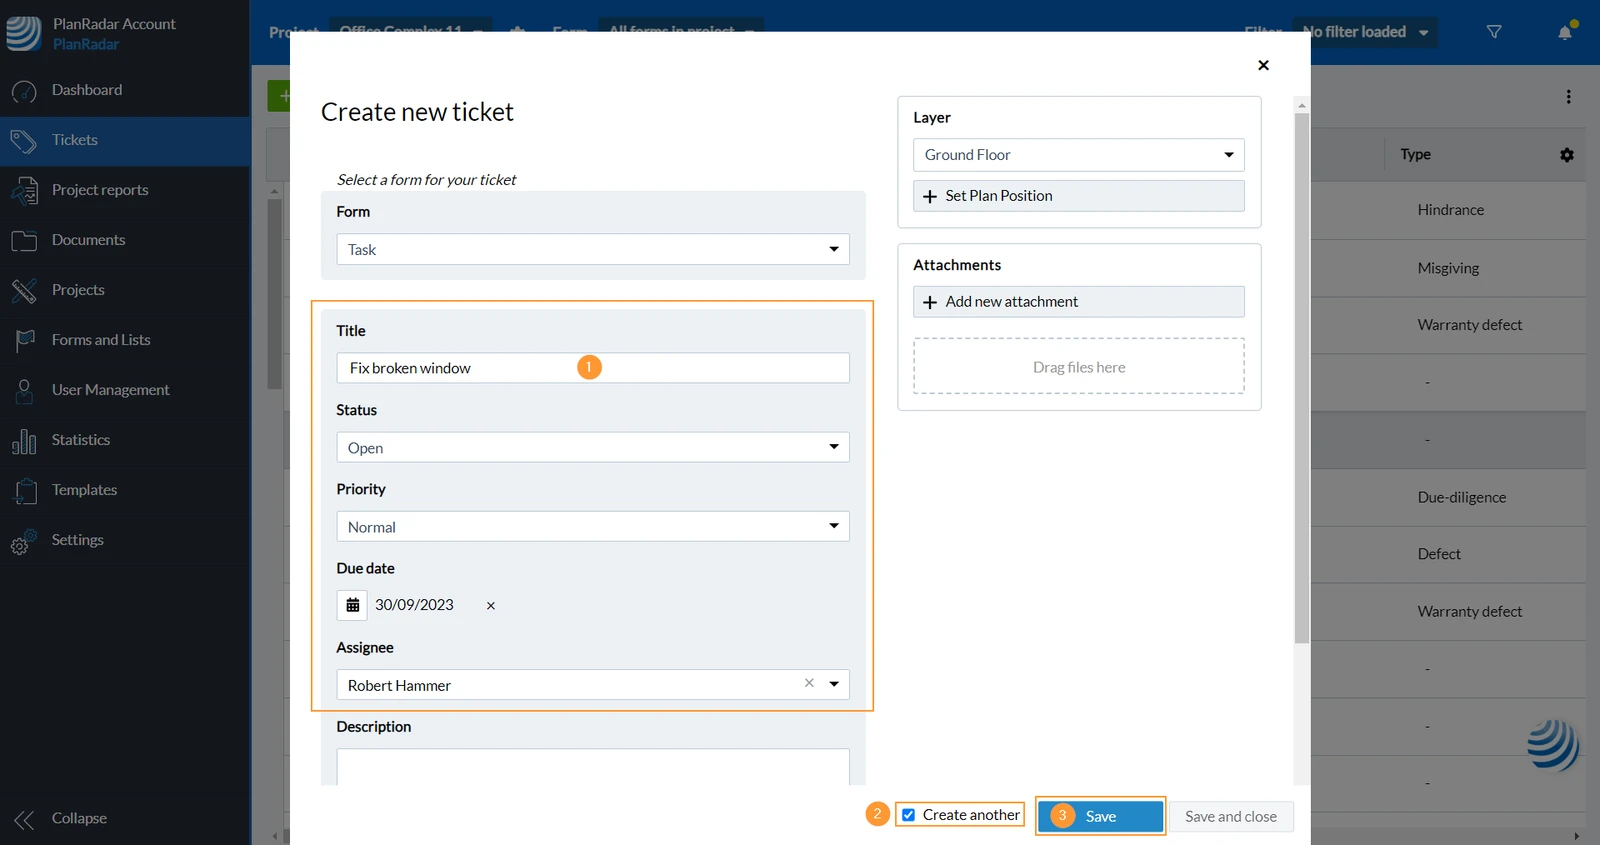
-
Fill your ticket and click Save.
Updated September 3, 2026