

 Deutsch
 Español
 Français
 Hrvatski
 Italiano
 Polski
 Português (BR)
Edit Field Properties
Overview
When you Create and Edit Forms, you can configure field properties to define how each field behaves, for example by making fields mandatory, assigning default lists, or setting default values. Available properties depend on the field type.
- Default properties can be overwritten per project.
- Global properties cannot be overwritten per project.
Access & Permissions
How to access Field Properties
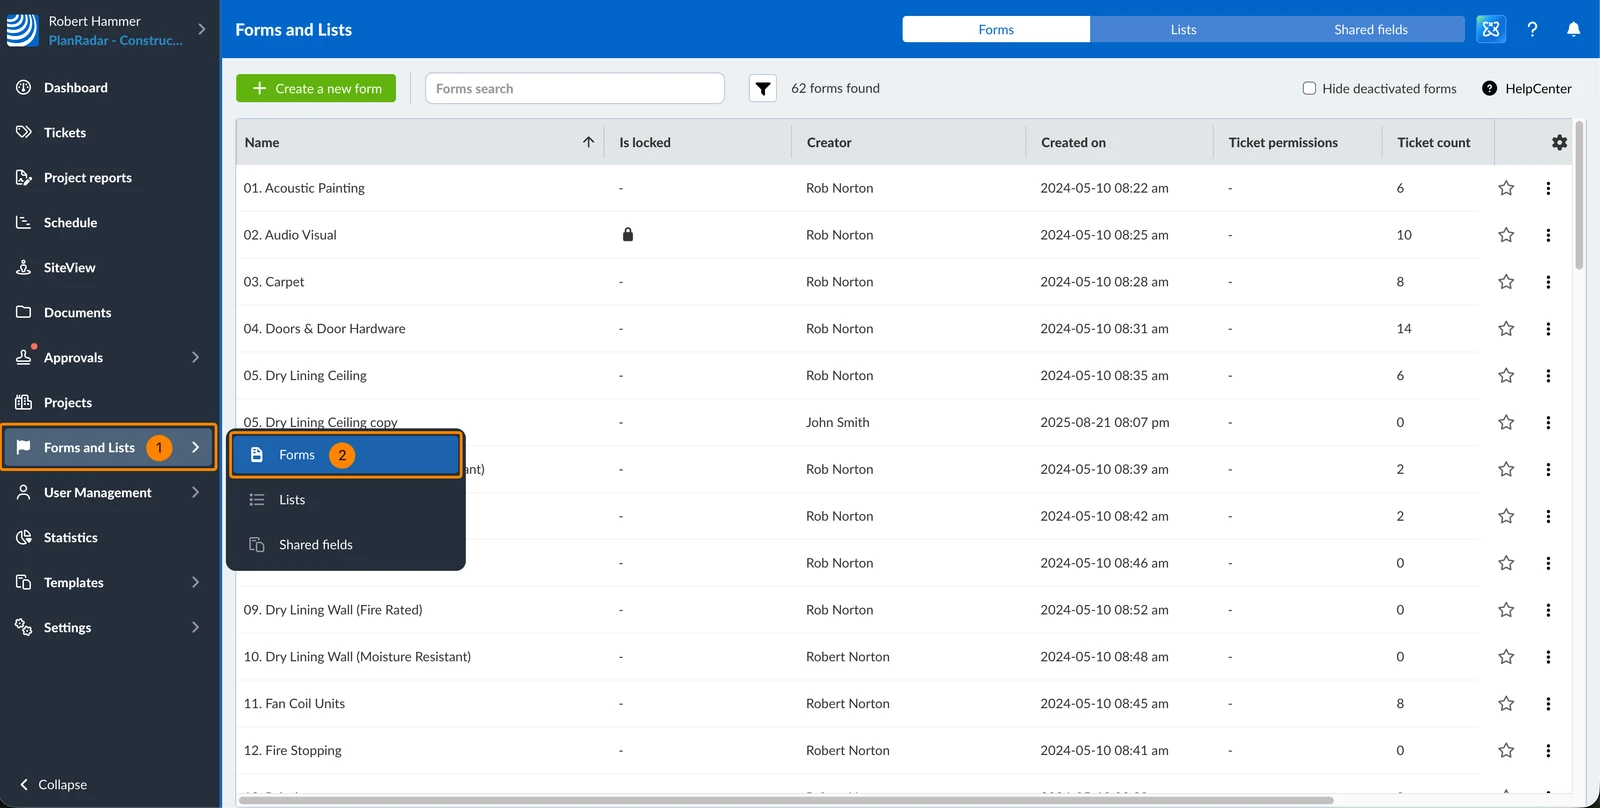
- Click Forms and Lists.
- Click Forms
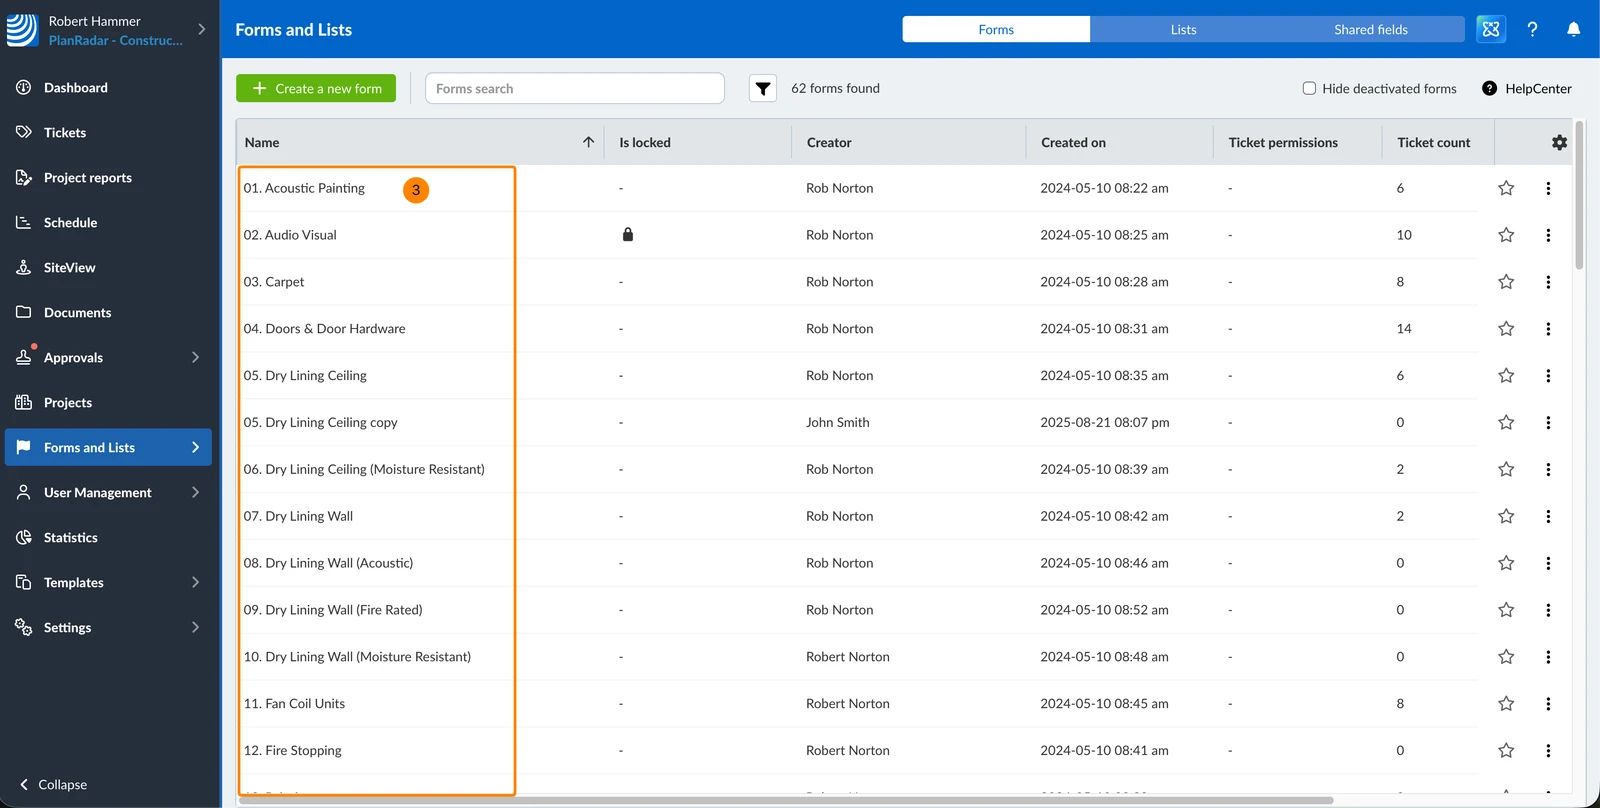
- Click a form (or continue while creating a new form).
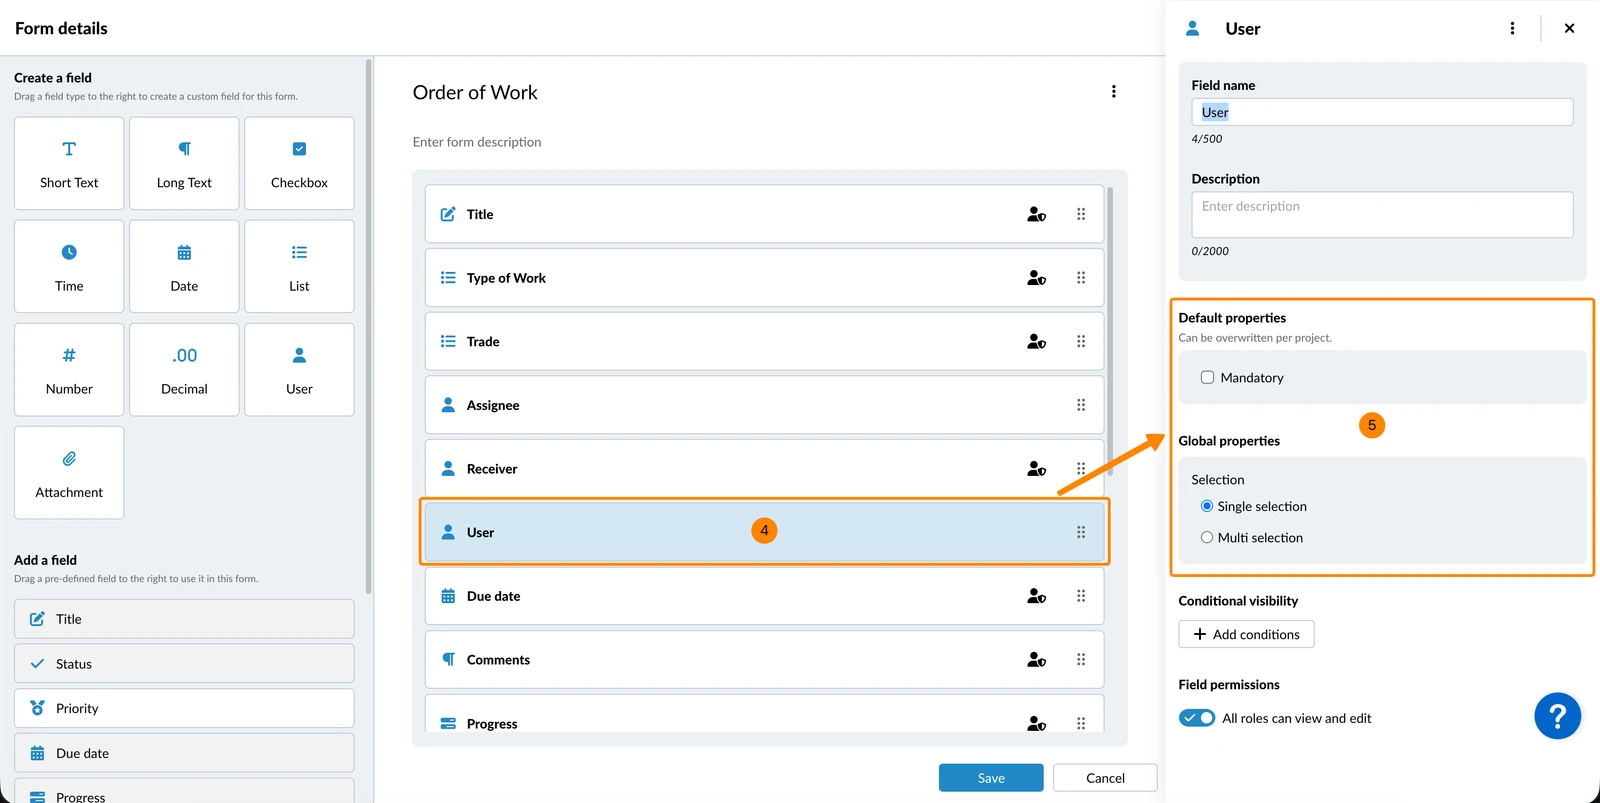
- Click a field (or continue after adding one).
- View and edit the field properties in the right-hand panel.
Default Properties
Make a Field Mandatory
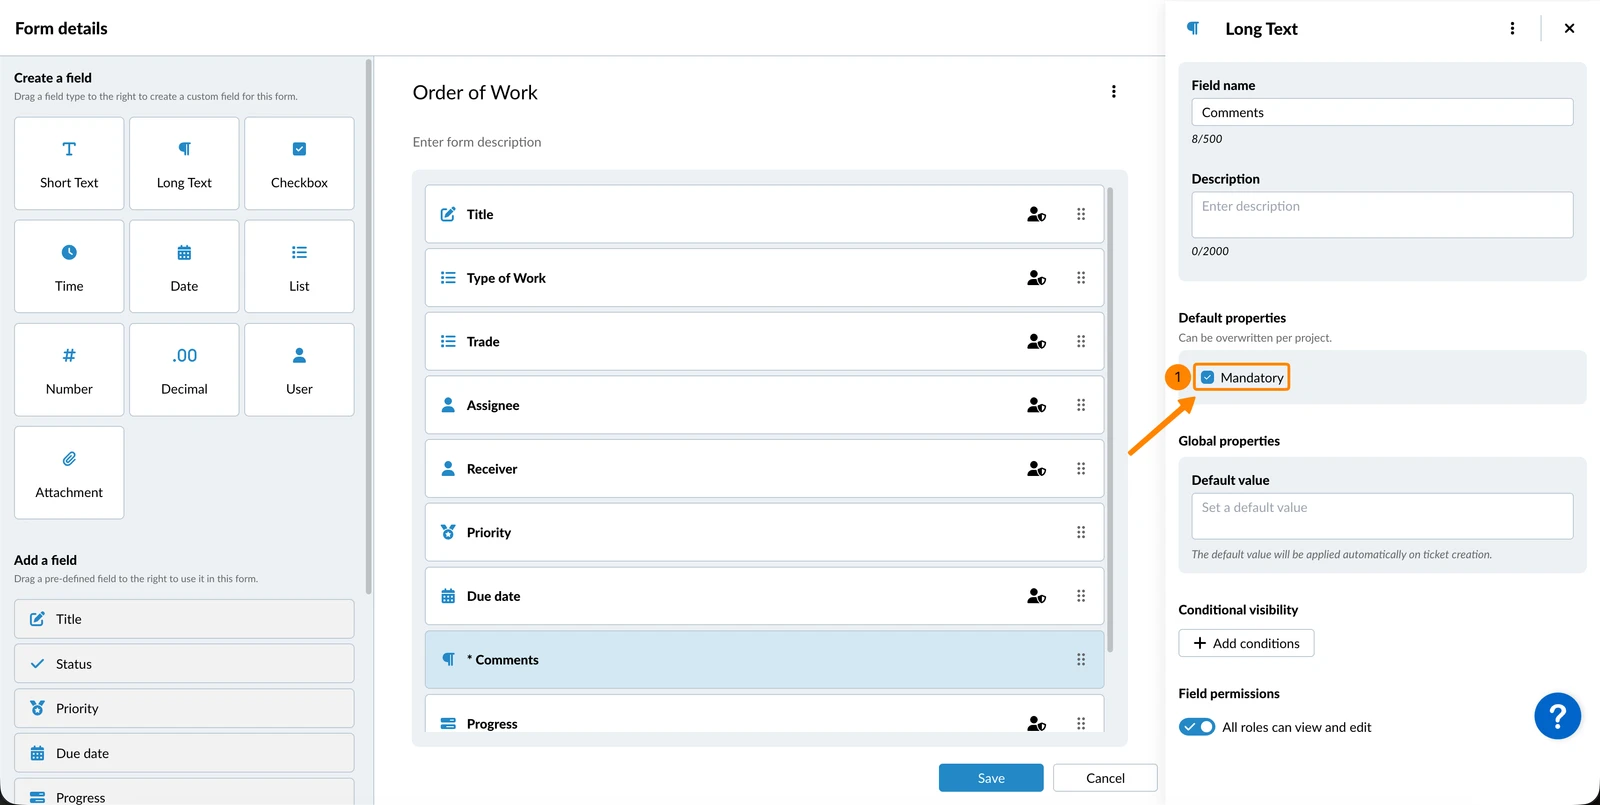
Mandatory fields must contain a value before a ticket can be saved.
To make a field mandatory:
- Select the Mandatory checkbox
Assign a Default List
After adding a custom list field, you can assign a default list to it. Only global lists can be assigned here. Project-specific lists can be assigned later when the form is added to a project. Read more in Lists.
To assign a default list:
- Select a Default list from the drop-down menu (for example, Type of Work).
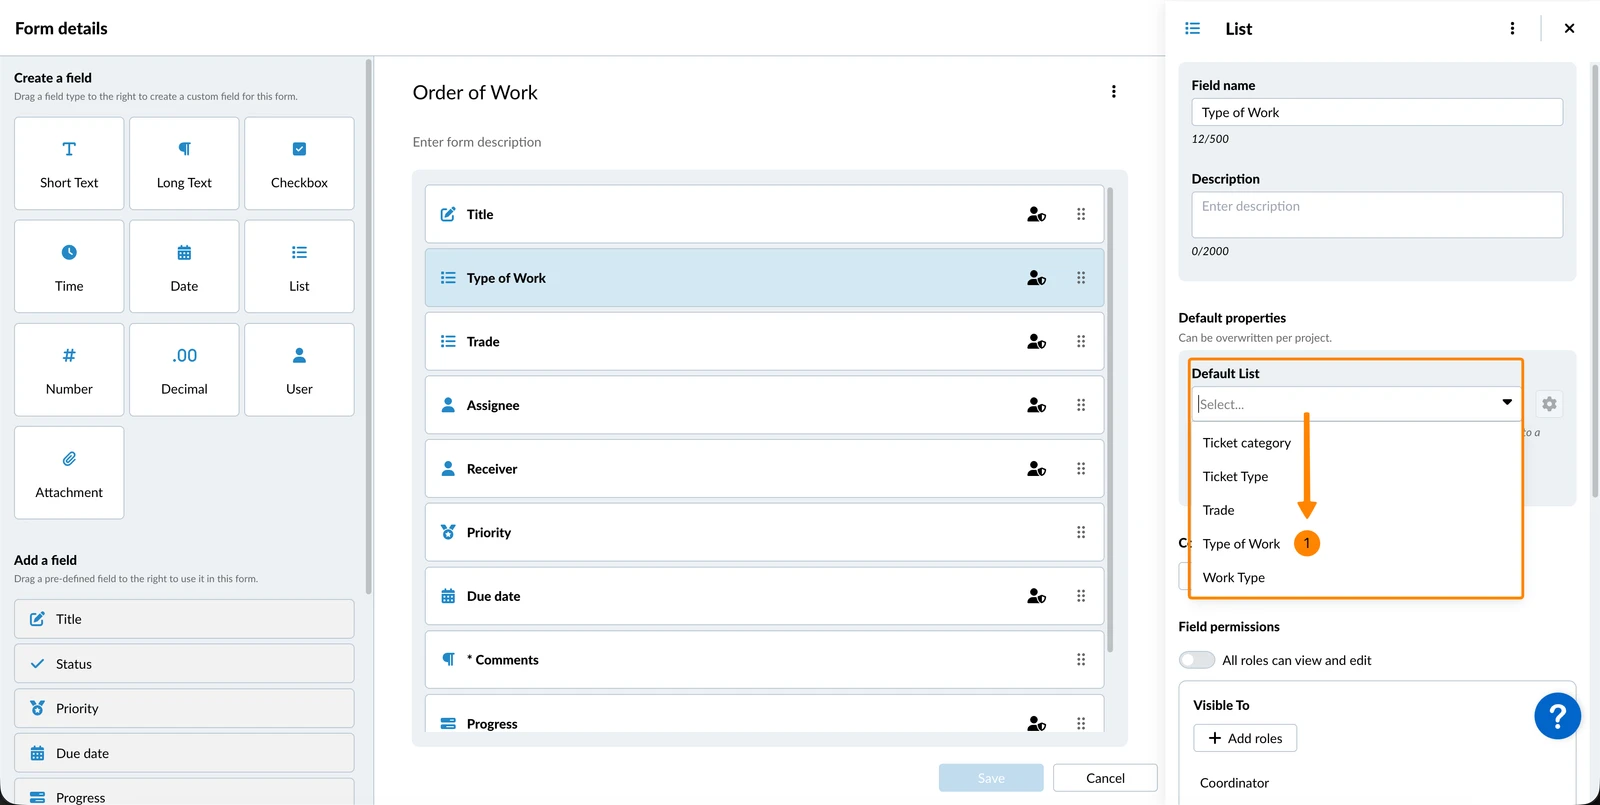
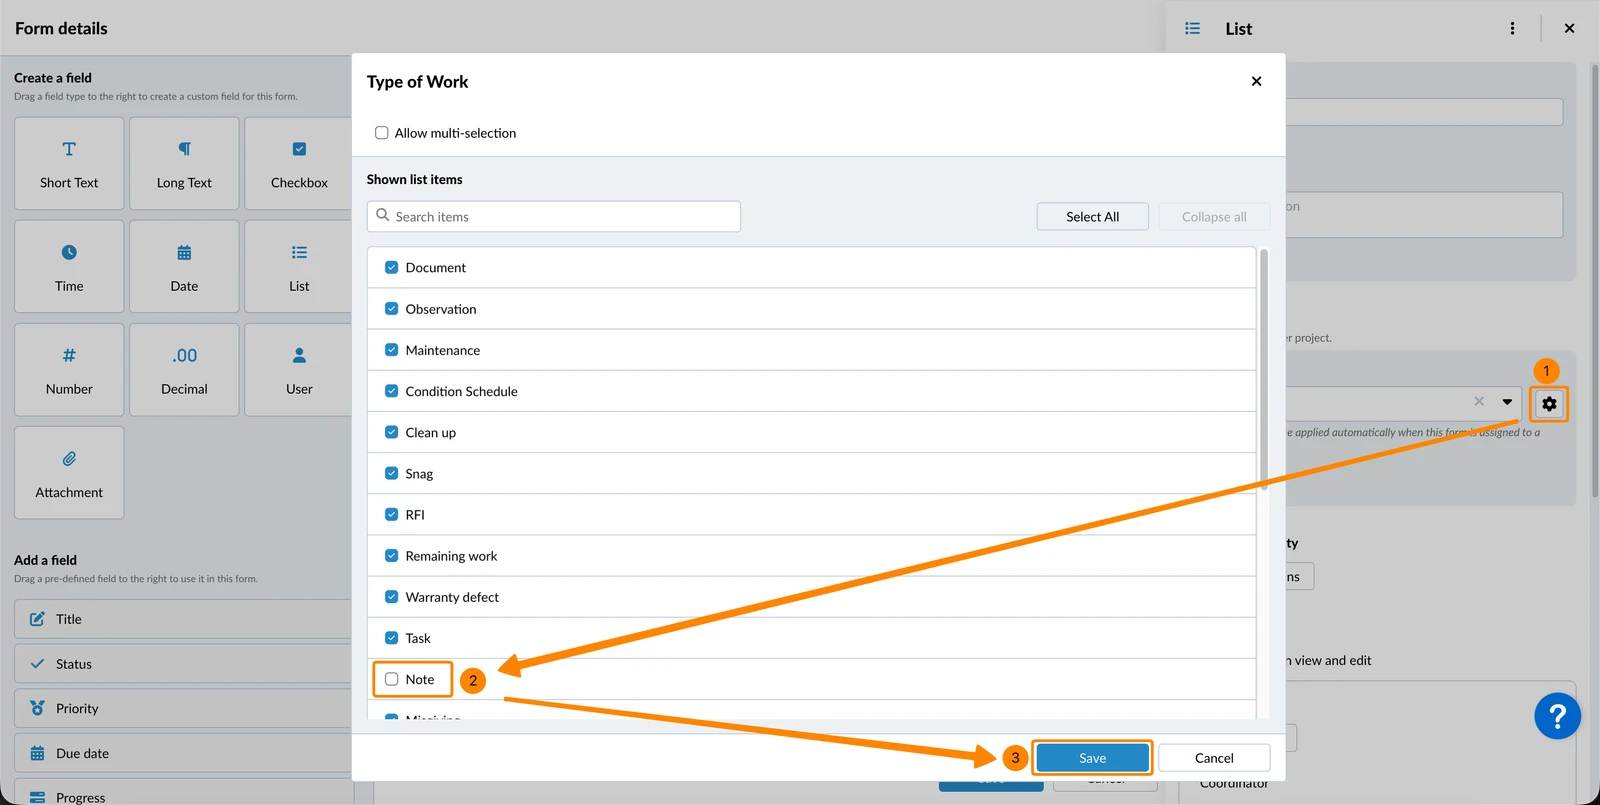
To disable values in the list:
- Click the Settings icon
- Clear the checkbox(es) for the value(s) you want to disable.
- Click Save
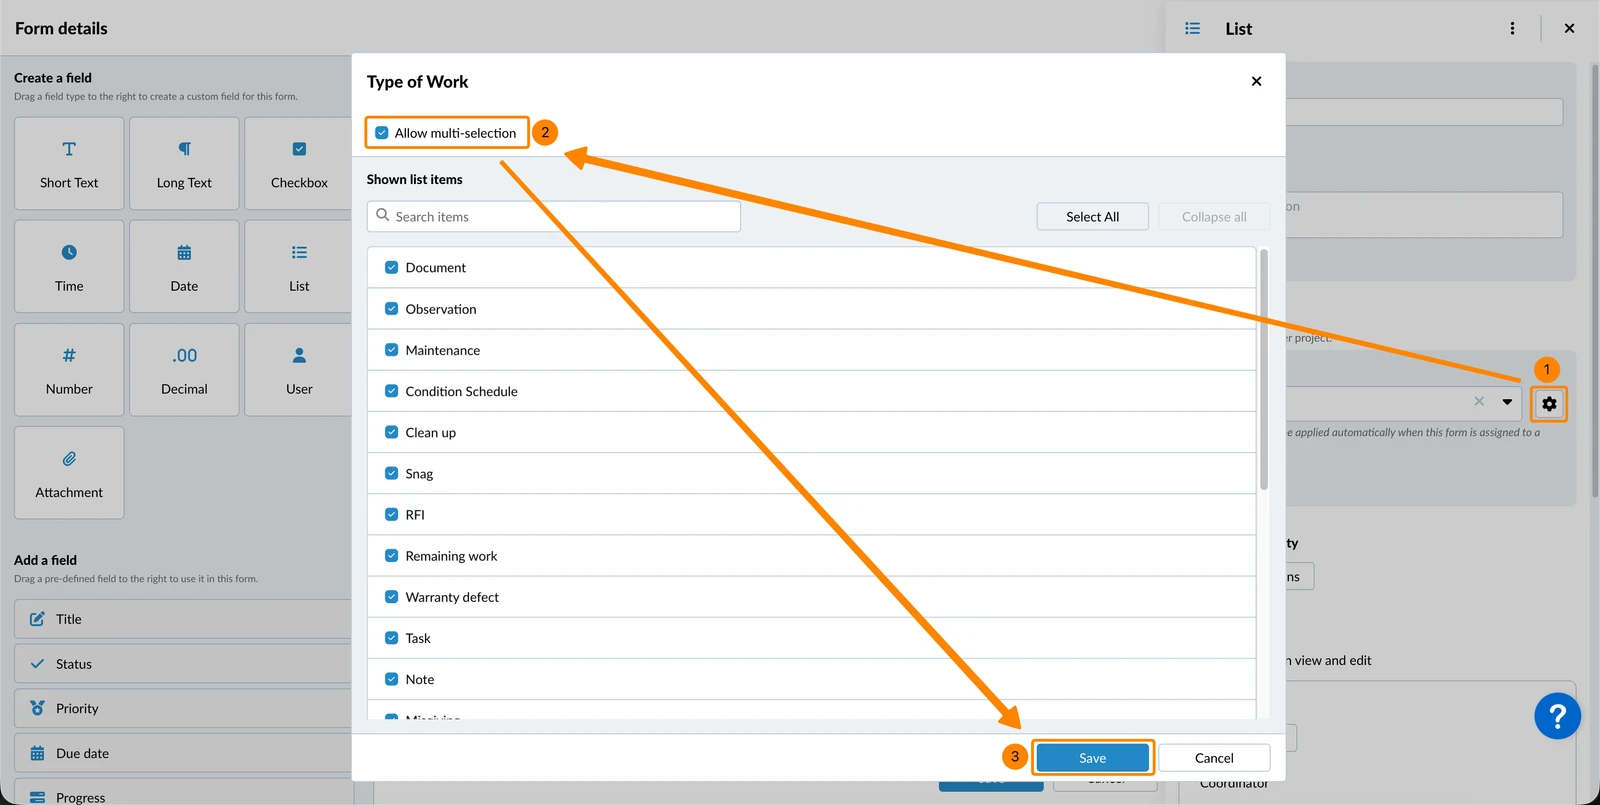
To allow multiple values to be selected for this list field:
- Click the Settings icon
- Select the Allow multi-selection checkbox
- Click Save
Global Properties
Set a Default Value
To set a default value for a field:
- Enter a Default value
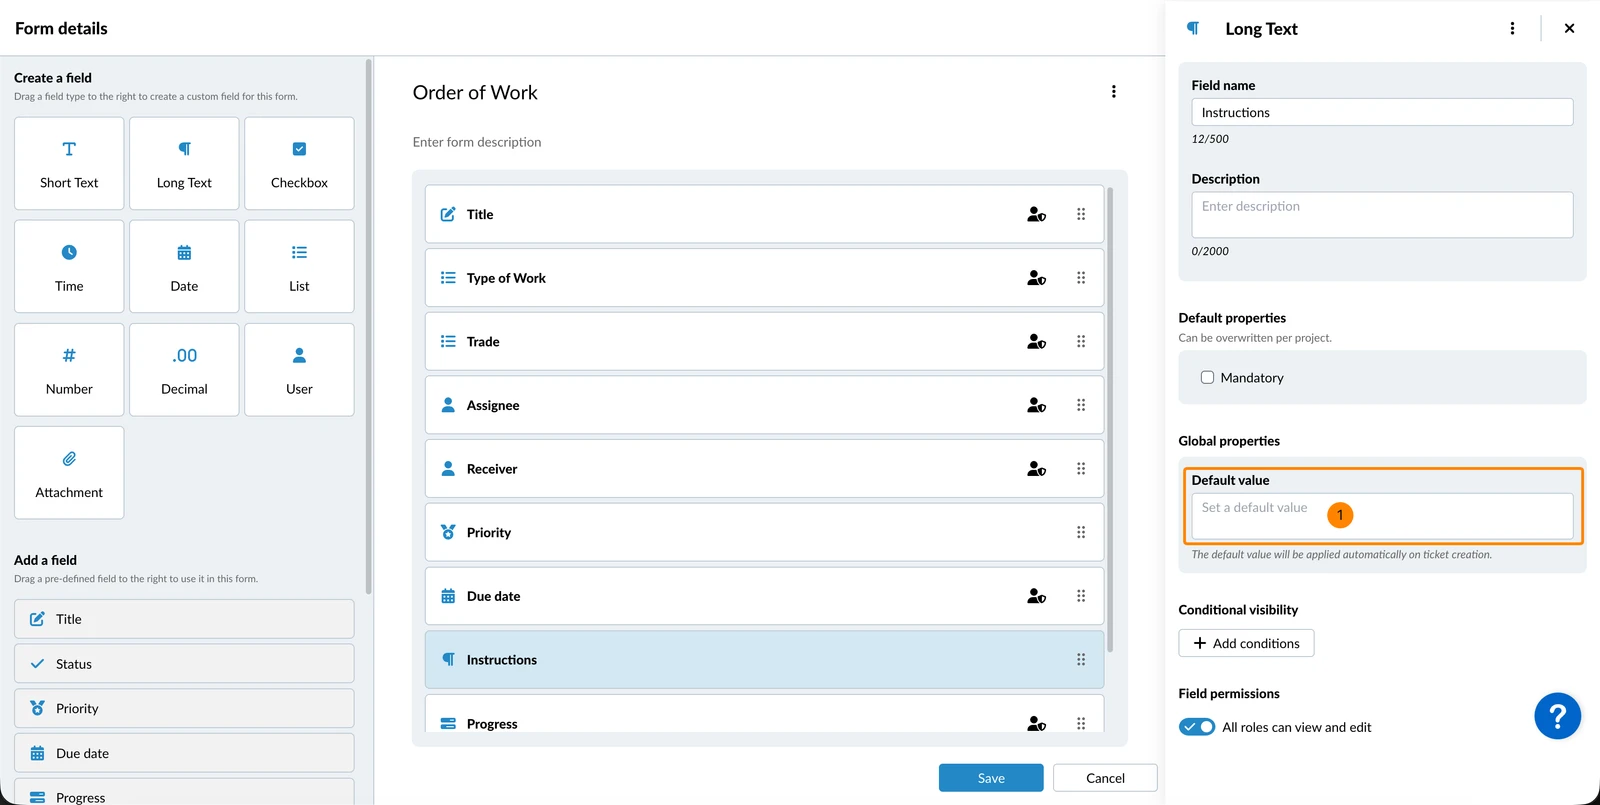
Depending on the field type, this may be a date picker, a drop-down list, or a checkbox.
Fields that allow default values:
Title, Status, Priority, Progress, Short text, Long text, Checkbox, Time, Date, Number, Decimal, List
Fields that do not allow default values:
Due date, Extension date, Parent ticket, Receiver (CC), Assignee, User, Attachment, Checklist
Default Values for List Fields
You can set a default value for a list field once a default list has been assigned to it, as described in Assign a Default List above. Only values from that list can be chosen.
For a single-select list field, choose one Default value. For a multi-select list field, choose one or more Default values. For a multi-level list, only end values can be chosen; when a ticket is created, the list expands to show the full path to the default value.
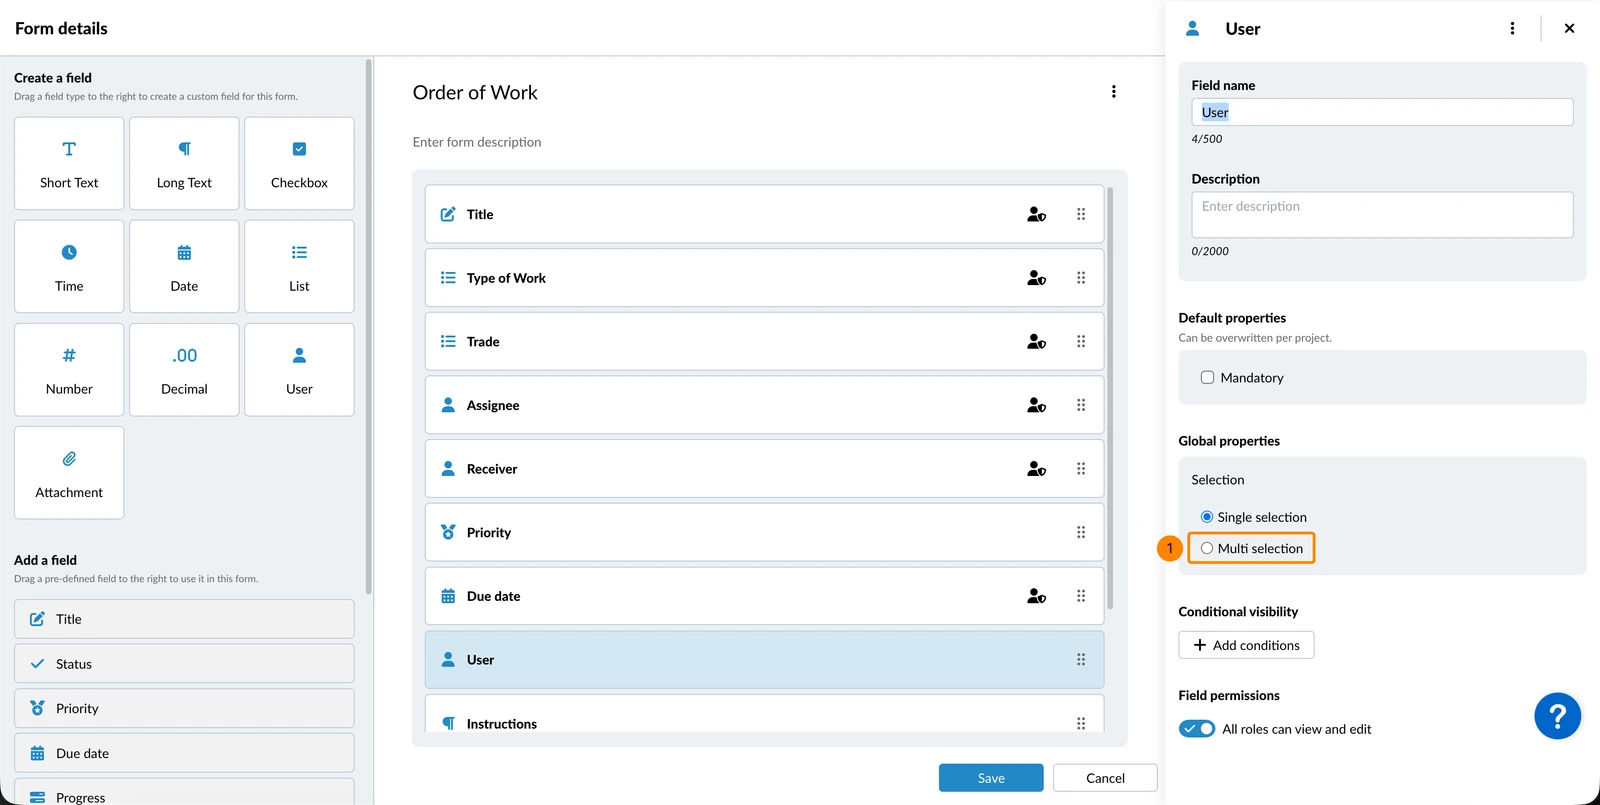
Allow Single or Multiple User Selection
After adding a user field, you can allow the selection of multiple users in the ticket.
- Select Multi-selection
Edit Maximum Number of Attachments
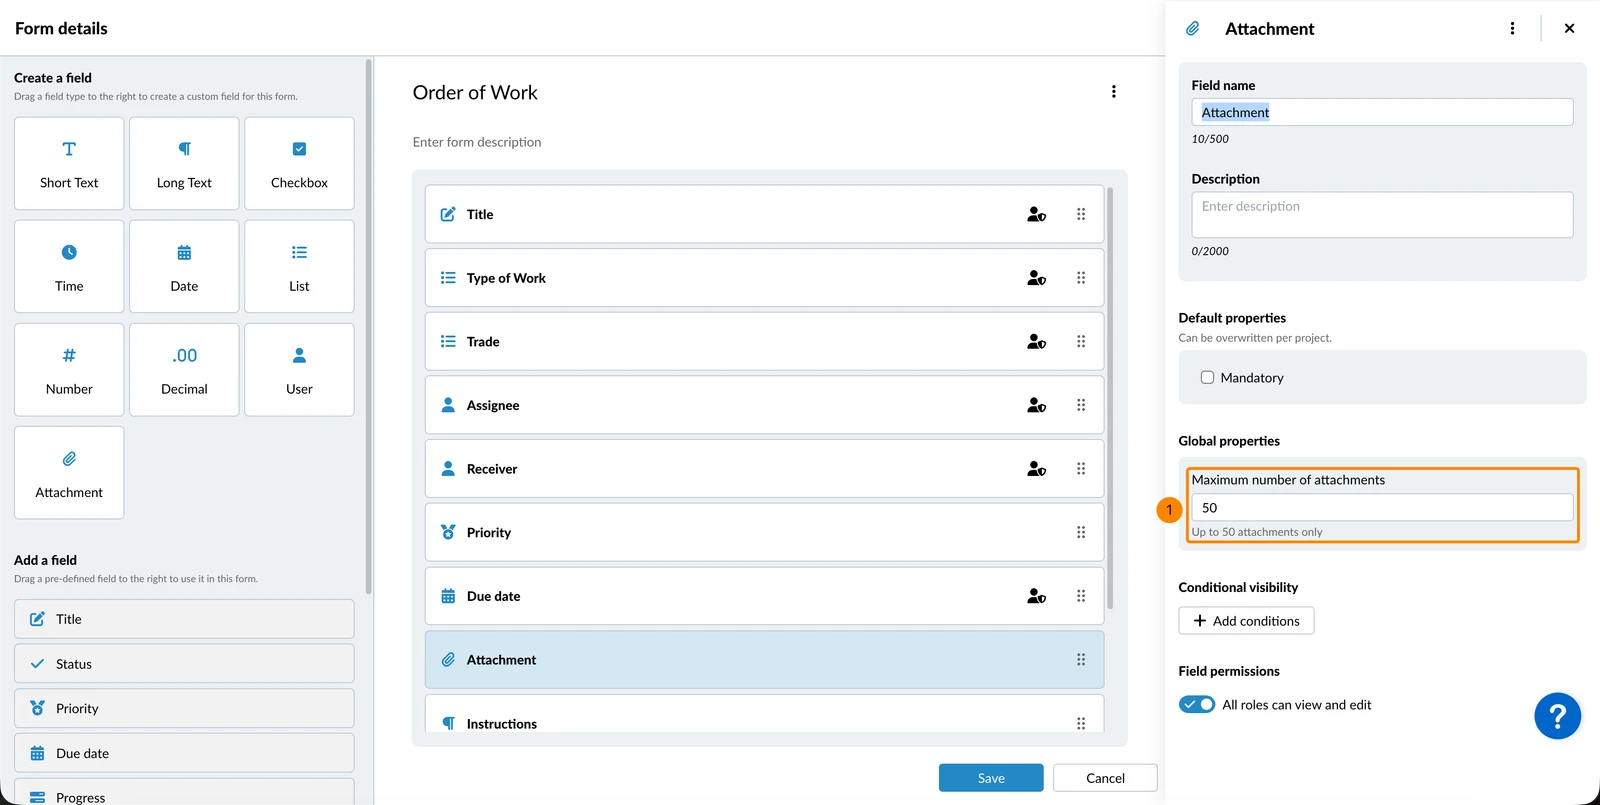
By default, PlanRadar allows up to 50 attachments per attachment field or per checklist field.
To reduce this limit:
- Enter the desired value in Maximum number of attachments.
Checklist Field Properties
The Checklist field lets users record a response from a configurable set of predefined options — useful for inspections, quality checks, and compliance workflows. Read more in Field Types > Checklist Field.
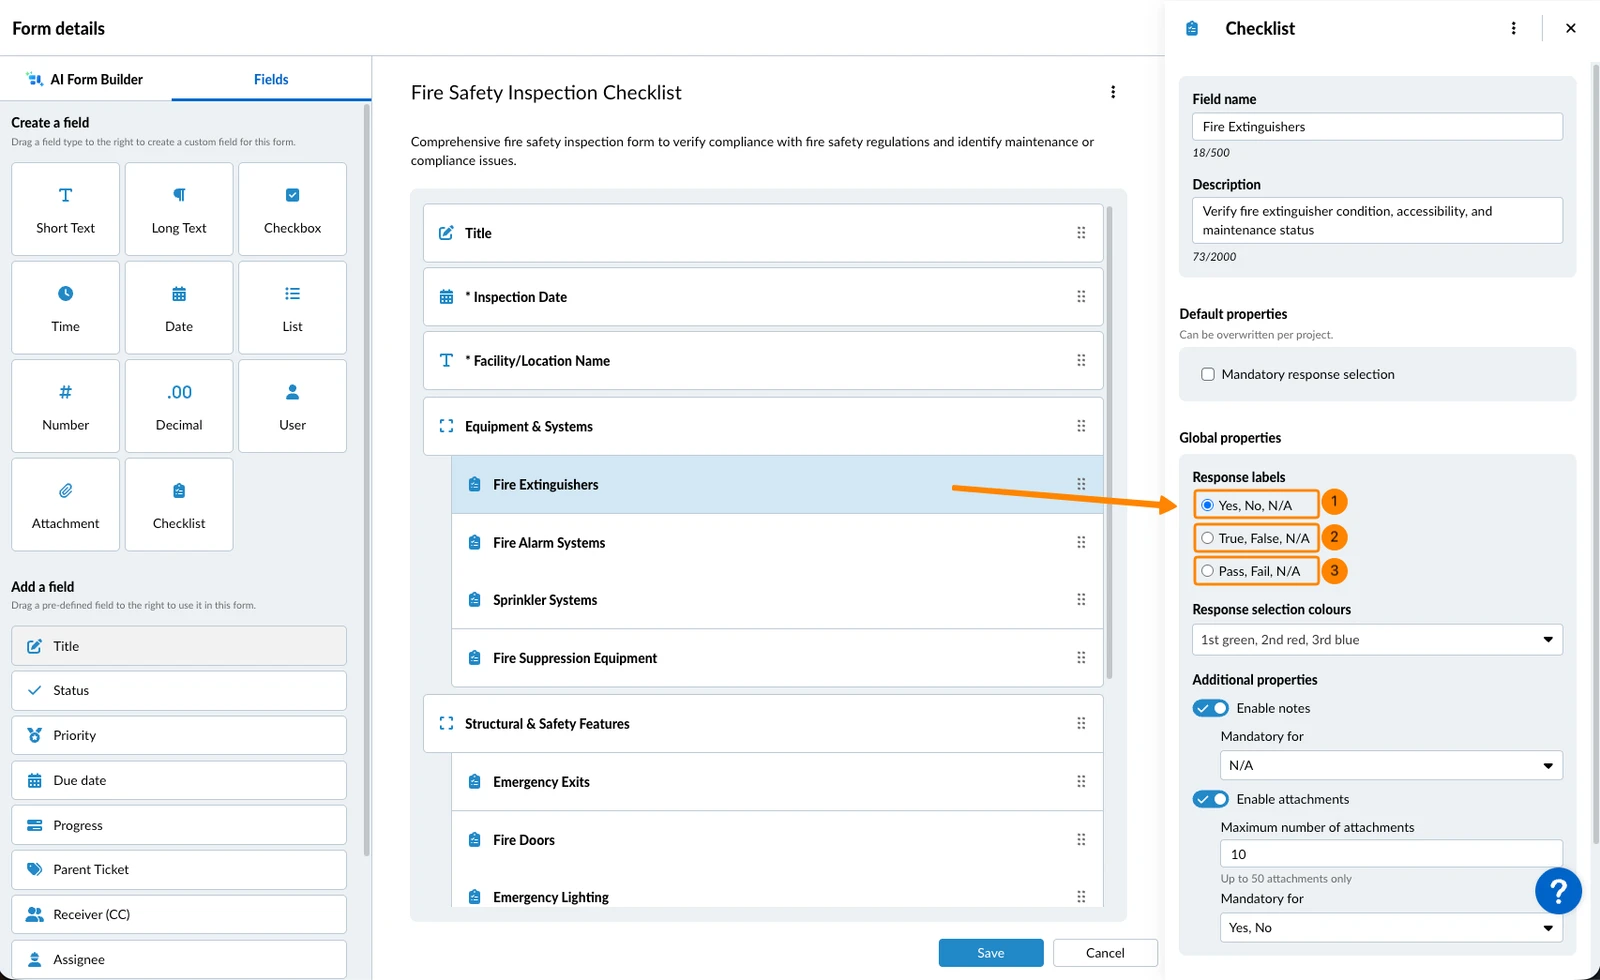
Response Labels and Colours
To select one of the three available sets of Response labels:
- Click Yes, No, N/A
- OR click True, False, N/A
- OR click Pass, Fail, N/A
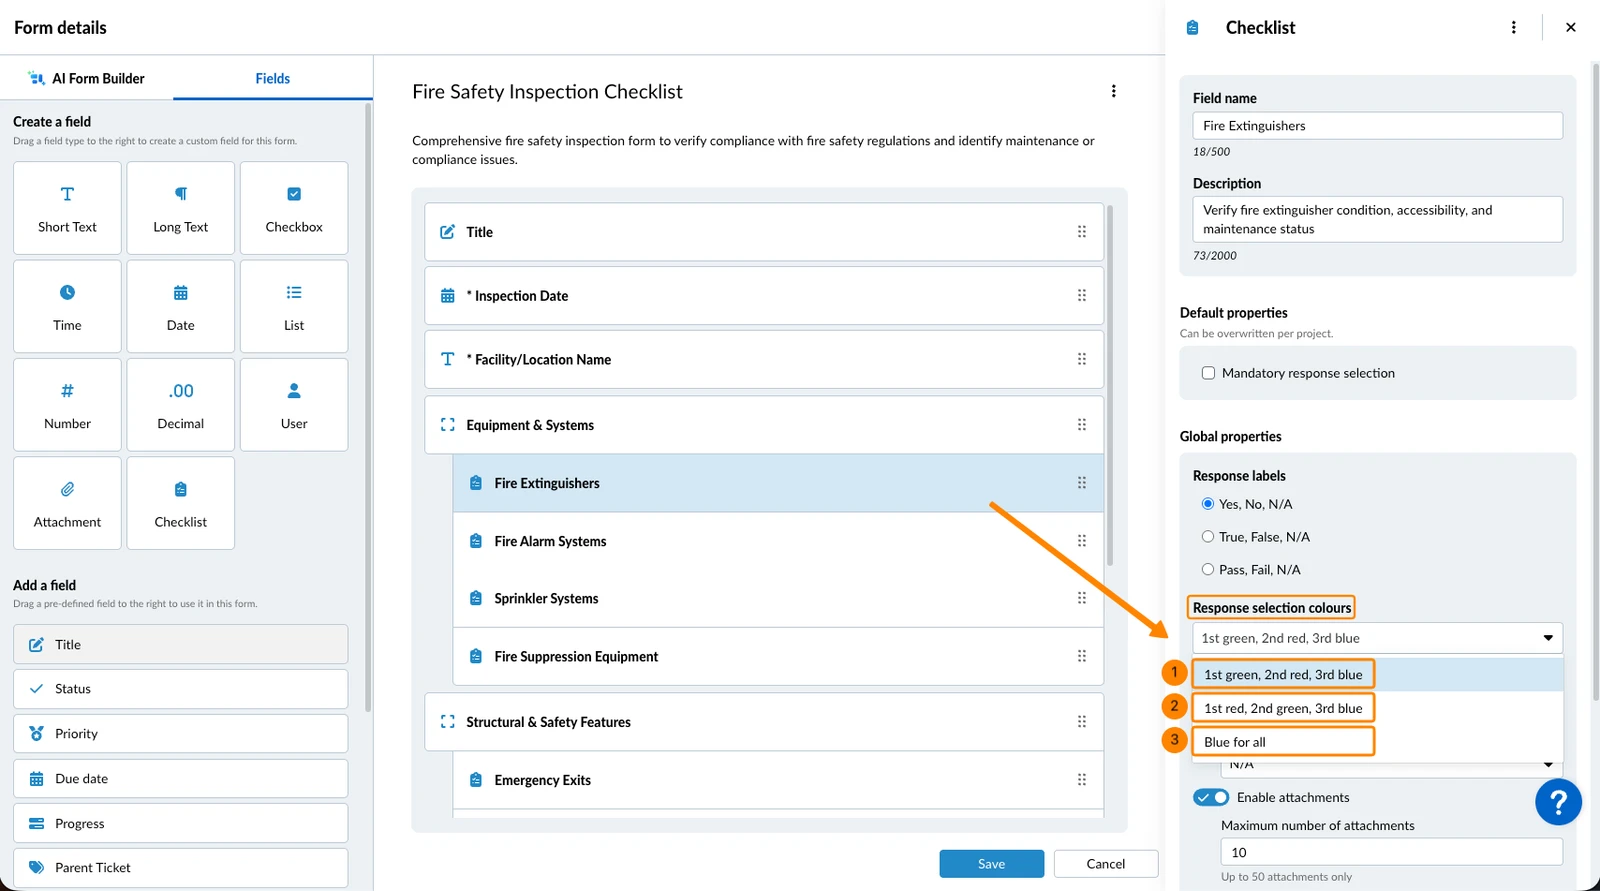
To select one of the three available sets of Response selection colours in the drop-down:
- Click 1st green, 2nd red, 3rd blue
- OR click 1st red, 2nd green, 3rd blue
- OR click Blue for all
Notes
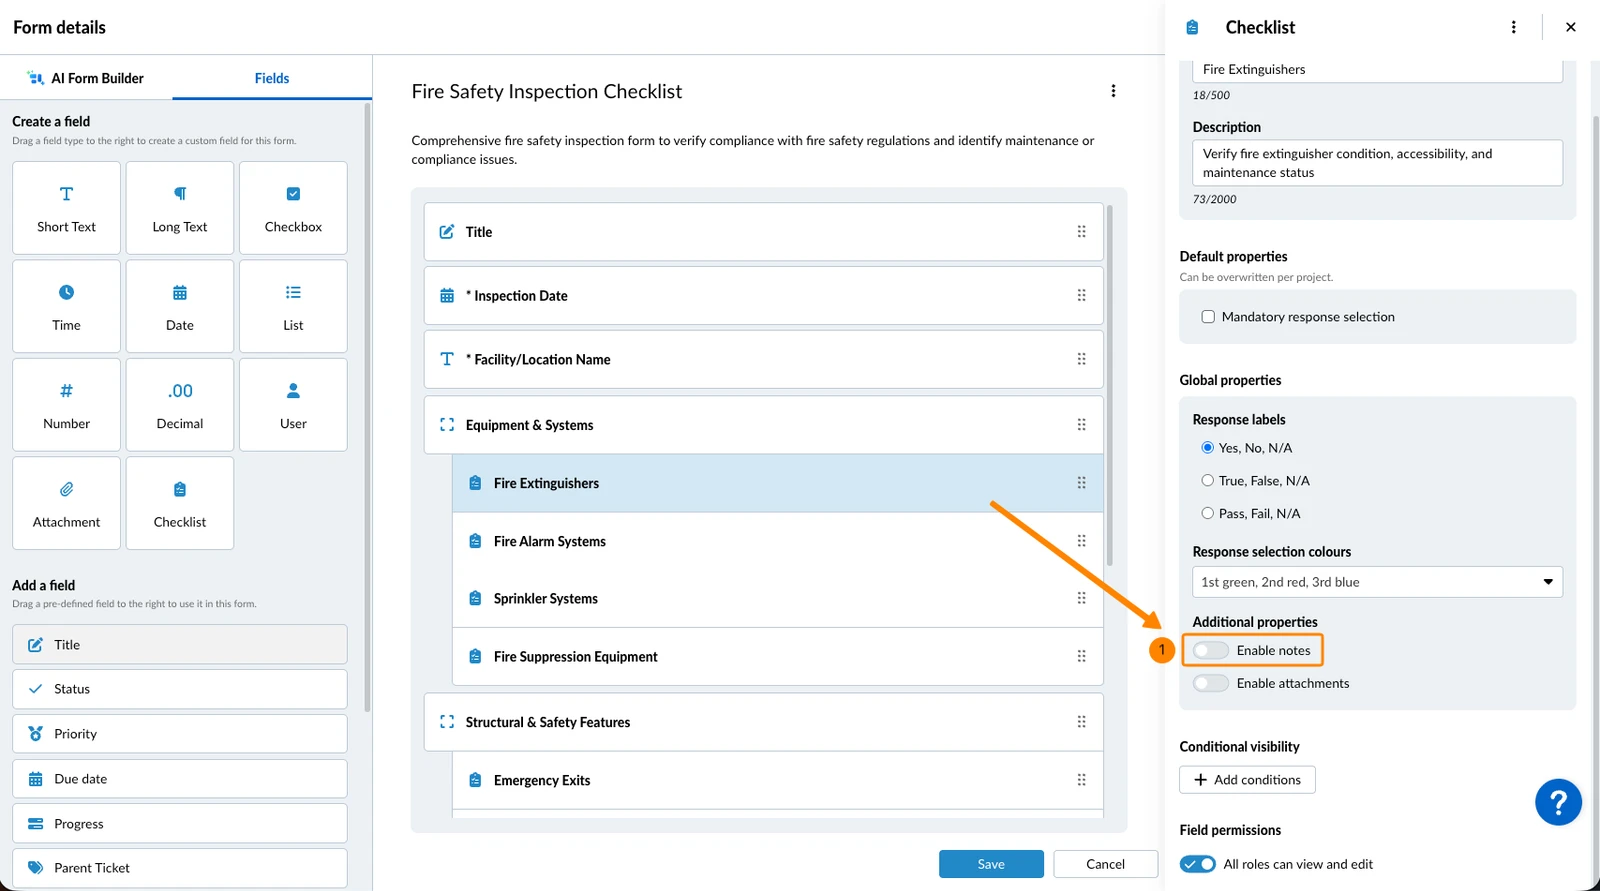
To allow users to enter a note under the response:
- Activate the Enable notes toggle
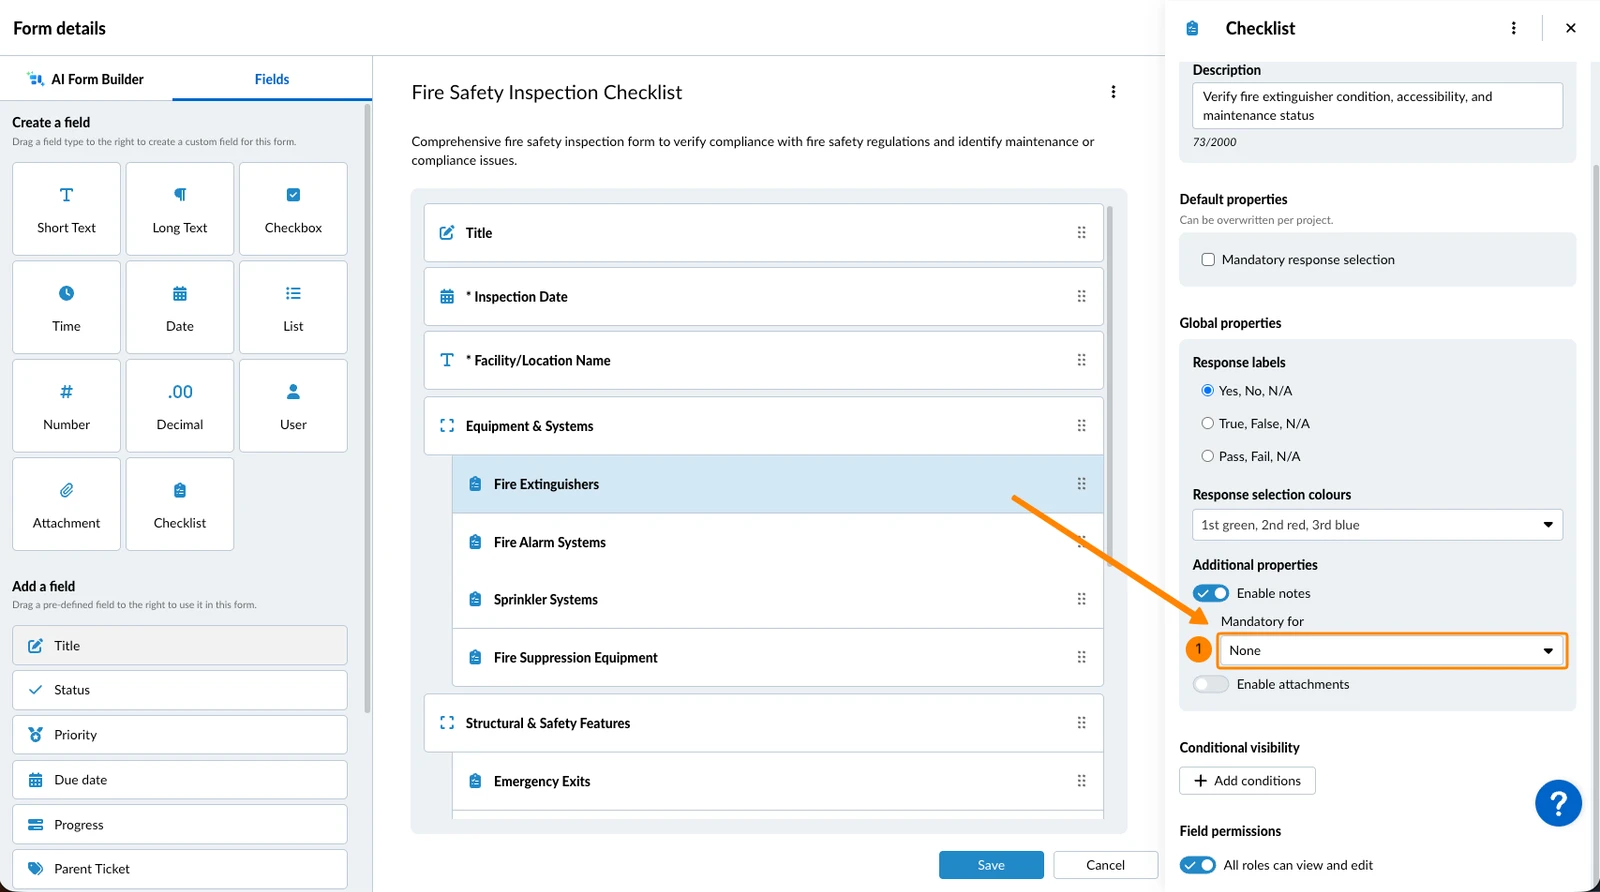
To make entering a note mandatory based on one or more responses:
- Click the Mandatory for drop-down
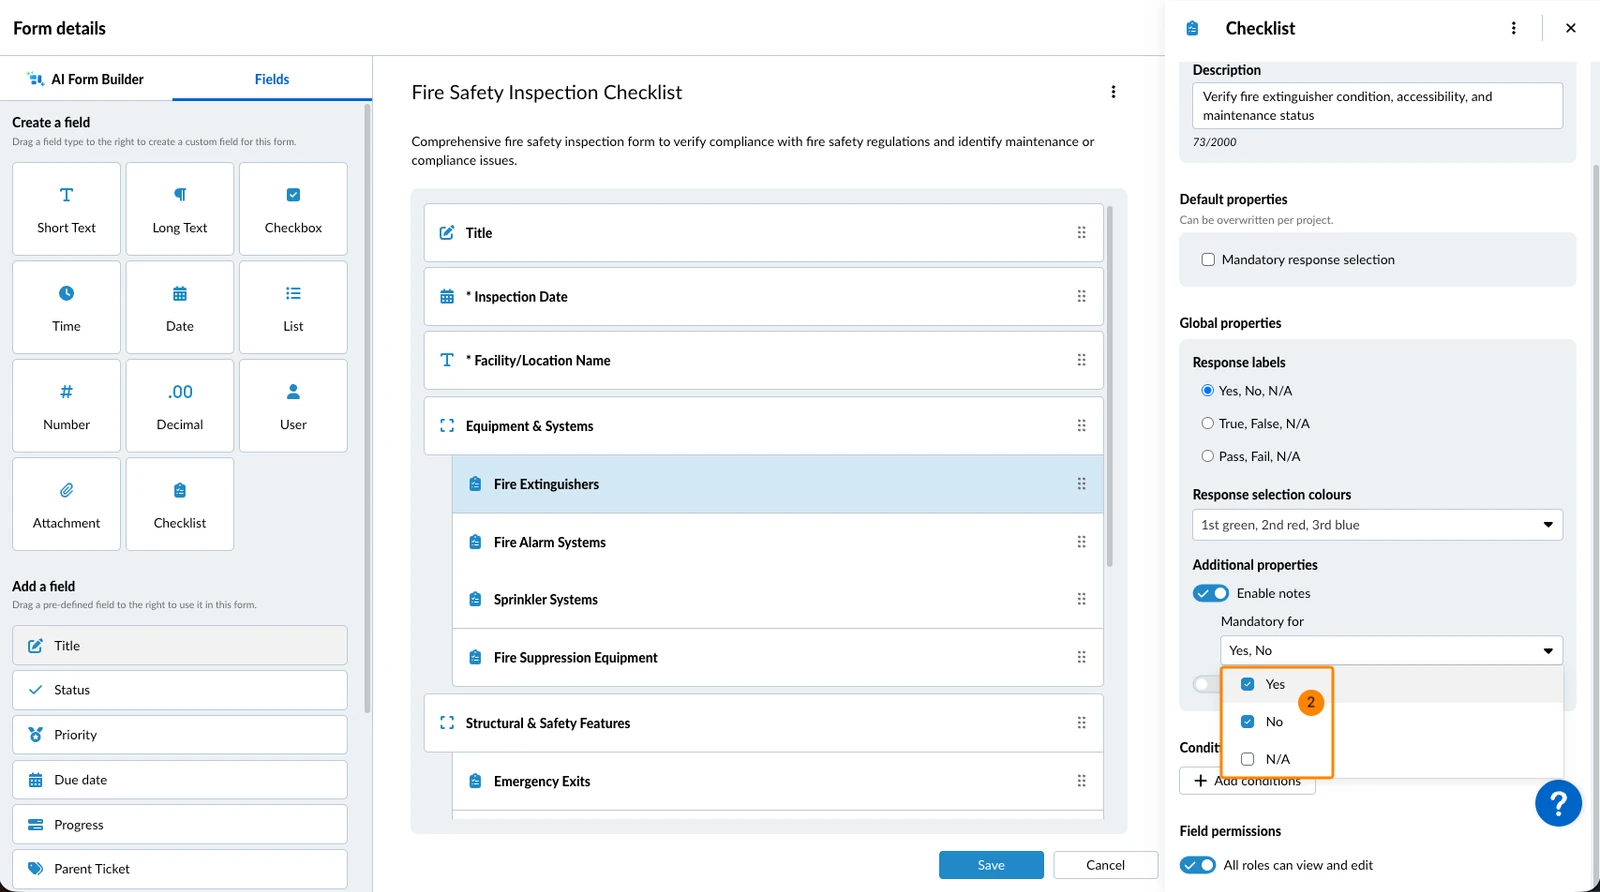
- Select the response(s) e.g. Yes, No, N/A (they match the response labels of the field)
Attachments
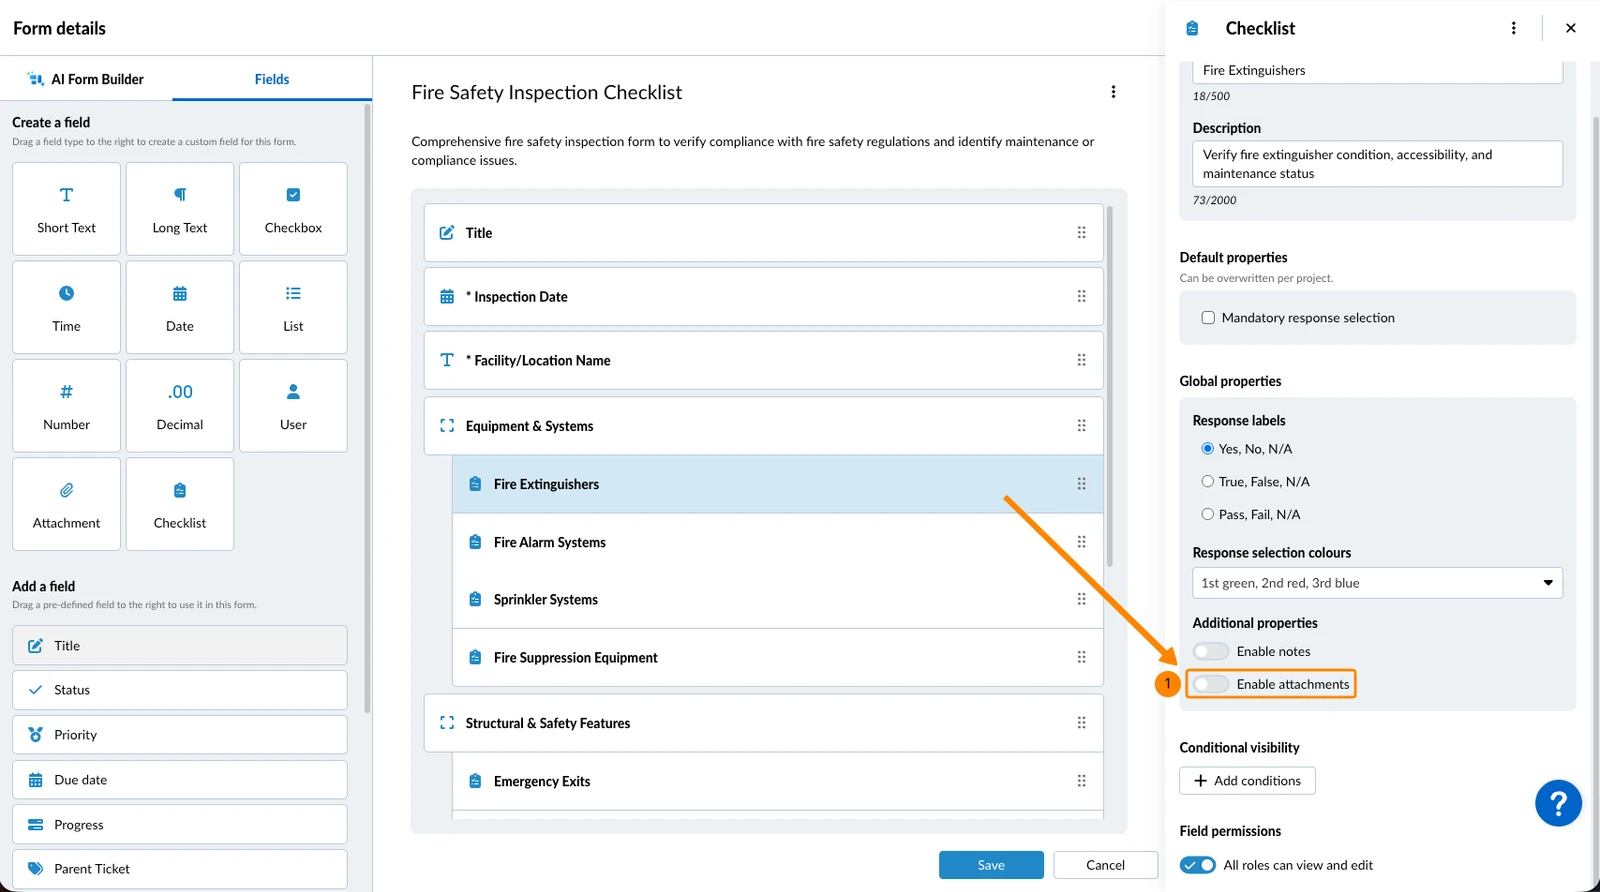
To allow users to add attachments to the checklist field:
- Activate the Enable attachments toggle
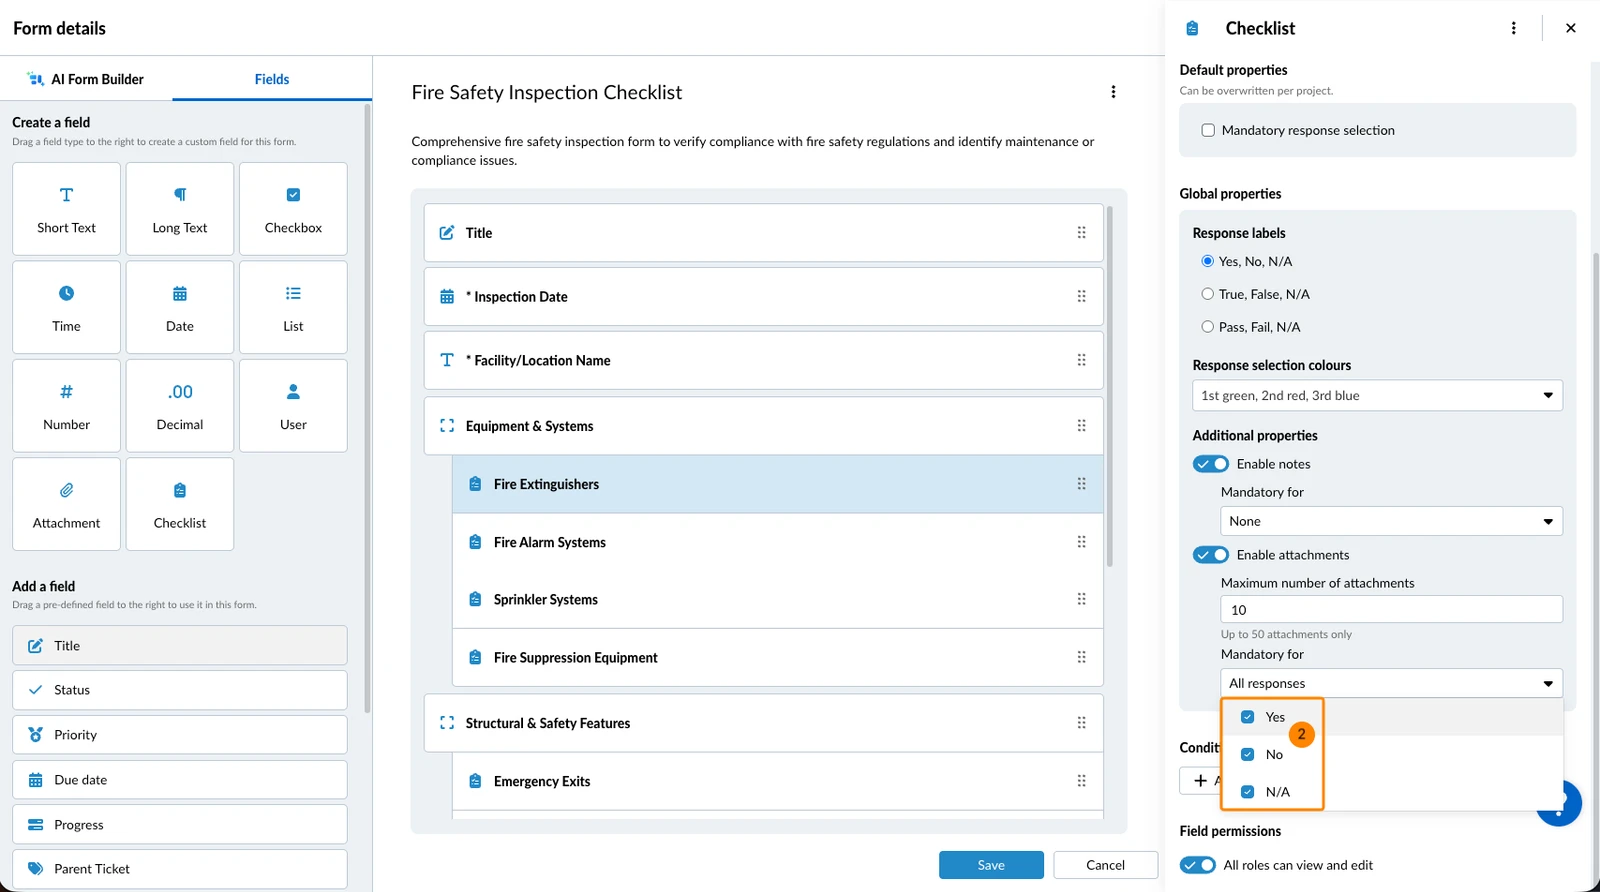
To make adding an attachment mandatory based on one or more responses:
- Click the Mandatory for drop-down
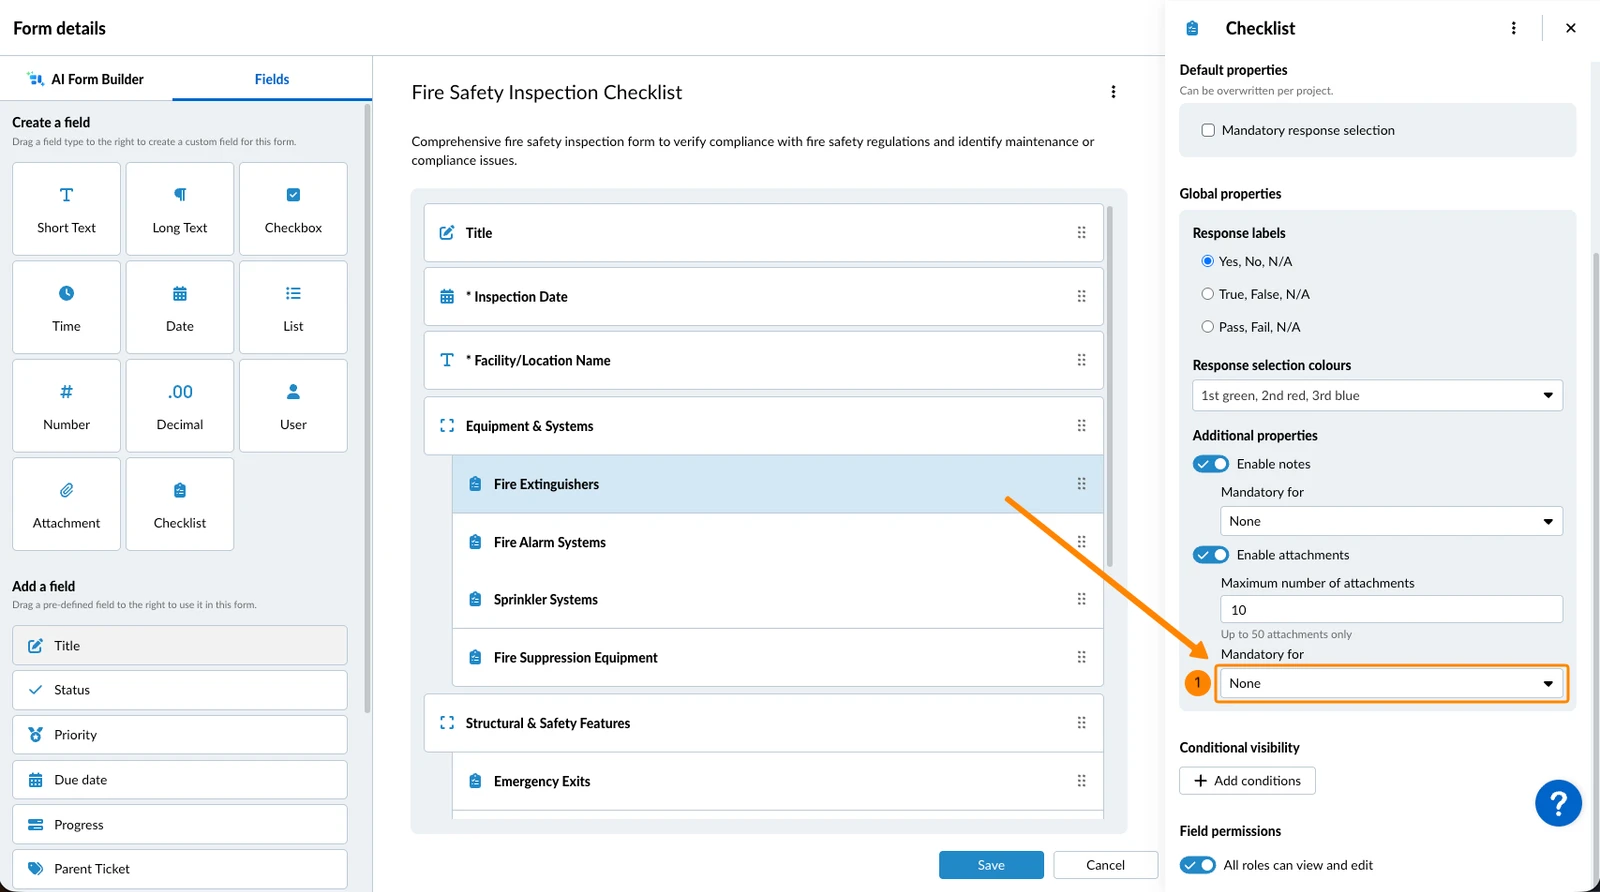
- Select the response(s) e.g. Yes, No, N/A (they match the response labels of the field)
Ticket Links
Ticket links let users create a new ticket or link an existing one directly from a checklist field while they fill in the form. Read more in Use Linked Tickets in Checklists.
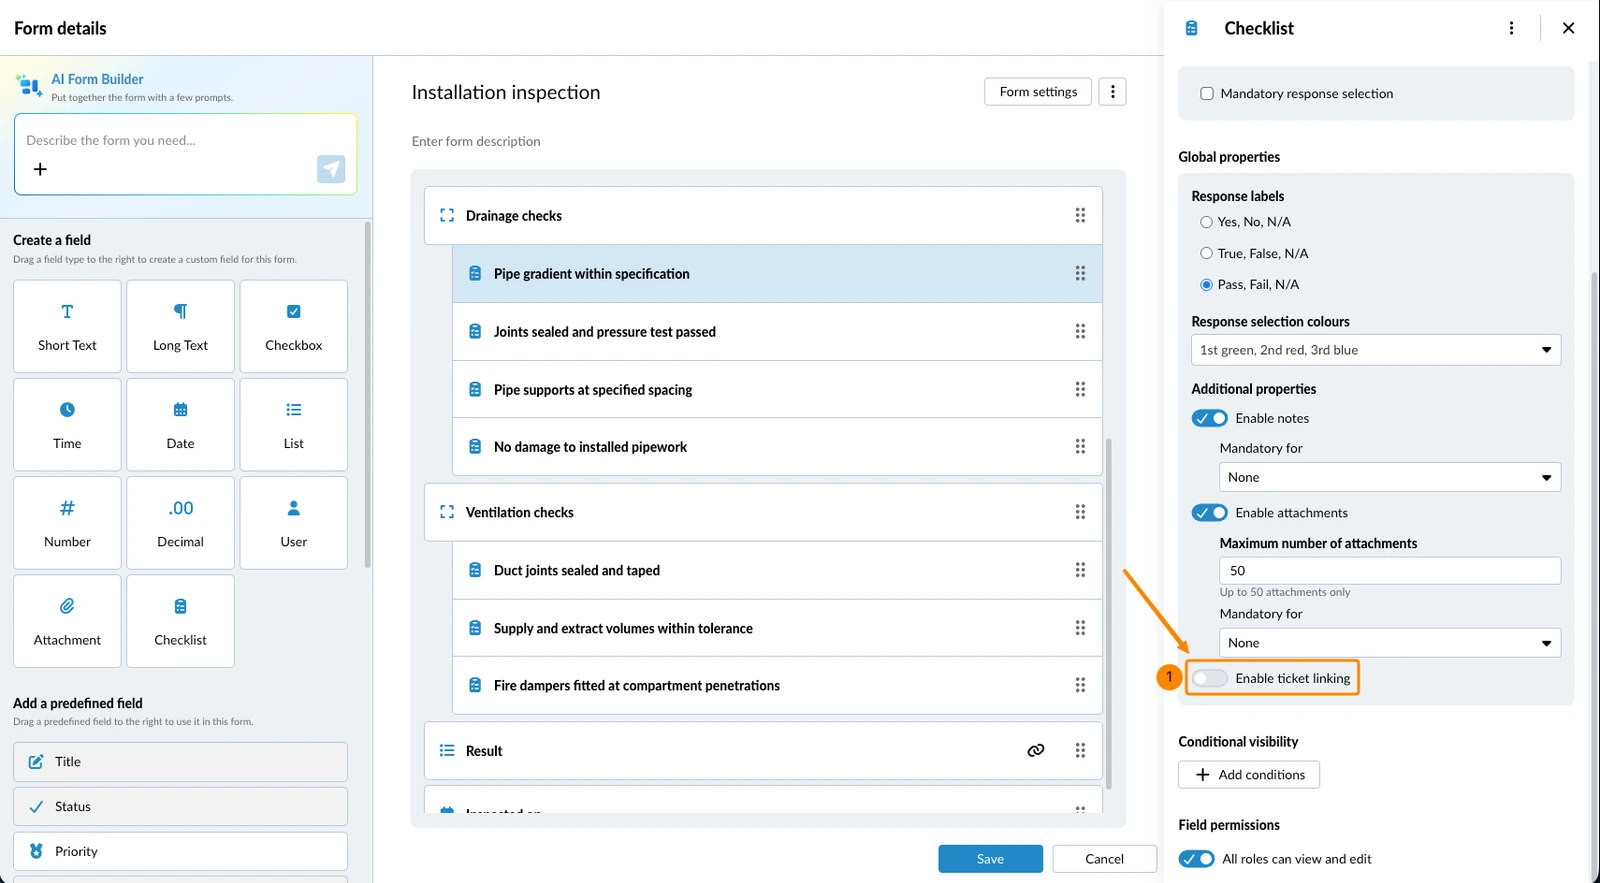
Unlike notes and attachments, ticket links are enabled by default on every checklist field.
To stop users creating or linking tickets from this field:
- Deactivate the Enable ticket linking toggle
By default, users can link tickets of any form they have access to. To restrict them to specific forms:
- Deselect the All forms can be linked checkbox
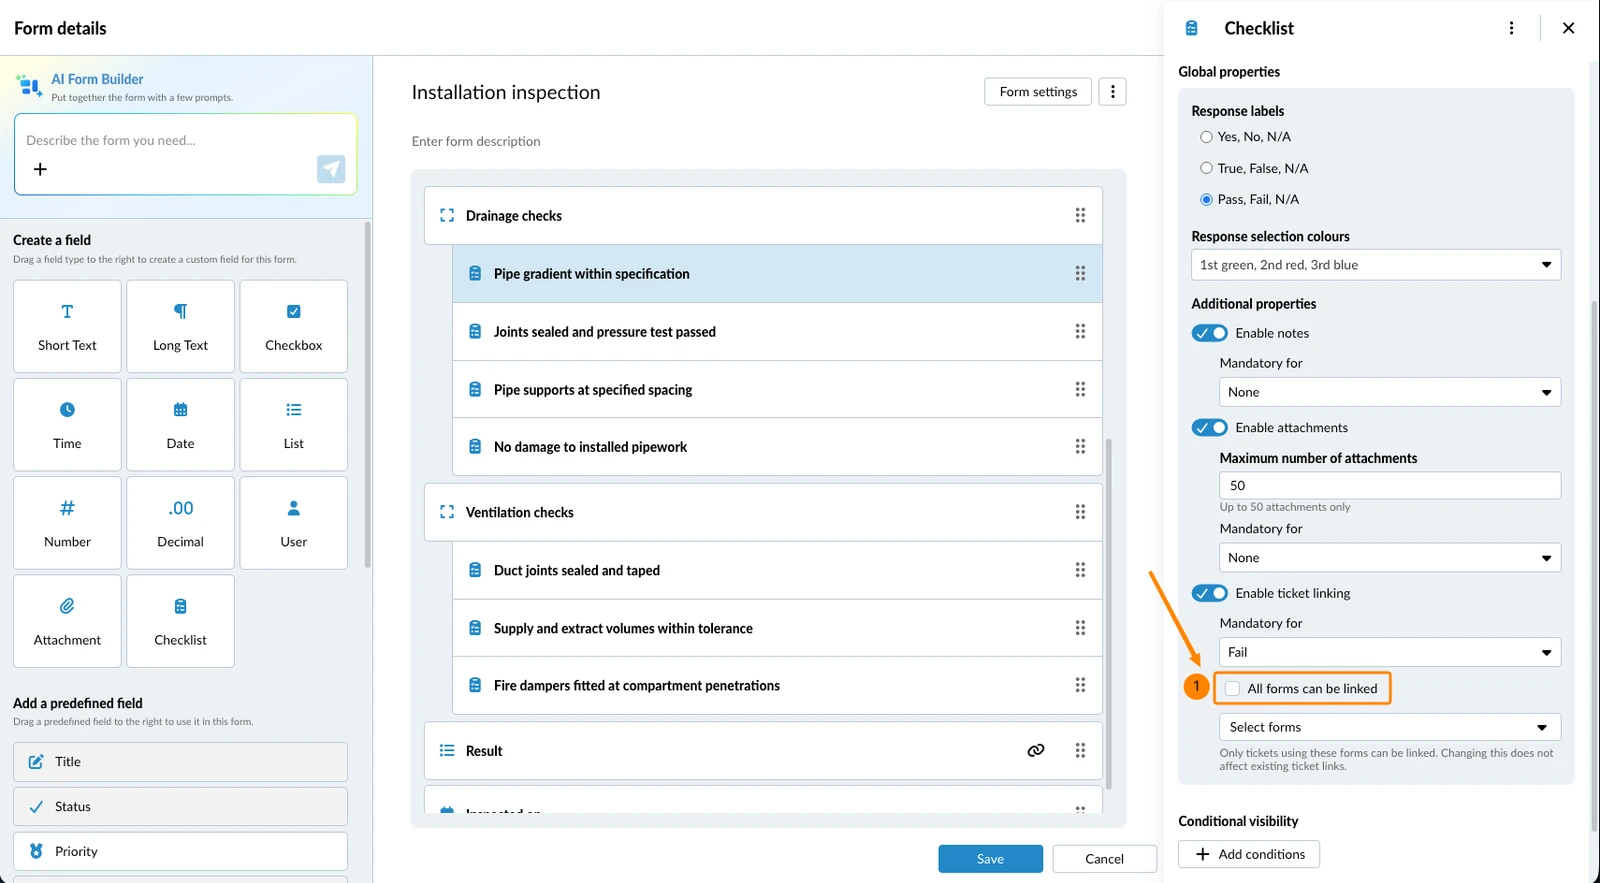
- Select the forms in the Select forms drop-down list
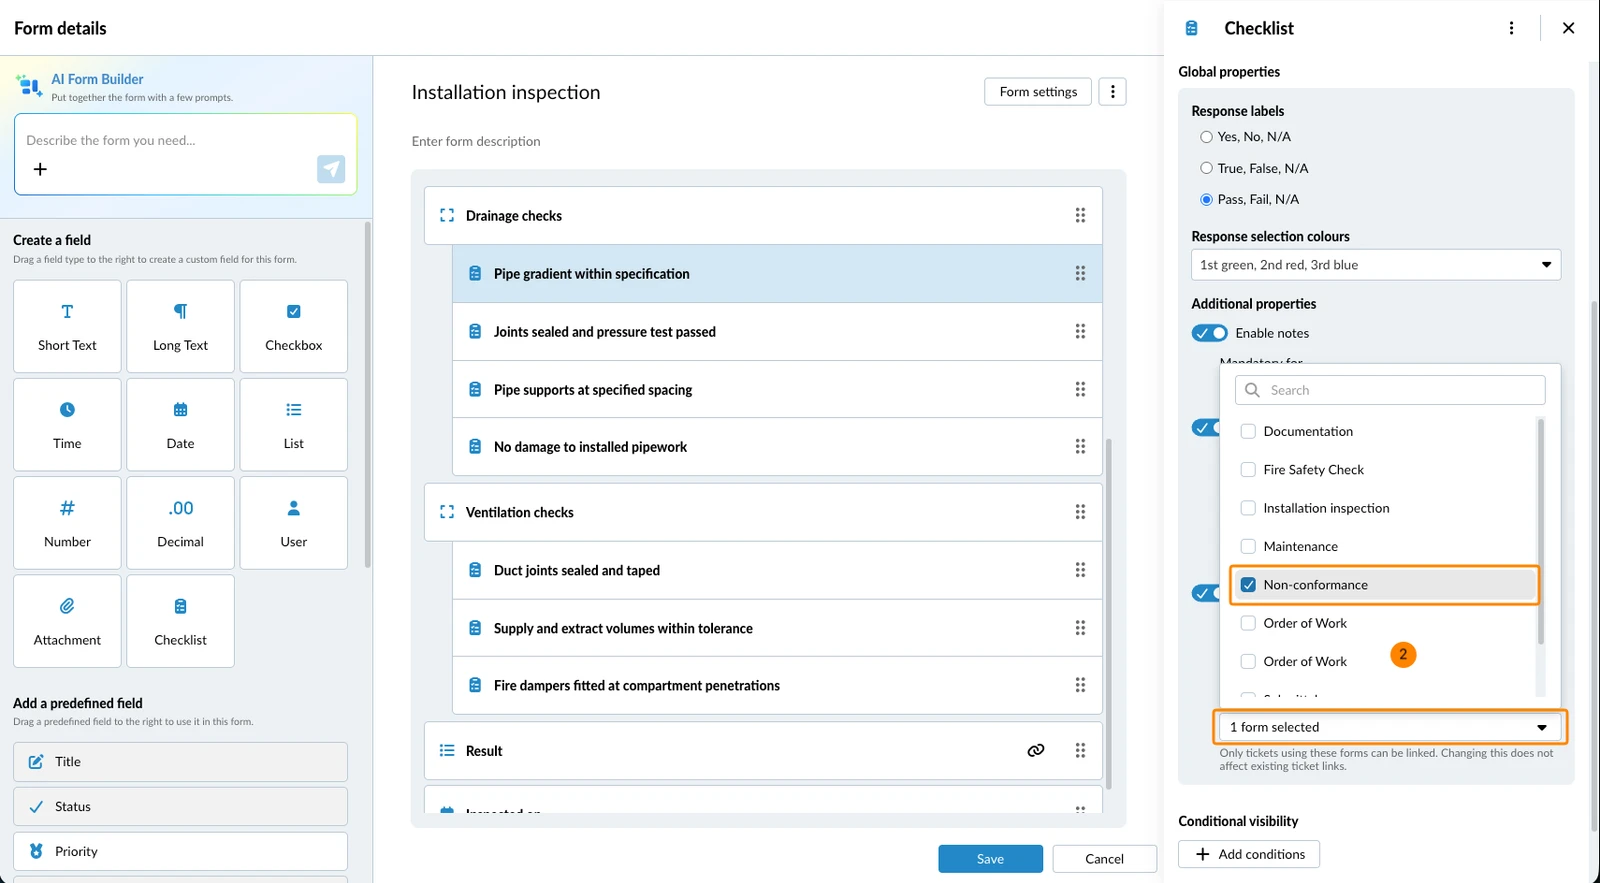
With one form selected, users get no choice — that form is used automatically. With several, users pick one of them, and when they search for an existing ticket they only find tickets that use those forms. Changing this does not affect tickets that are already linked.
To require a linked ticket based on one or more responses:
- Click the Mandatory for drop-down
- Select the response(s) e.g. Fail (they match the response labels of the field)
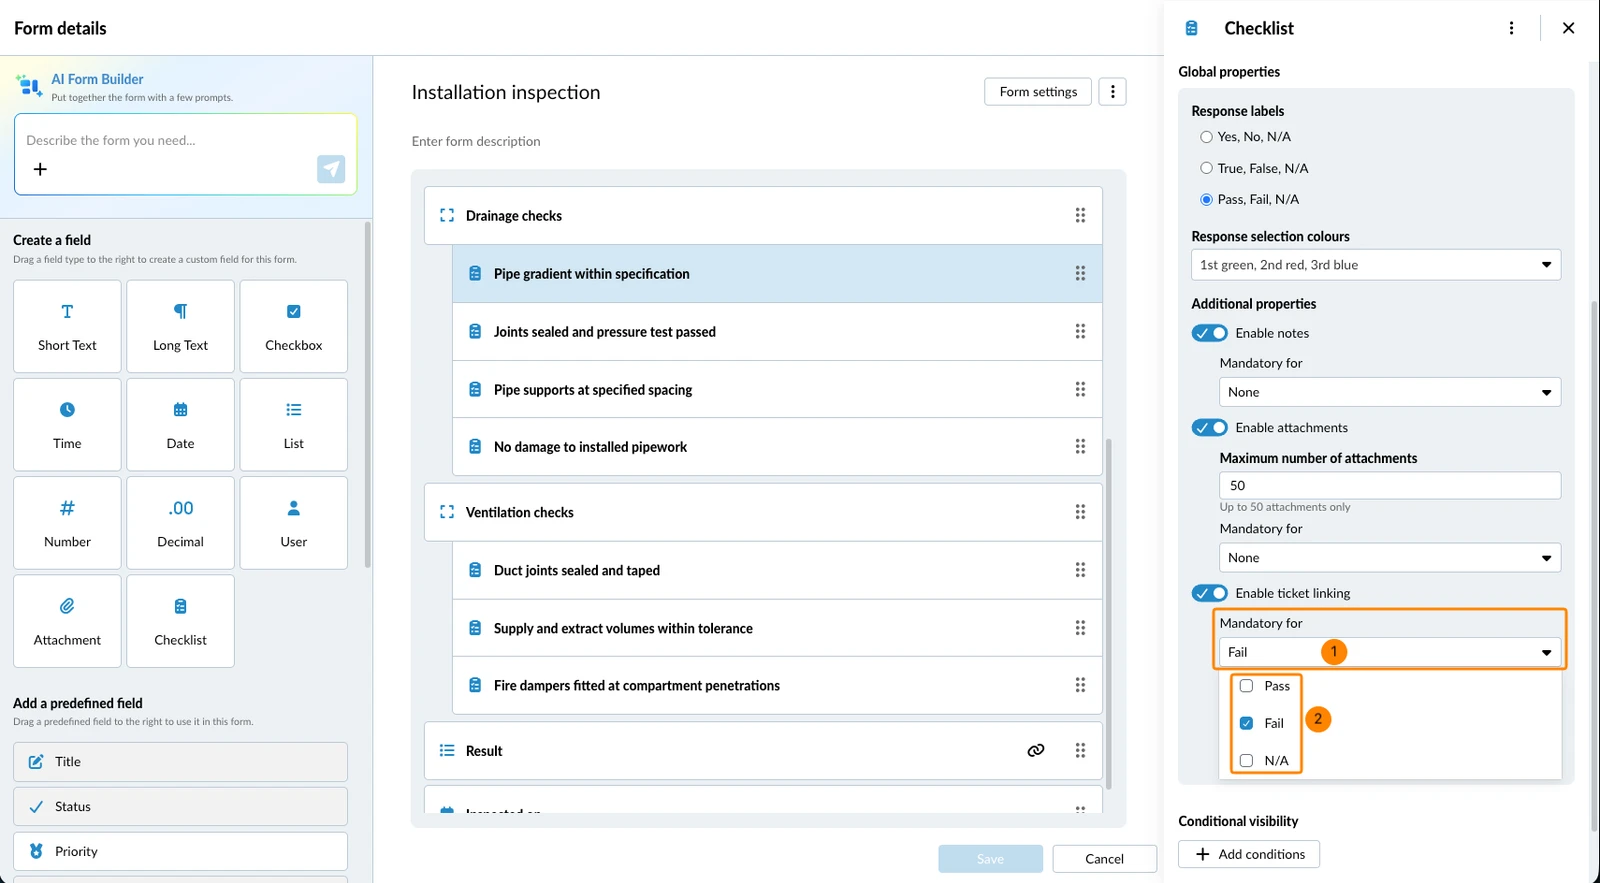
Users who select that response see the checklist field marked with an asterisk and have to add a ticket before they can save.
Field Properties of Shared Fields
A shared field’s core — its name, field type and list — is defined once on the Shared fields page and applies to every form that uses it, so these are read-only in the form builder. You can still give the field a form-specific description.
Its remaining properties are set at different levels:
- Mandatory: set on the Shared fields page for all forms, then adjustable per form and per project.
- Default value: set on the Shared fields page and can be overwritten per form, but not per project.
- Set only on the Shared fields page, and applied to every form: single or multiple user selection, the maximum number of attachments, and all checklist properties.
- For a shared list field, the list itself is fixed on the Shared fields page. You can still allow multiple selections and disable individual values per project, and set a default value for the field (overwritten per form, not per project).
Updated August 13, 2026