

 Deutsch
 Español
 Français
 Hrvatski
 Italiano
 Polski
 Português (BR)
Use Linked Tickets in Checklists
Overview
While you fill in a form, you can create a new ticket or link an existing one directly from a checklist field. The issue you found is documented as a real ticket, attached to the exact check it came from, without leaving the form.
A linked ticket is an independent ticket. It has its own form, assignee, status and location, and it stays in the project when the ticket holding the checklist is deleted.
Ticket links can be switched on or off for each checklist field, and a linked ticket can be made mandatory for a specific response.
Access & Permissions
How to Access Linked Tickets
- Click Tickets
- Open a ticket
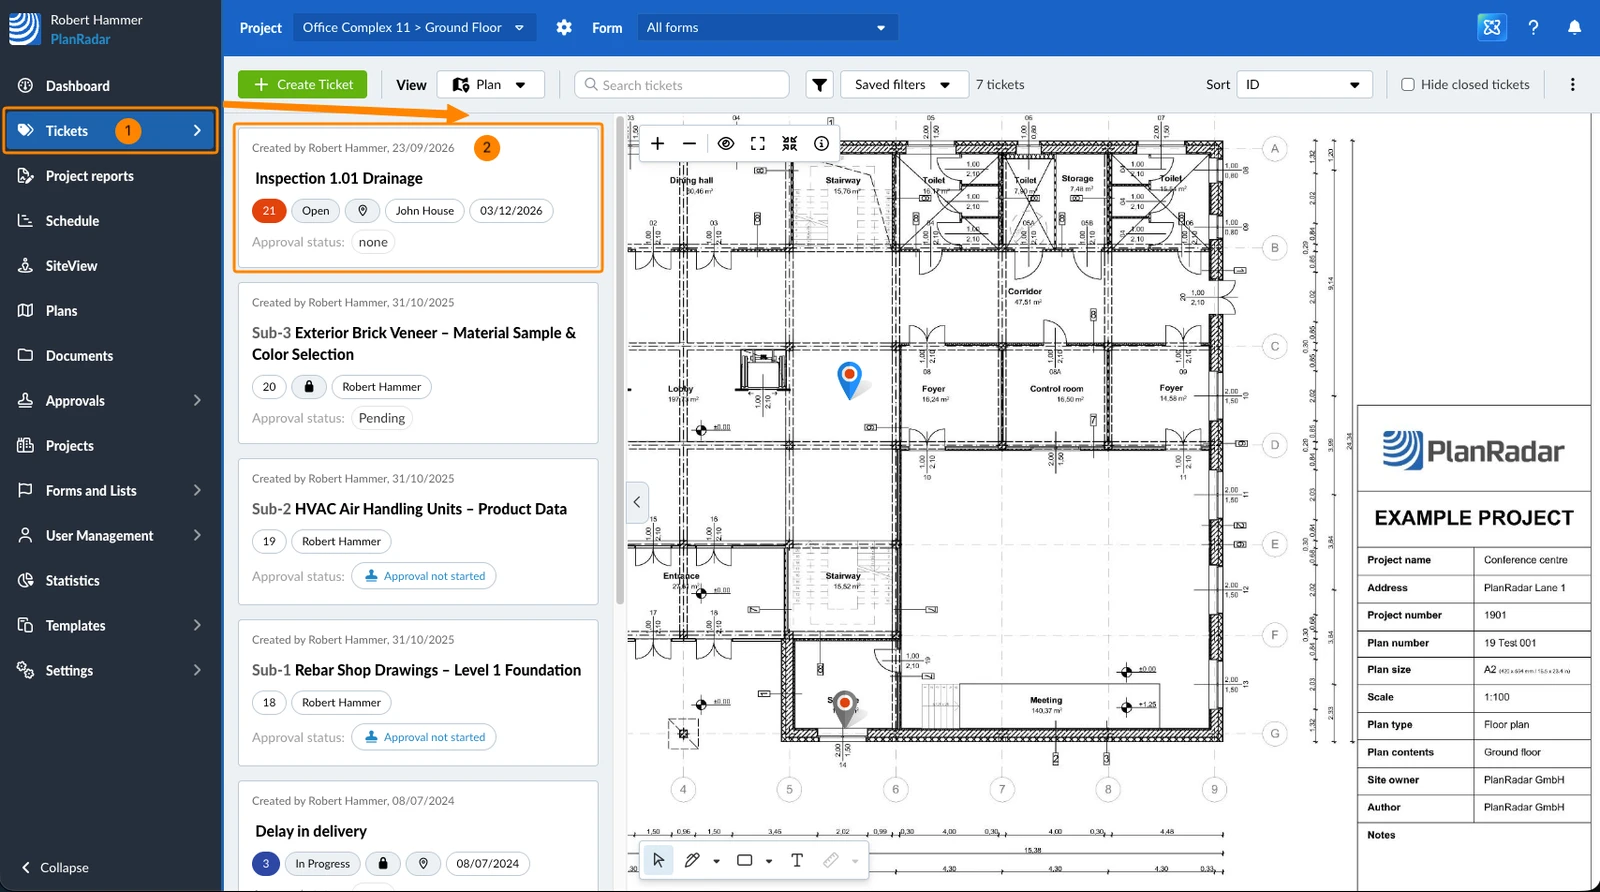
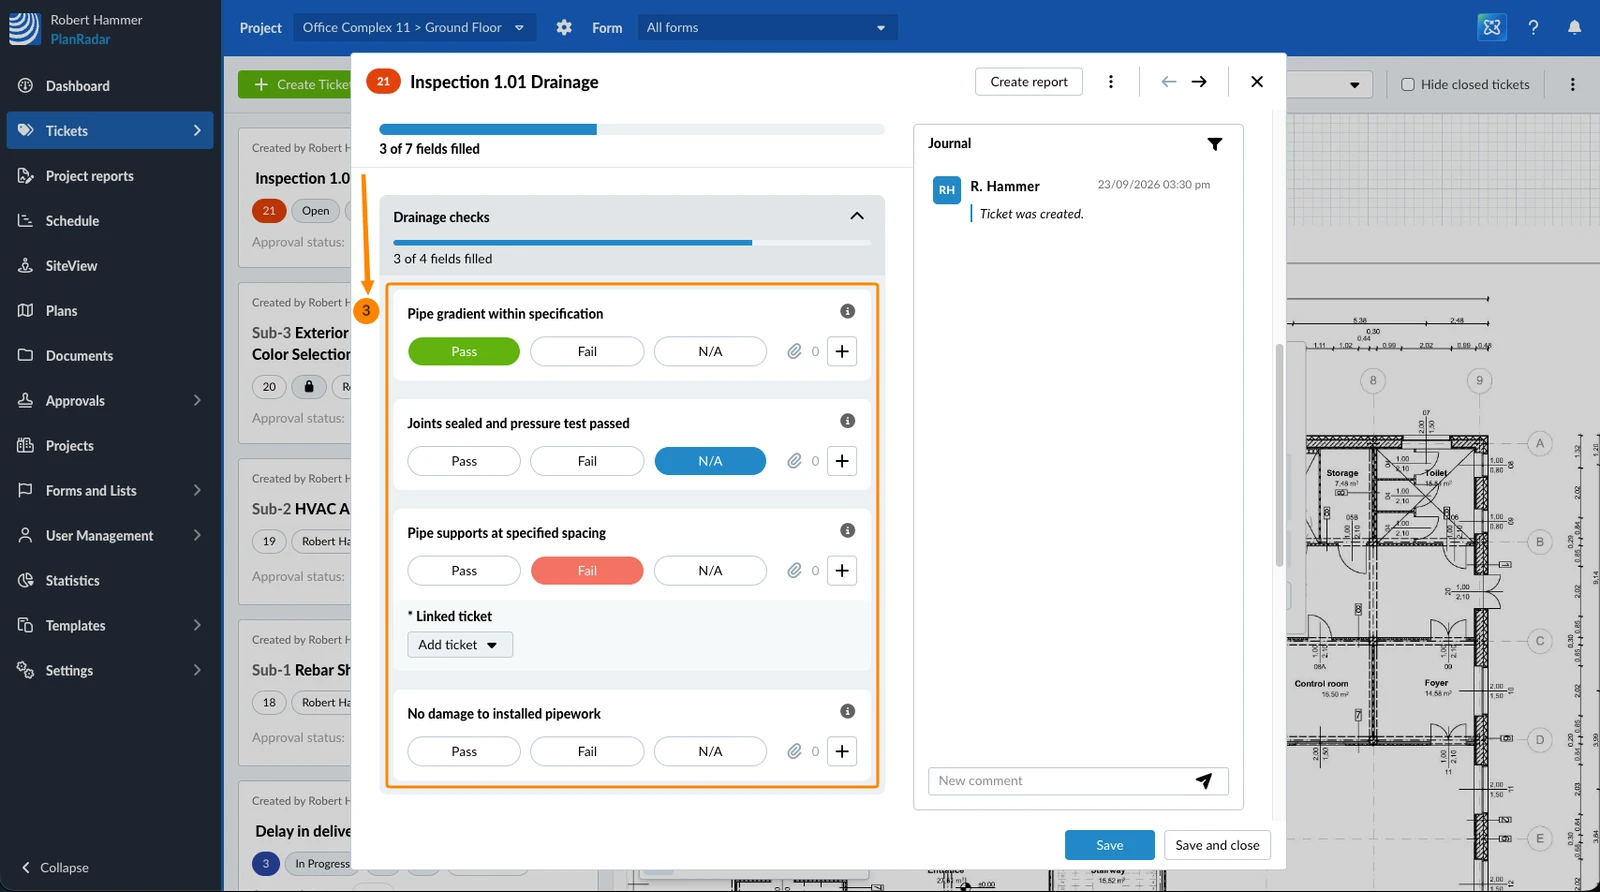
- Scroll to a checklist field
- Tap Tickets in the main menu
- Open a ticket
- Scroll to a checklist field
Create a Linked Ticket
Use this when you find something that is not documented anywhere yet — the usual case during an inspection.
To create a linked ticket:
- Click the + button on the checklist field
- Click Create new ticket
- Fill in the new ticket — it already carries the project, the ticket you started from and the checklist field. Read more in Fill in the Form of a Ticket
- Click Save or Save and close
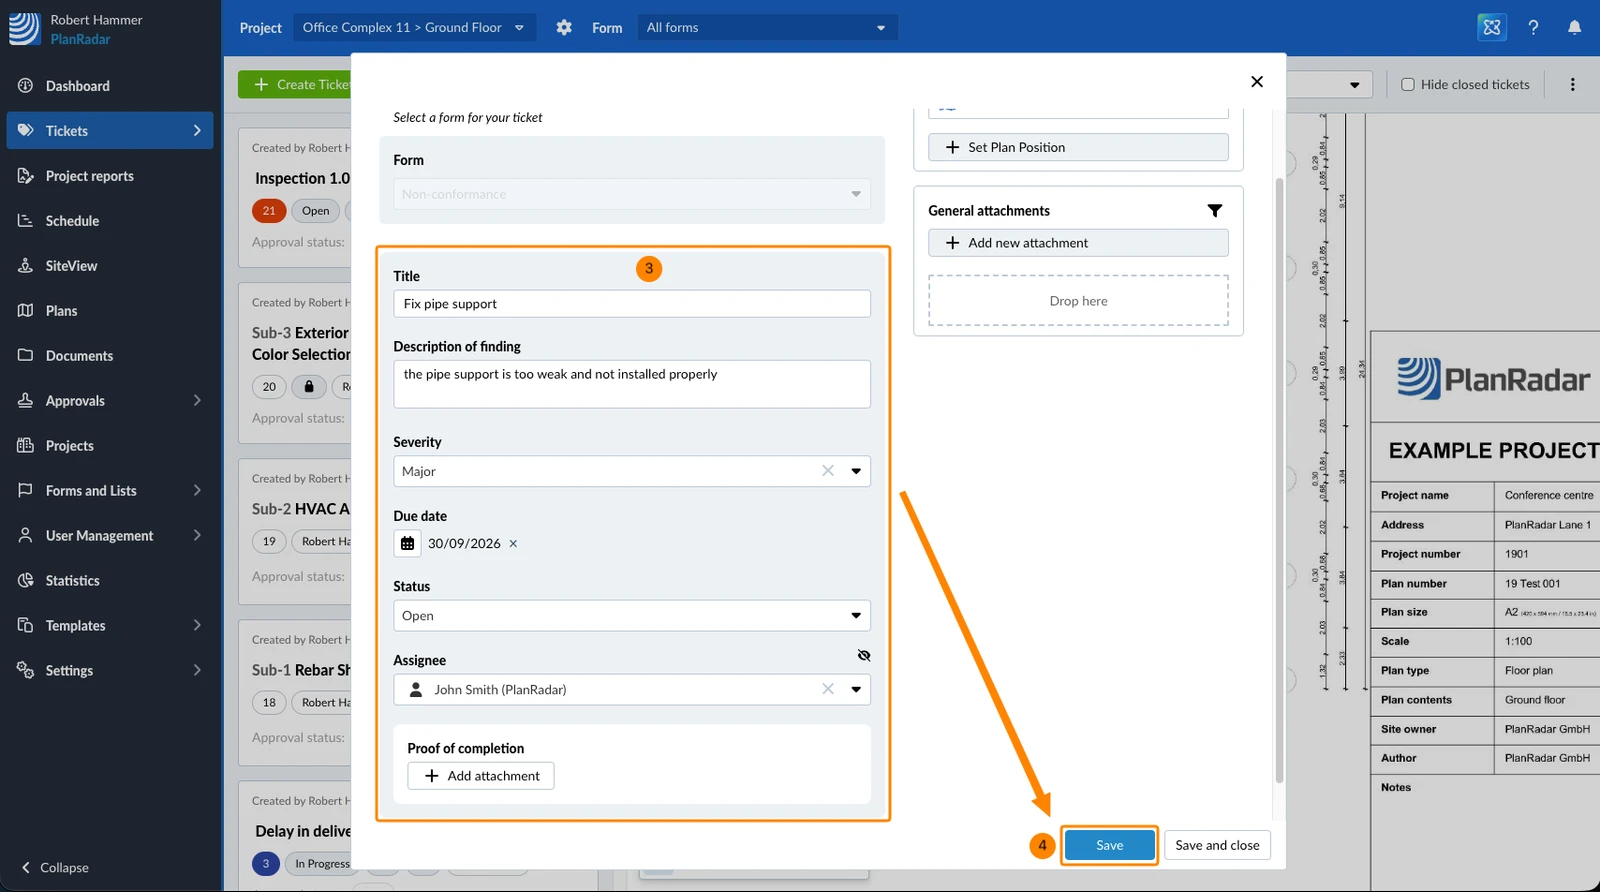
The ticket is saved immediately and exists on its own from that moment — you do not have to save the ticket holding the checklist first, and you can carry on with the form afterwards.
If only one form is allowed for this checklist field, that form is used automatically. If several are allowed, you choose one of them. Otherwise you choose from the forms you can create tickets with.
Link an Existing Ticket
Use this when the issue is already documented, so you connect the inspection to it instead of creating a duplicate. You can link several tickets at once.
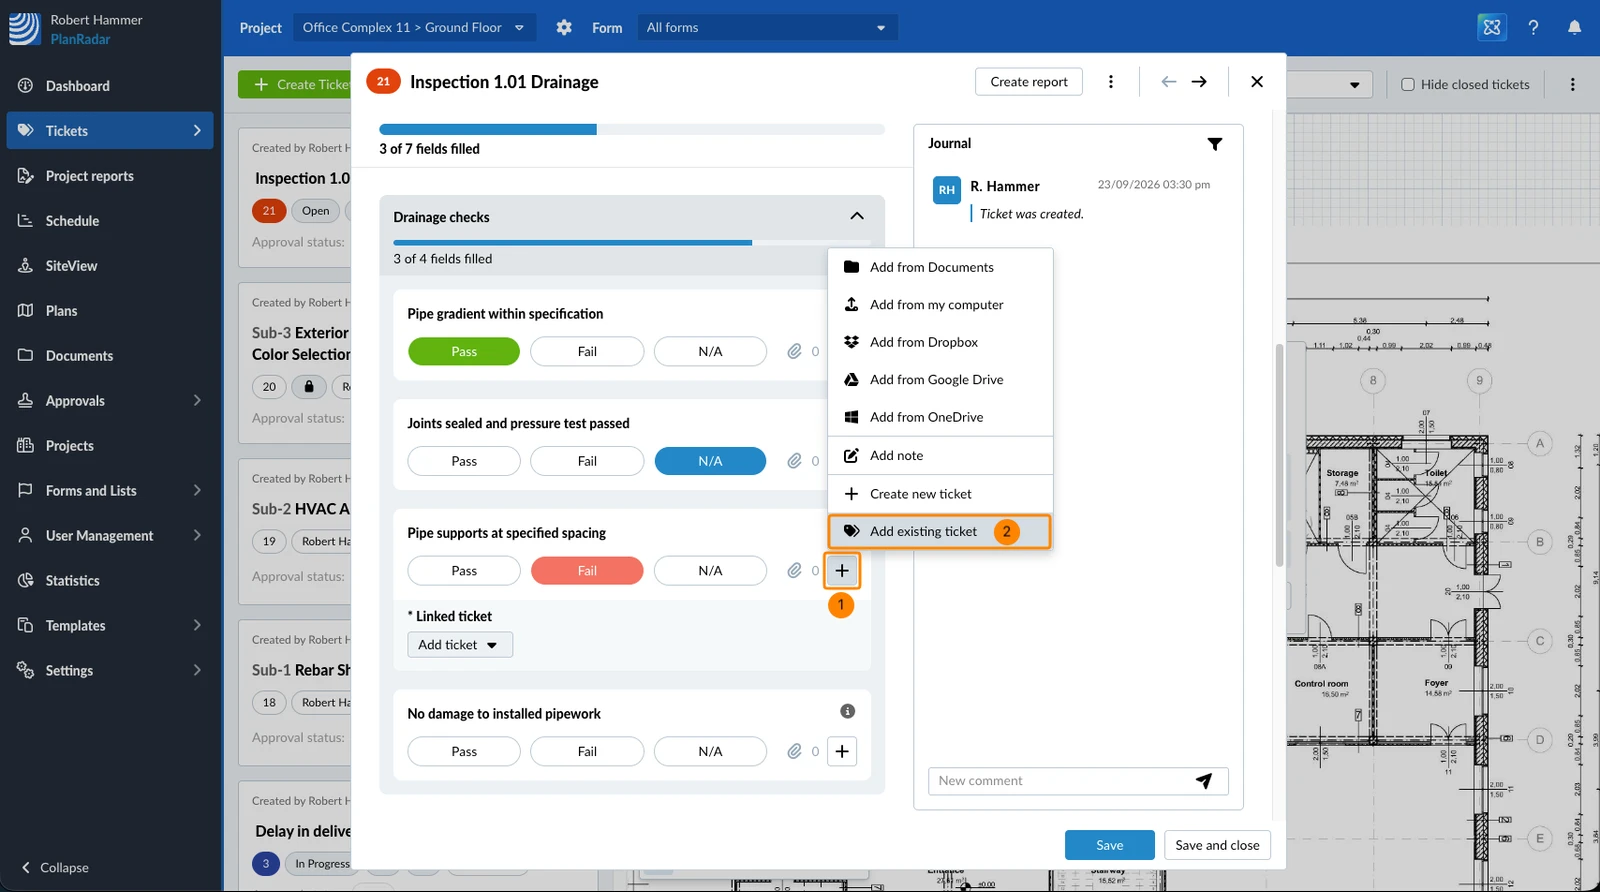
- Click the + button on the checklist field
- Click Add existing ticket
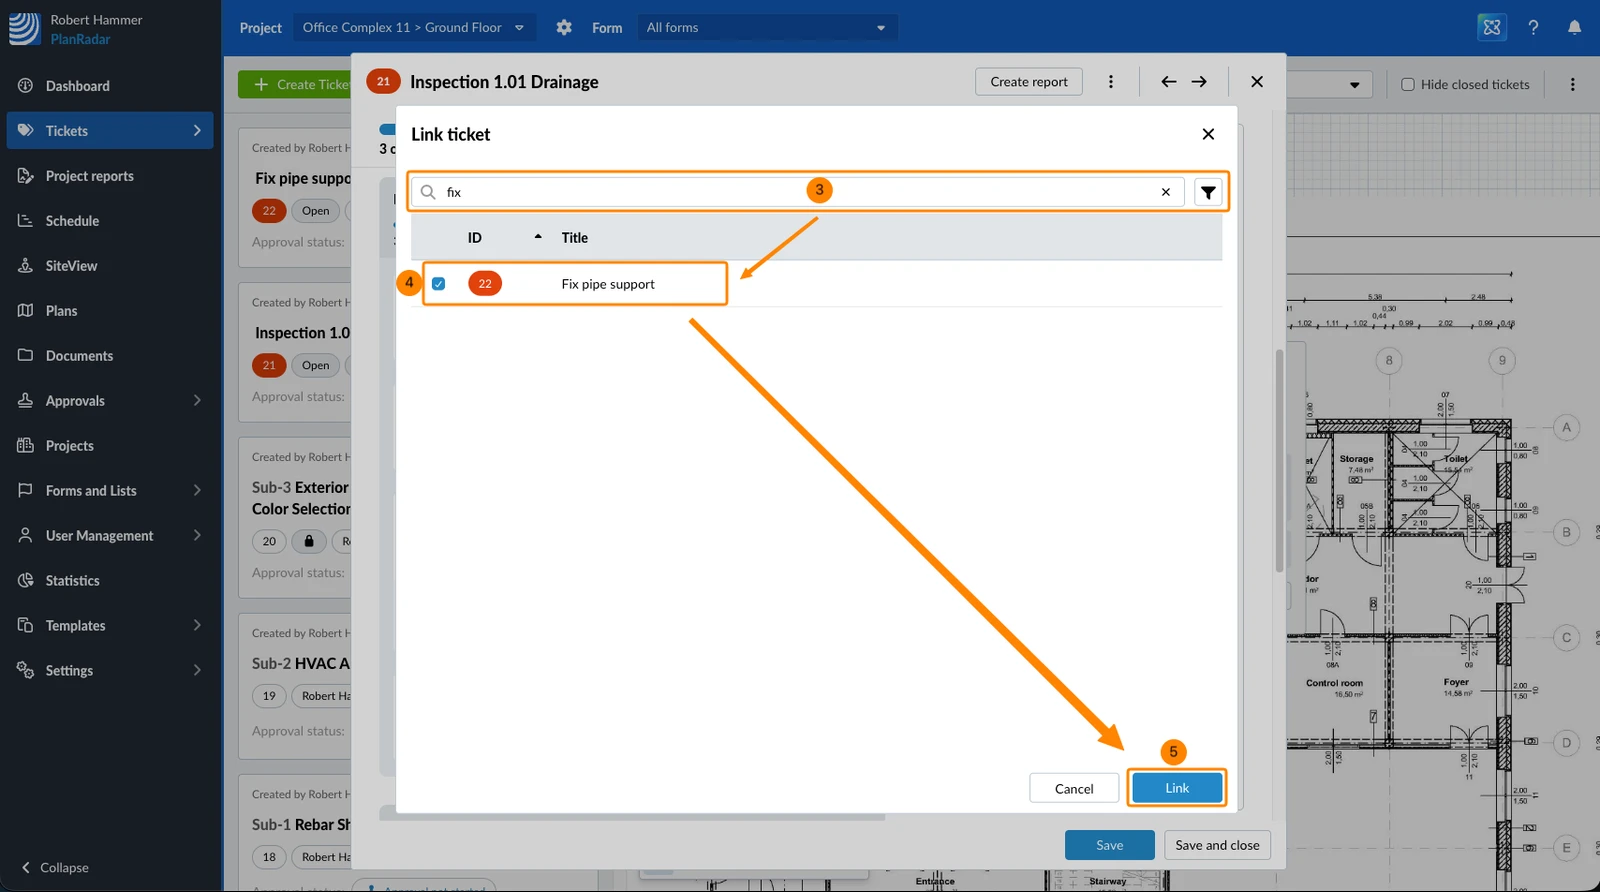
- Find the tickets you want, using the search field and filters
- Select the checkbox of each ticket you want to link
- Click Link
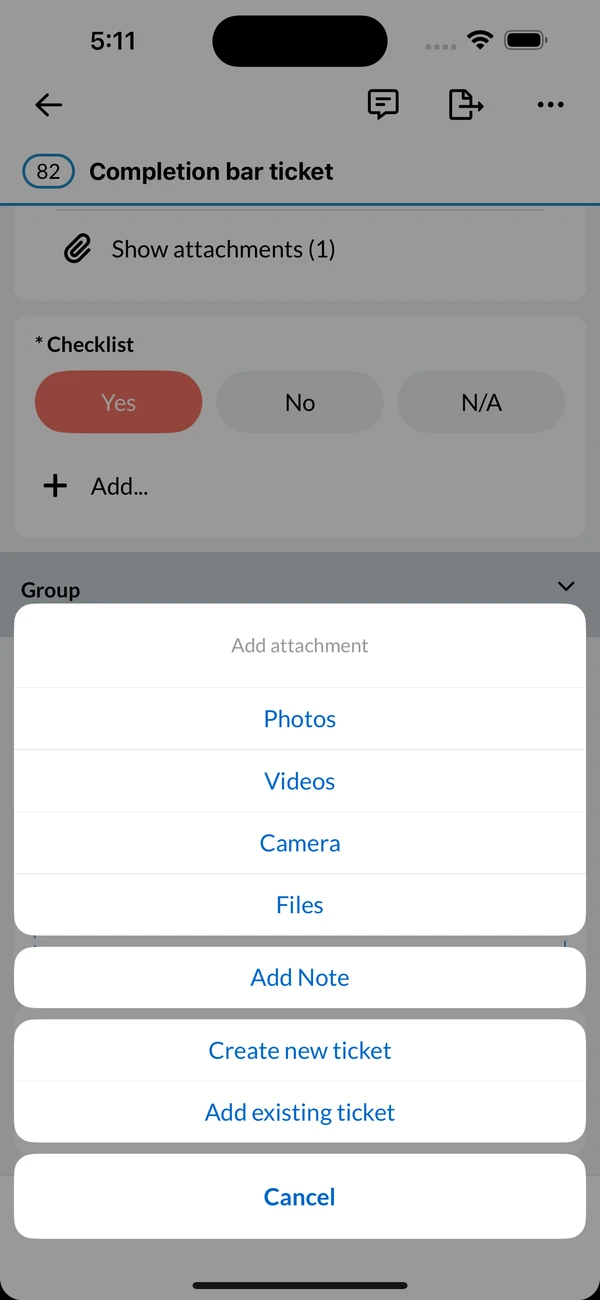
- Tap Add... on the checklist field
- Tap Add existing ticket
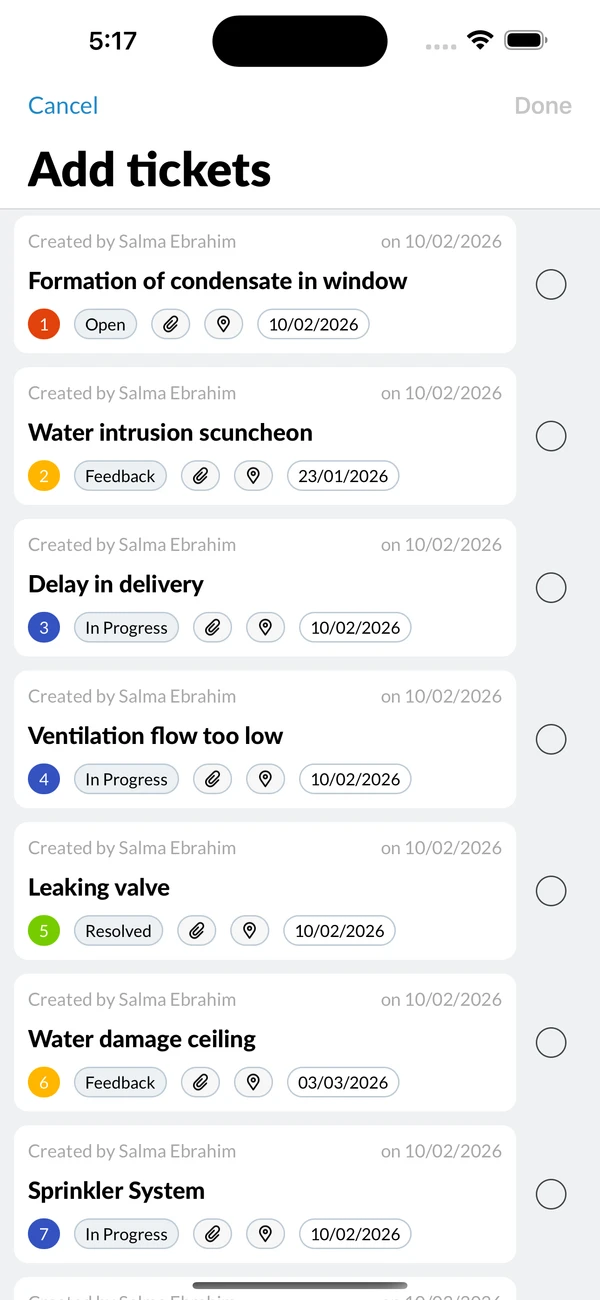
- Find the tickets you want on the Add tickets screen, using the search field and filters
- Select each ticket you want to link
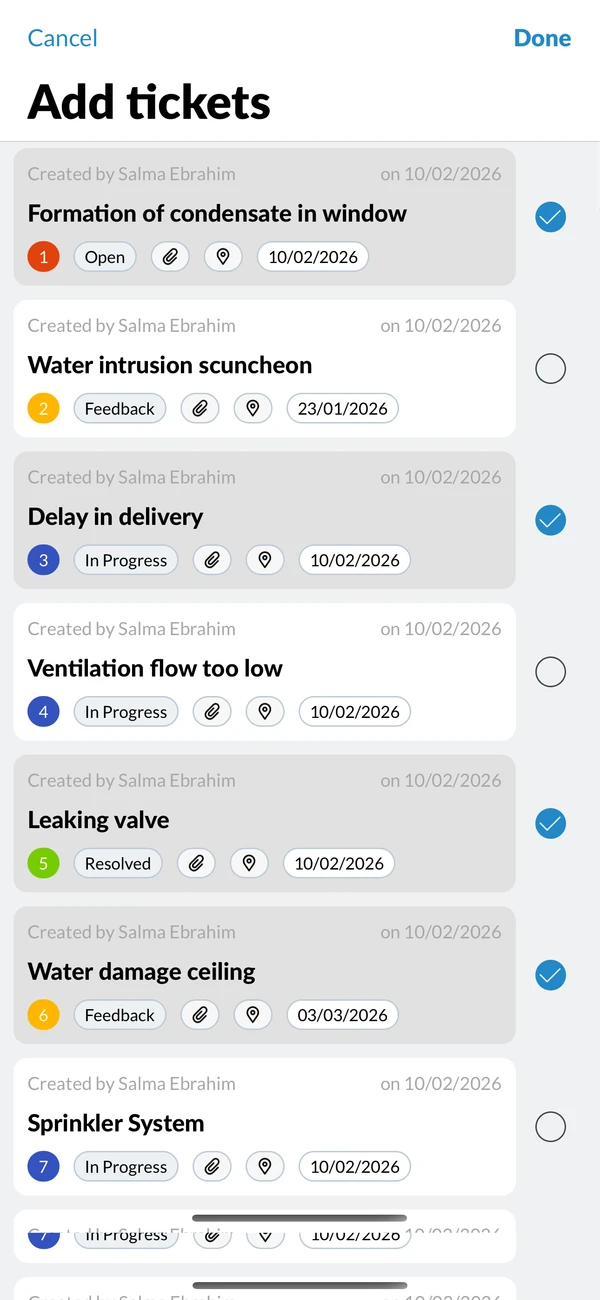
- Tap Done
You can only link tickets that use one of the forms allowed for this checklist field. Tickets that are already linked to the checklist field are not offered again.
View and Open Linked Tickets
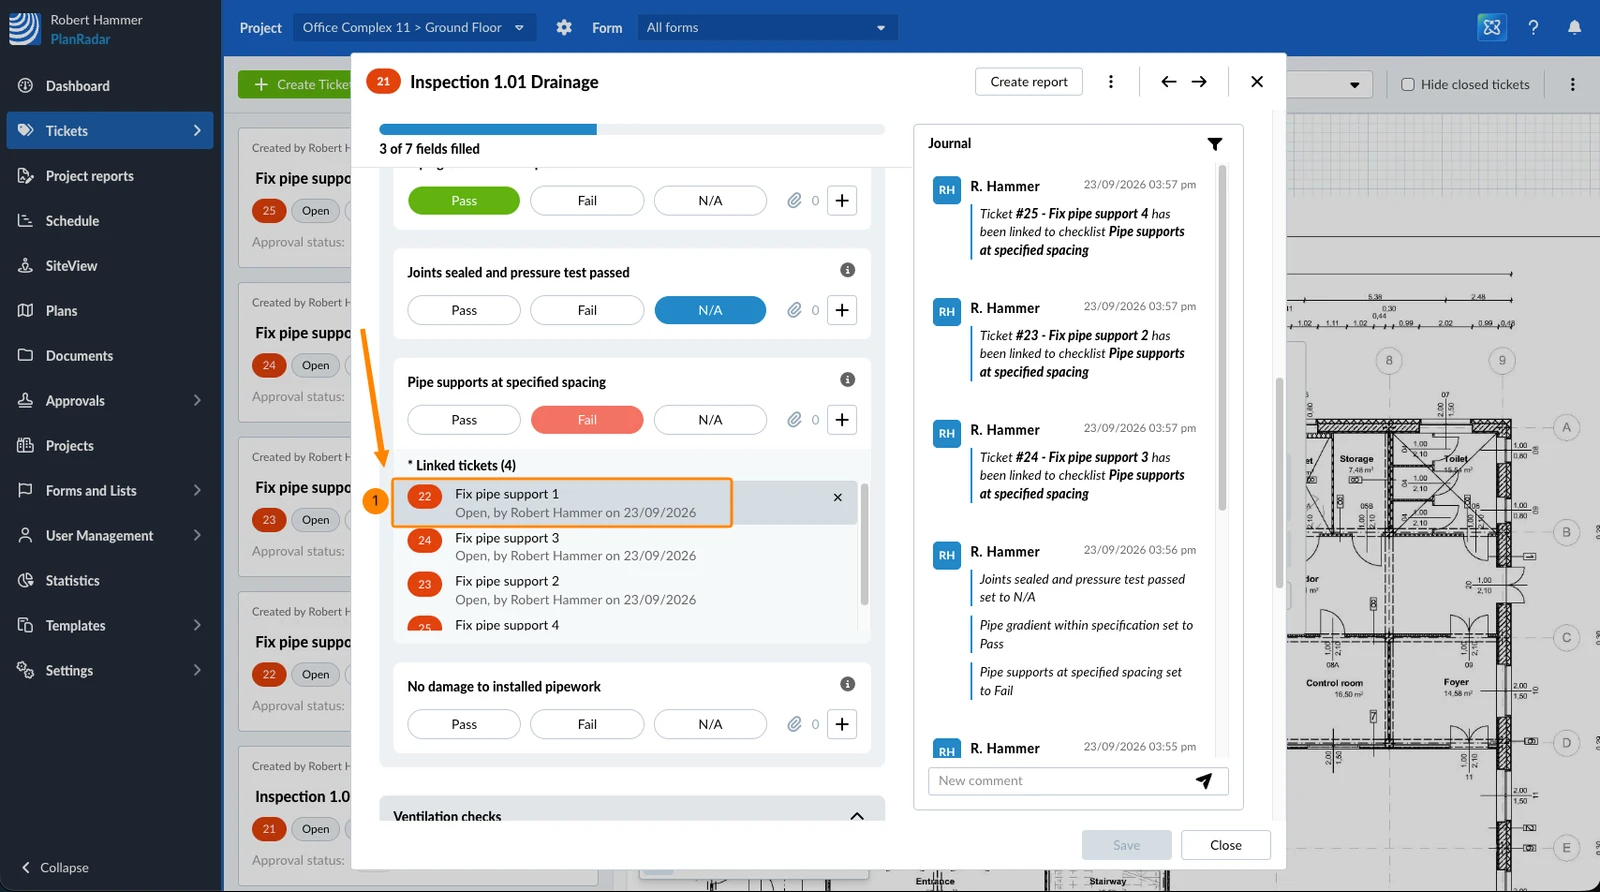
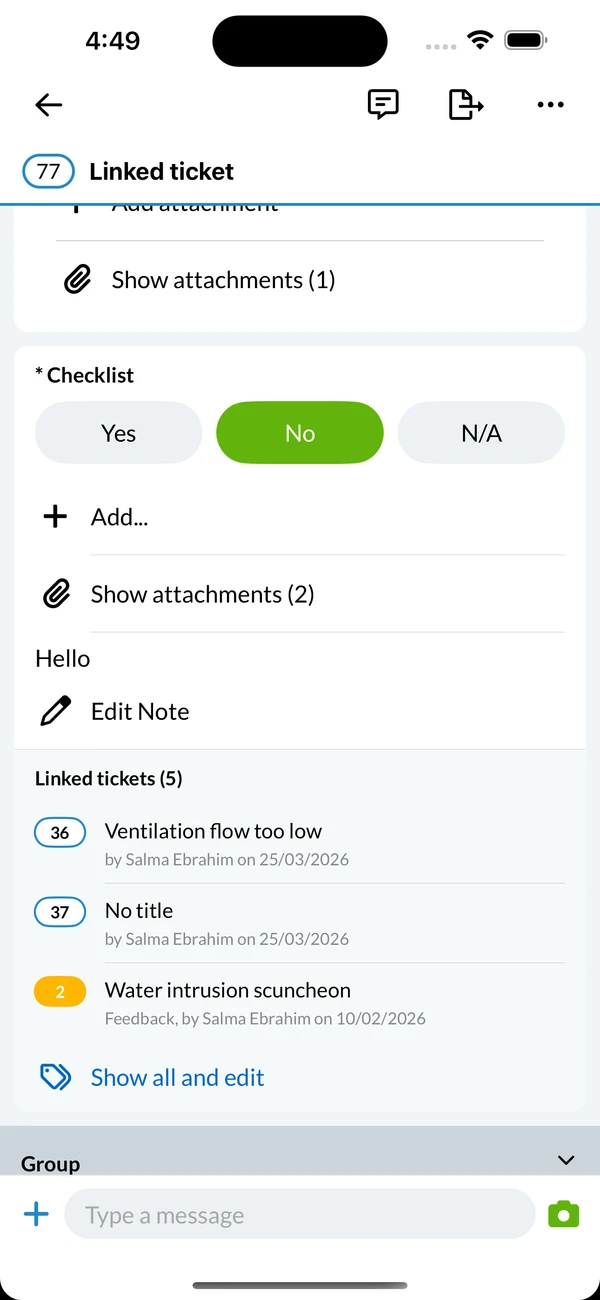
Linked tickets are listed on the checklist field they belong to. Each entry shows the ticket number, its title, and its status, creator and date.
To open a linked ticket:
- Click the linked ticket
- Tap the linked ticket
Unlink a Linked Ticket
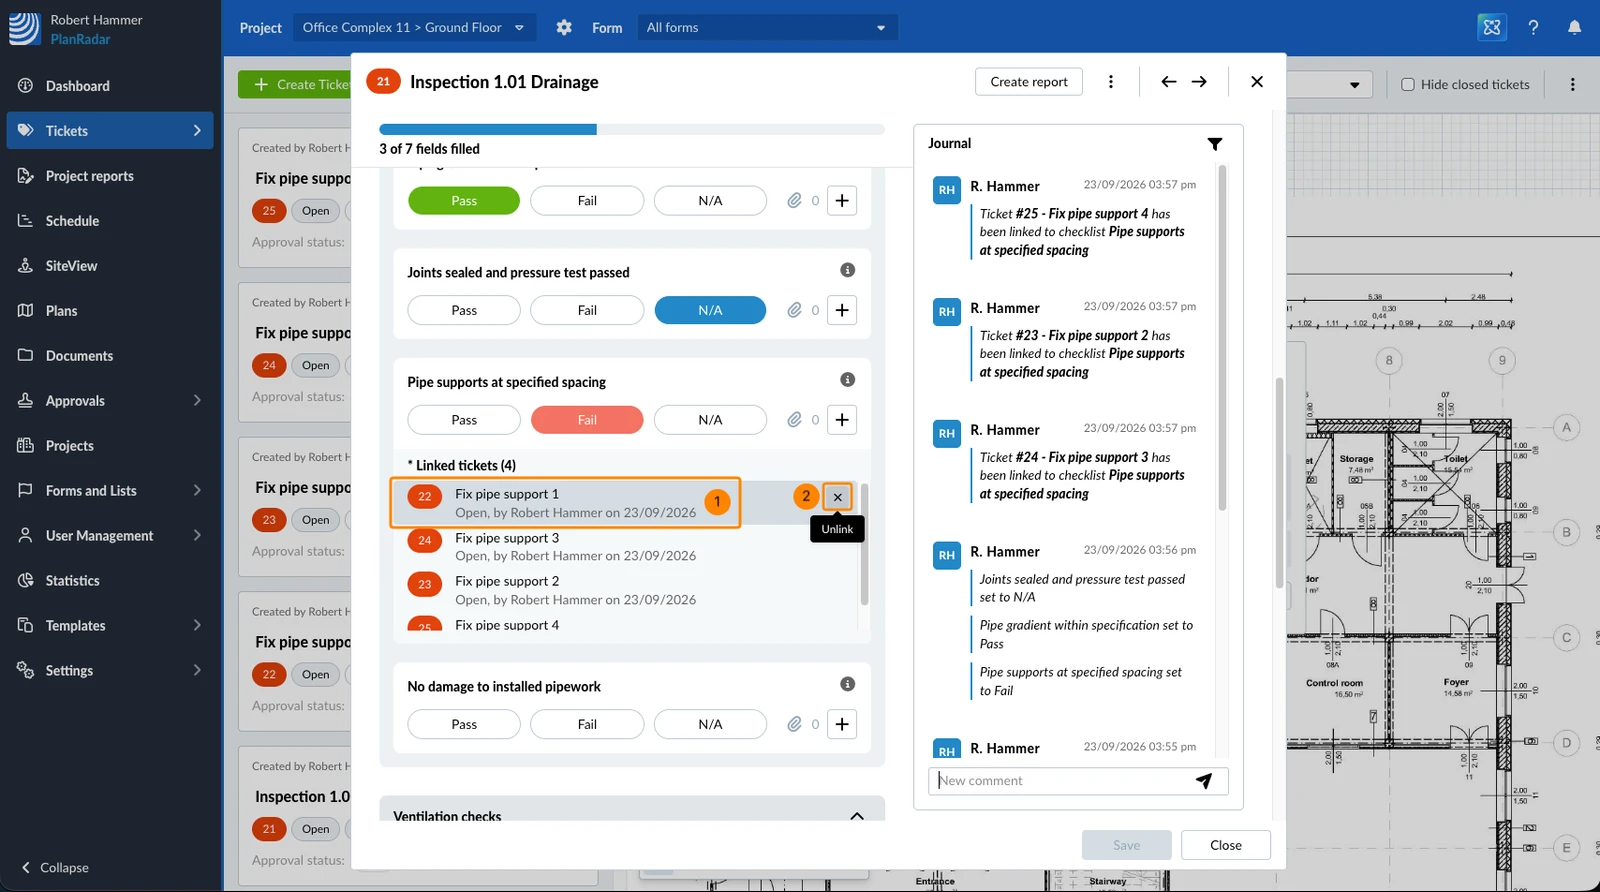
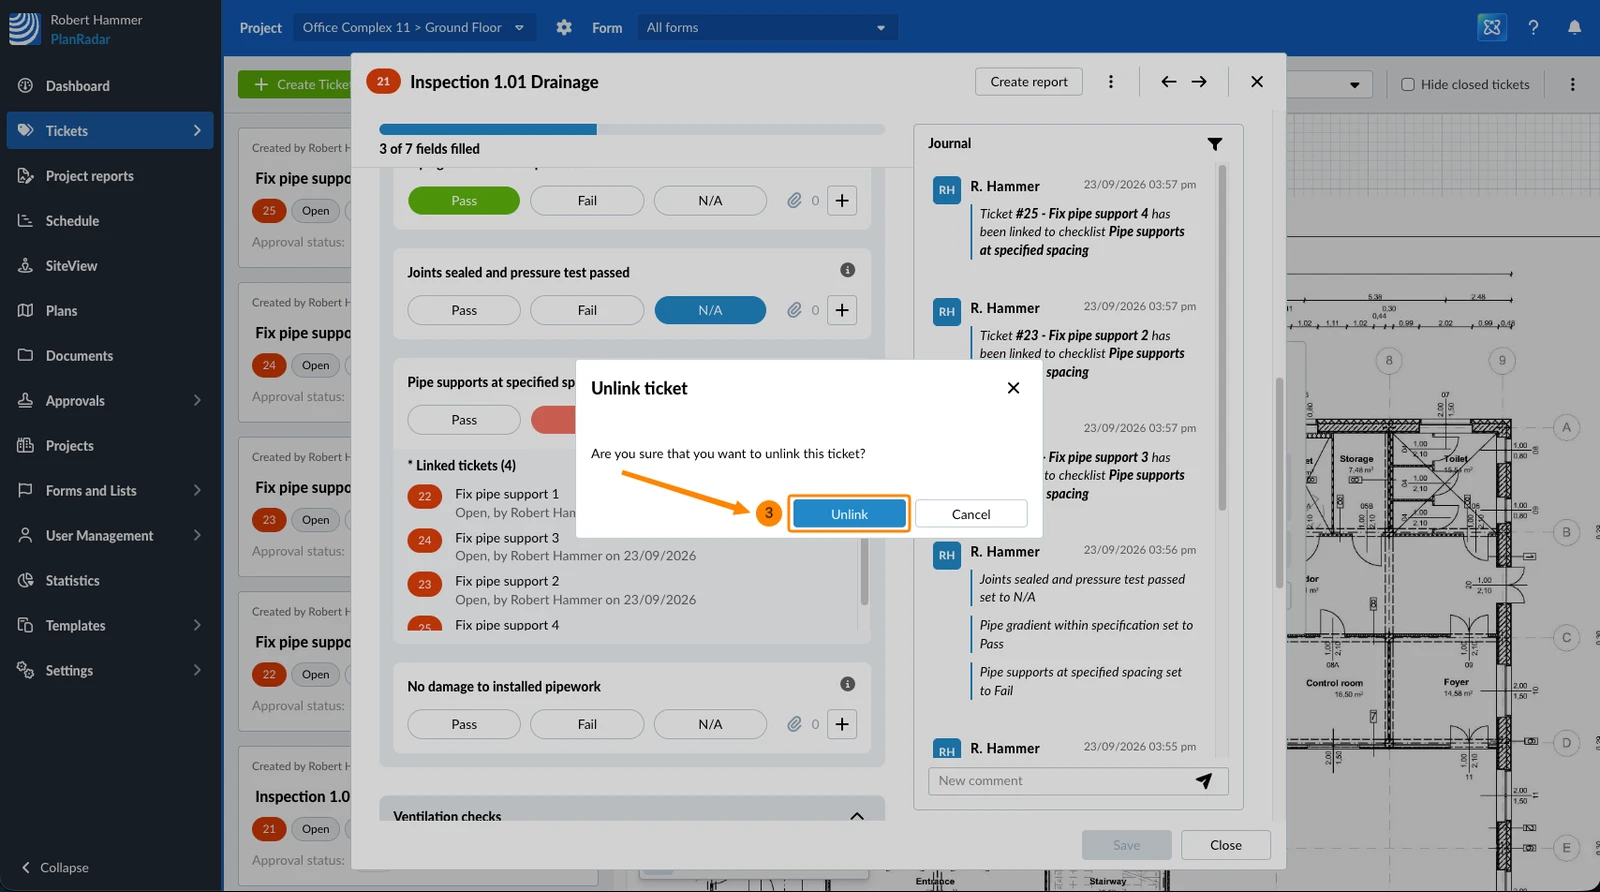
Unlinking only removes the connection to the checklist field. The ticket itself stays in the project.
- Hover over the linked ticket
- Click the X icon
- Click Unlink to confirm
- Tap Show all and edit to open the Linked tickets screen
- Swipe left on the linked ticket
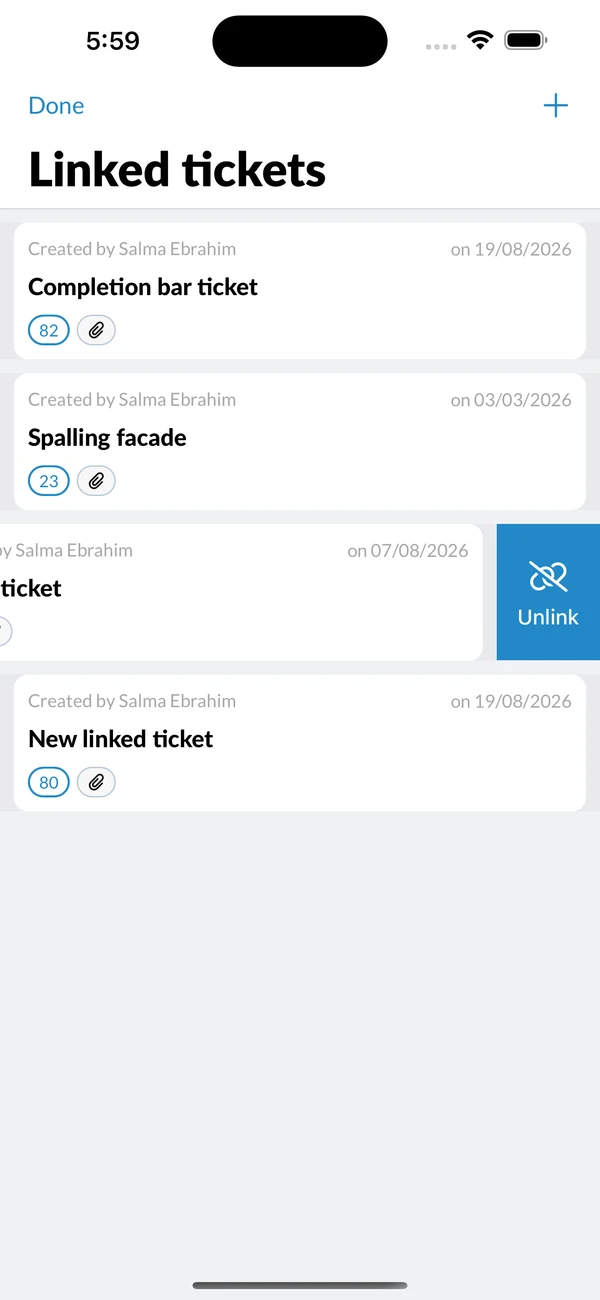
- Tap Unlink
- Tap Unlink to confirm
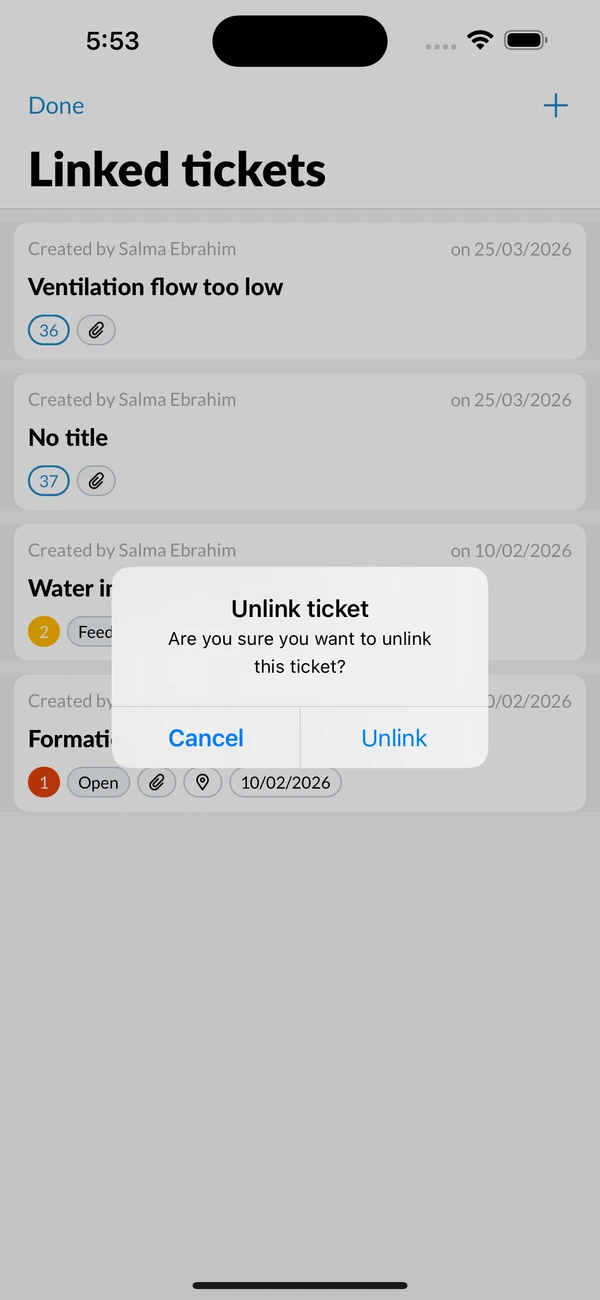
- Tap Show all and edit to open the Linked tickets screen
- Open the More menu on the linked ticket, then tap Unlink
Find Tickets With Linked Tickets
To find the tickets whose checklist fields have linked tickets, filter the ticket list by Has linked tickets.
See Which Checklist Fields a Ticket is Linked To
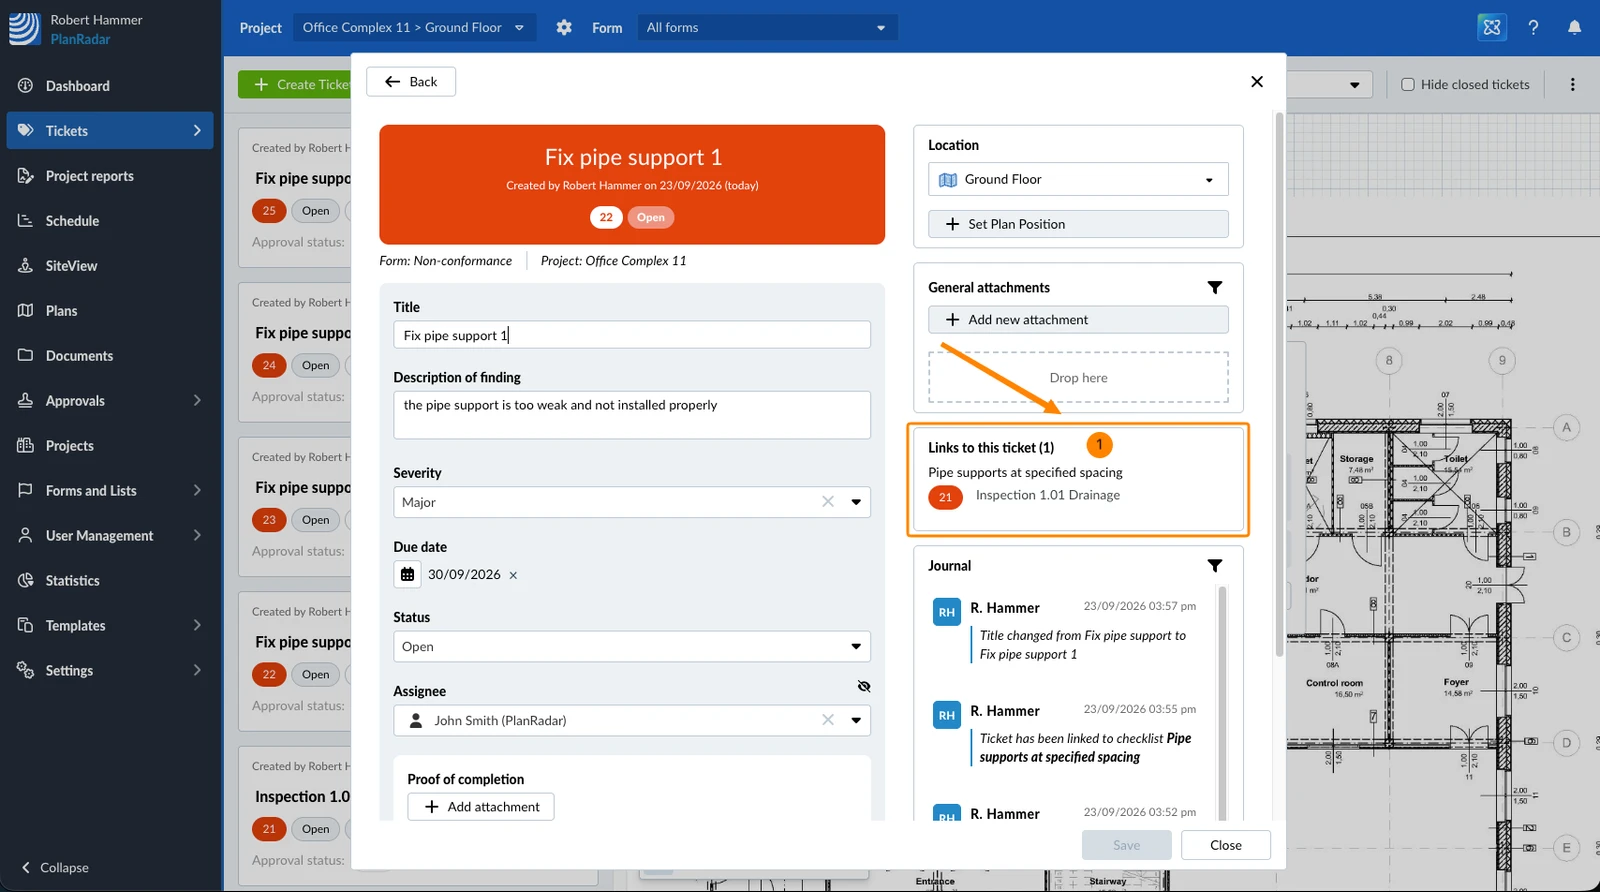
A link is visible from both sides. Open a linked ticket and the Links to this ticket panel lists every ticket that links to it, with the checklist field each link came from.
- Click an entry to go to that ticket, and use the back navigation to return
Updated September 16, 2026