

 Deutsch
 Español
 Français
 Hrvatski
 Italiano
 Polski
 Português (BR)
Manage Plans & Folders in the Webapp
Overview
The Plans section is where a project's drawings live. Folders give the project its structure — one per building, block or floor — and each folder holds as many plans and BIM models as you need.
This article covers organising, finding and managing plans and folders in the webapp. Uploading, updating and approving plans each have their own article.
Access & Permissions
How to Access Plans
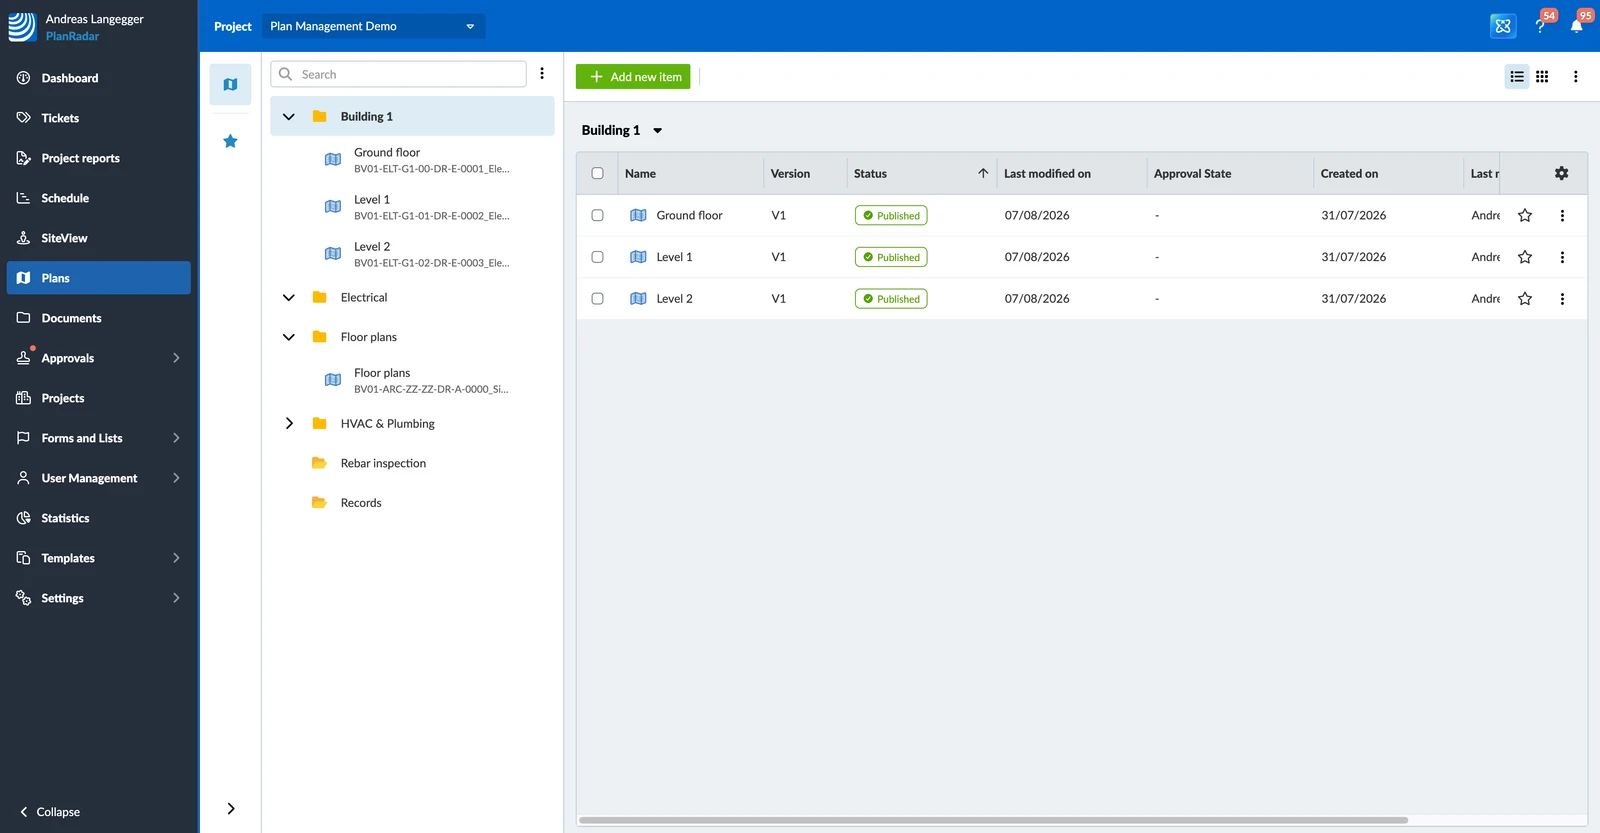
To open the plans of a project:
- Click Plans in the main menu.
- Select the project in the project drop-down.
Organise Plans in Folders
The folder tree stays visible on the left while you work. Click a folder to show its contents on the right; the toolbar above the contents applies to the folder you selected.
To create a folder:
- Select the folder you want to create it in.
- Click Add new item.
- Click New folder.
- Type the folder name.
- Click Save.
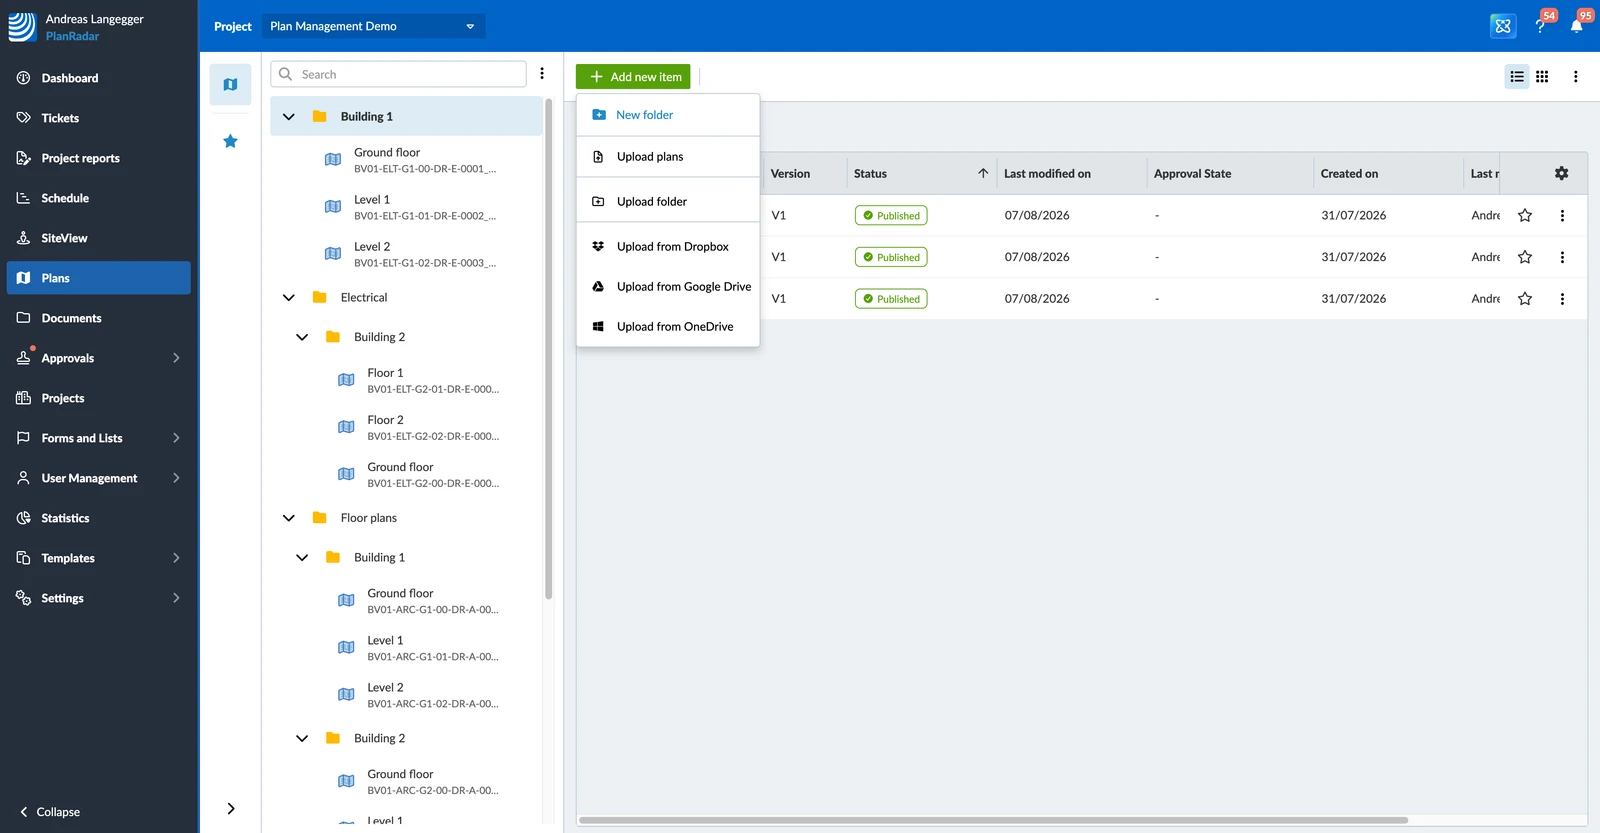
To show or hide the subfolders of a folder, click the arrow next to it. To do it for the whole tree at once, open the More menu above the tree and click Expand all or Collapse all.
To move a folder or a plan somewhere else in the tree, drag it by its handle and drop it on the folder it belongs in. Any tickets on the item travel with it.
To put the tree in alphabetical order:
- Open the More menu above the tree.
- Click Sort ascending (0-9, A-Z) or Sort descending (Z-A,9-0).
- Confirm the dialog.
Find a Plan
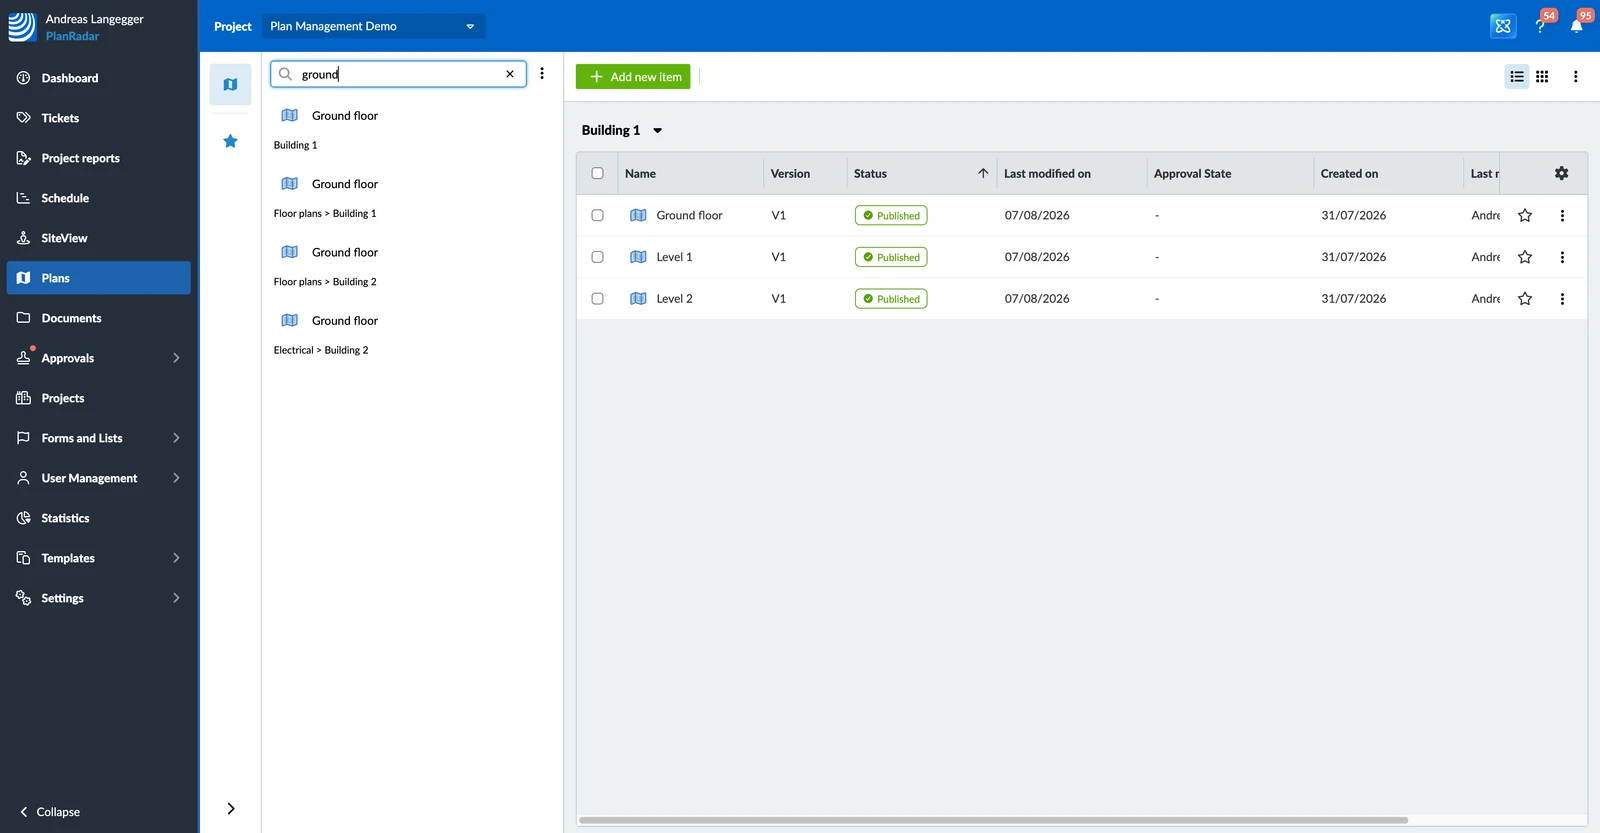
The tree has its own search. Type at least three characters into it and the results appear as you type, from anywhere in the project — each result shows the folder path it sits in, so you can tell two plans with similar names apart. Click x to leave the search and see the full tree again.
In the plan list you can also click a column header to sort by it. Clicking it again sorts the other way, and a third click returns the list to the manual order the items were dragged into.
Manage Plans and Folders
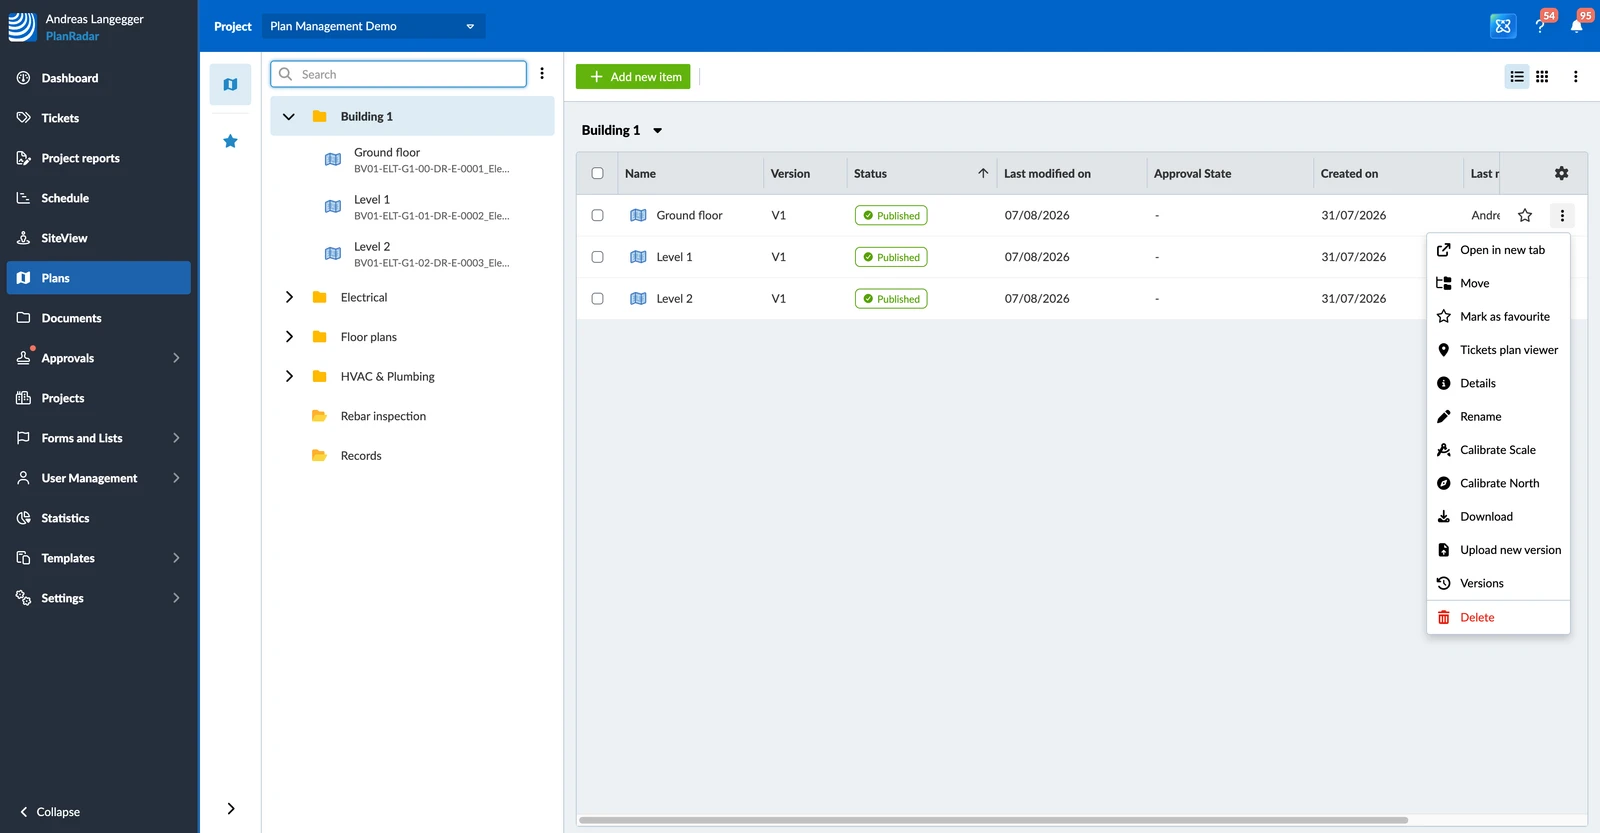
Open the More menu on a plan or folder for everything you can do with it:
- Open in new tab
- Move
- Mark as favourite
- Tickets plan viewer
- Details
- Rename
- Calibrate Scale
- Calibrate North
- Download
- Upload new version
- Versions
- Delete
A folder has the entries that apply to it. The same actions are available for the folder you are currently in from the breadcrumb above the list.
Move a Plan or Folder
Besides dragging items in the tree, you can move them through a dialog.
To move an item:
- Open the More menu on the item.
- Click Move.
- Select the folder it should go to.
- Click Move here.
Tickets stay on the plan or folder you moved, so nothing is lost.
Rename a Plan or Folder
To rename an item:
- Open the More menu on the item.
- Click Rename.
- Type the new name.
- Click Save.
Plan names carry no file extension, and two items may have the same name — the original filename and the version number still tell them apart.
Mark a Plan as Favourite
Favourites give you a flat list of the plans you work on most, without navigating the tree. They are yours alone and apply to one project.
To add a plan to your favourites:
- Open the More menu on the plan.
- Click Mark as favourite.
Or click the star next to the plan. It then appears under Favourites in the sidebar.
To take a plan out of your favourites:
- Open the More menu on the plan.
- Click Remove from favourites.
Or click the star a second time.
Download a Plan or Folder
To download an item:
- Open the More menu on the item.
- Click Download.
For a plan you get the original file it was uploaded from. For a folder you get a ZIP file with the current version of everything inside it.
Delete a Plan or Folder
To delete an item:
- Open the More menu on the item.
- Click Delete.
- Click Delete to confirm.
An item that has tickets or SiteView runs on it cannot be deleted — the action is greyed out with the note that tickets or runs are attached. Move the tickets to another location first, then delete.
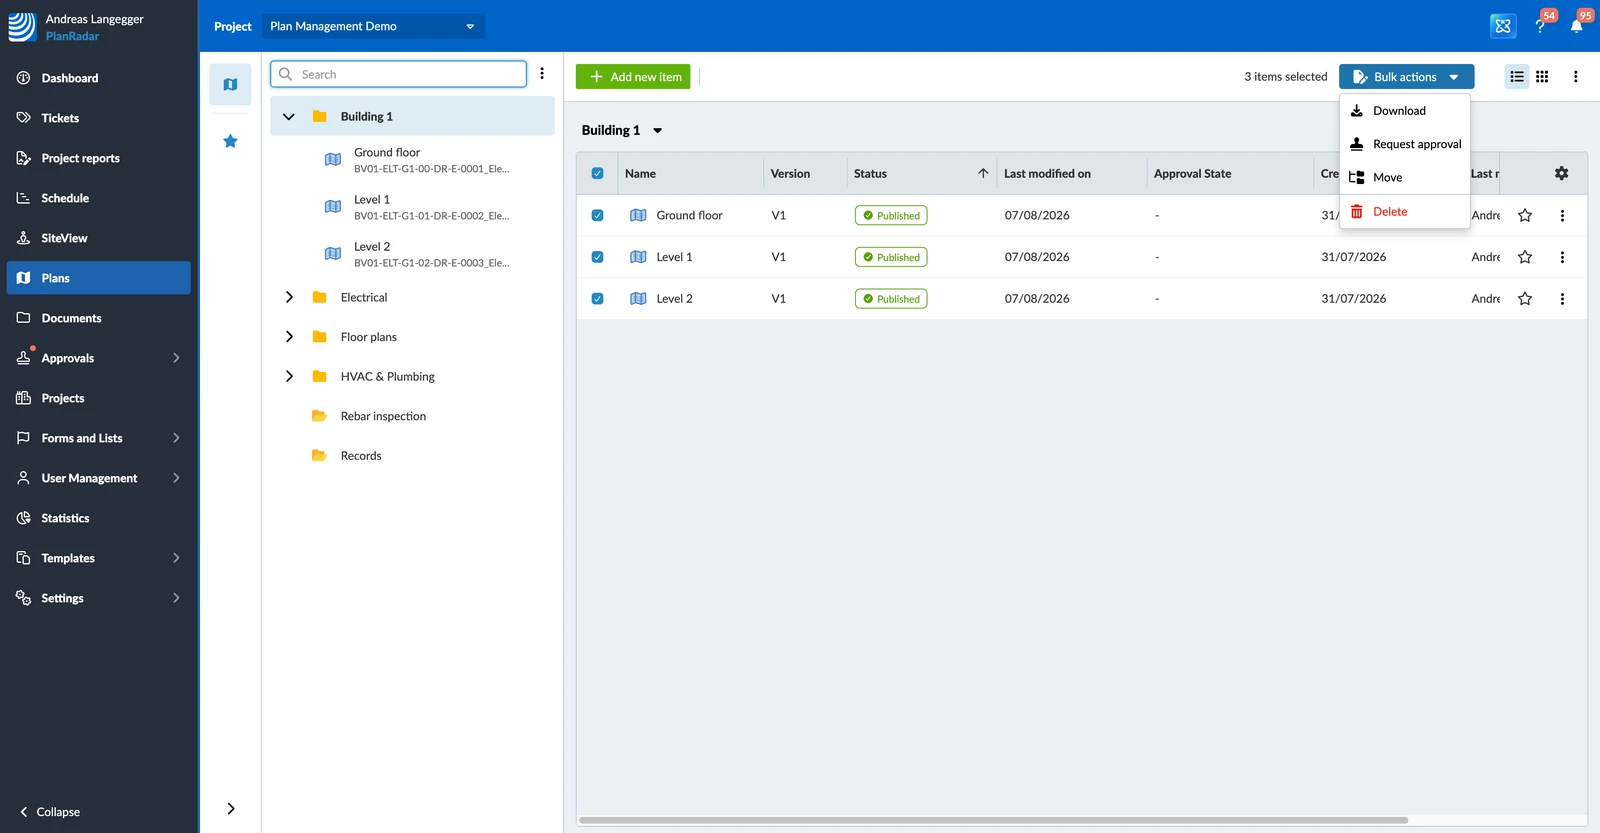
Work With Several Items at Once
To act on more than one plan or folder:
- Select the checkbox of each item you want, or click Select all.
- Click Bulk actions.
- Click Download, Request approval, Move or Delete.
Working With the Plan List
The contents of a folder are shown as a list by default. Click the view toggle in the toolbar for cards with plan thumbnails instead. Your choice is remembered across all your projects.
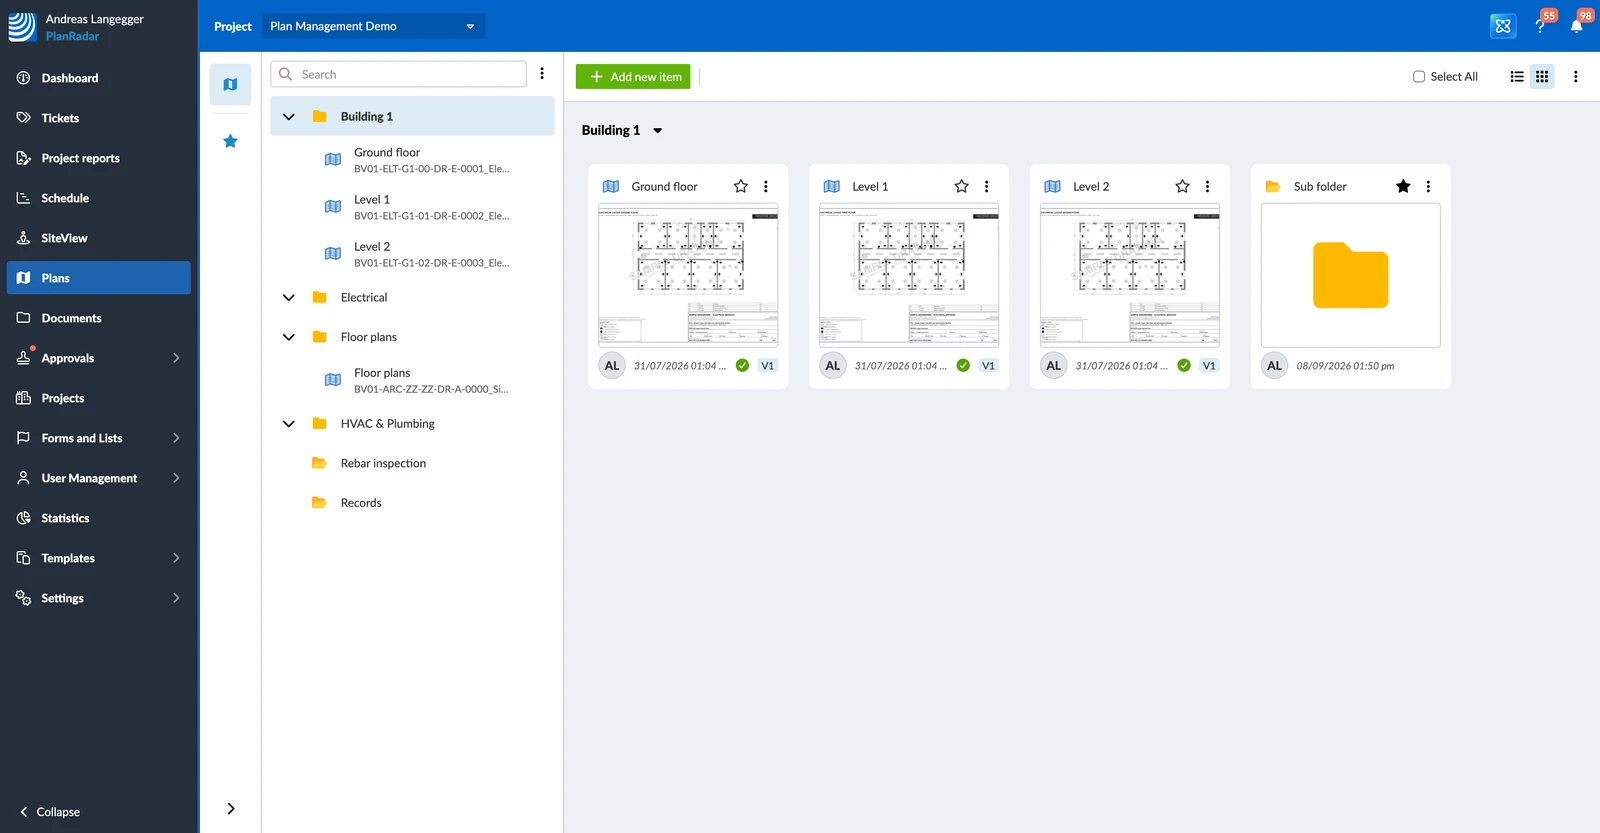
Under Show folders in the More menu you can keep folders On top of the list, or Mixed with files so everything sorts together.
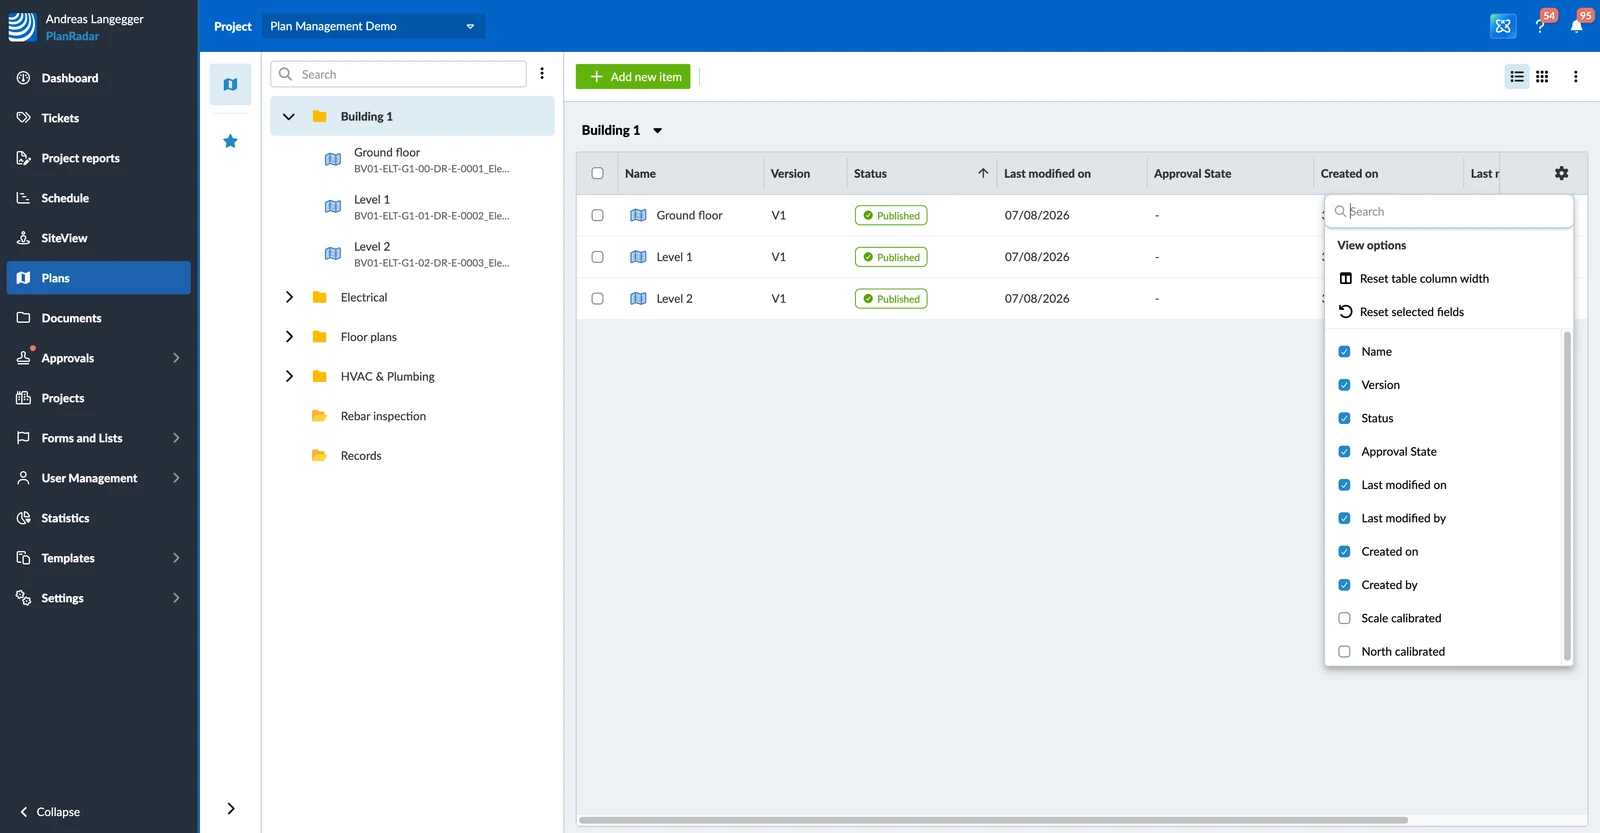
The list has a column for Name, Version, Status, Approval State, Last modified on and by, Created on and by, Scale calibrated and North calibrated. Click the gear icon above the list to show and hide columns, drag them into the order you want, and resize them. PlanRadar remembers your columns for the next time.
Plans also carry their state, in the Status column of the list and as an icon in the tree. An error icon also shows on the folders above the plan, so you can find it in a large tree.
| State | In the list | In the tree | What it means |
|---|---|---|---|
| Processing | Status Processing | Spinner on the plan | PlanRadar is preparing the plan for the plan viewer. Runs automatically after every upload. |
| Repositioning required | Status Repositioning required | Error icon on the plan and its folders | A new version was uploaded and the ticket pins need to be checked against it. |
| Processing failed | Status Processing failed | Error icon on the plan and its folders | The plan could not be prepared. Upload it again; if that fails too, contact Support. |
| Published | Green Published badge | Plain plan icon | The plan is live in Tickets, SiteView and on mobile devices. |
| Unpublished | Status Unpublished | Plain plan icon | A version is waiting for approval or was rejected; the plan is hidden from the team. |
| Scale calibrated | Scale calibrated column | Green plan icon | Not a state — the plan's scale has been calibrated, so measurements work. |
Read more in Plans & Folders.
Plan Quota
If your account has a plan limit, the toolbar above the plan list counts your plans against it, for example 3/50 plans, with a bar that turns red when the limit is reached. The count is account-wide, not per project, and every version of a plan counts. It updates when a plan has finished processing or is deleted. Accounts without a plan limit show no counter.
When the limit is reached, only New folder stays available — the other Add new item entries are greyed out with the tooltip Plan limit reached and dragging files in is disabled — until you delete plans or old versions. BIM models have a limit of their own: reaching one does not block the other, and an IFC file dropped into the uploader at the BIM limit is refused with BIM model limit reached.
Updated September 3, 2026